チュートリアル
簡単にライブラリーを使用するためのチュートリアルコレクション
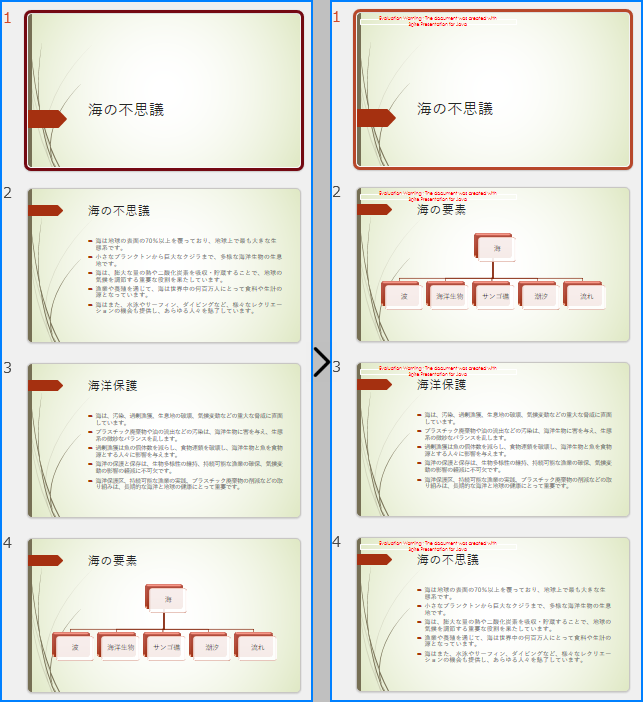
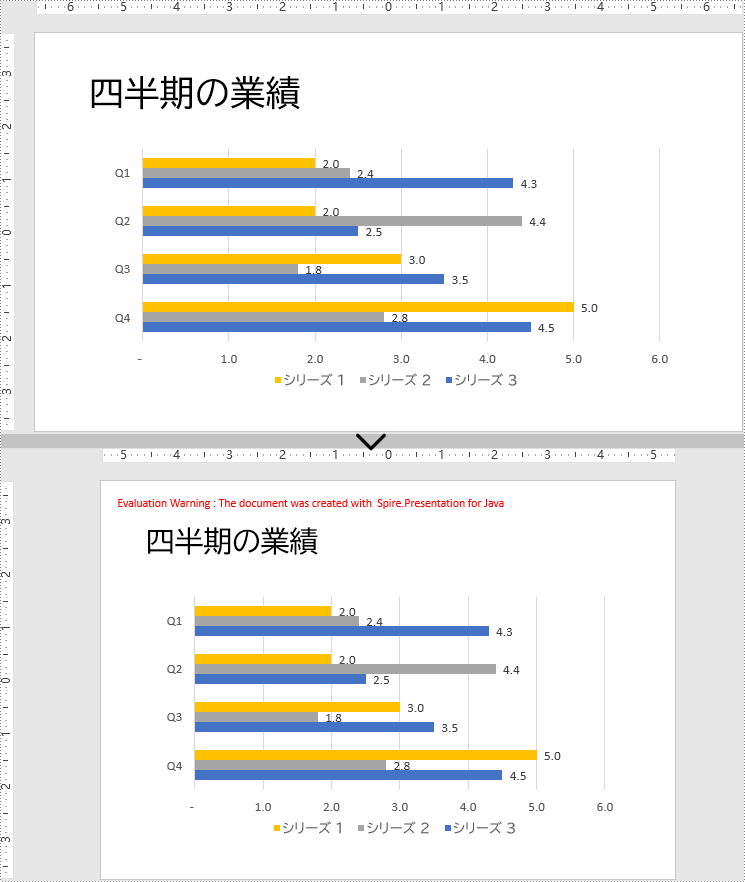
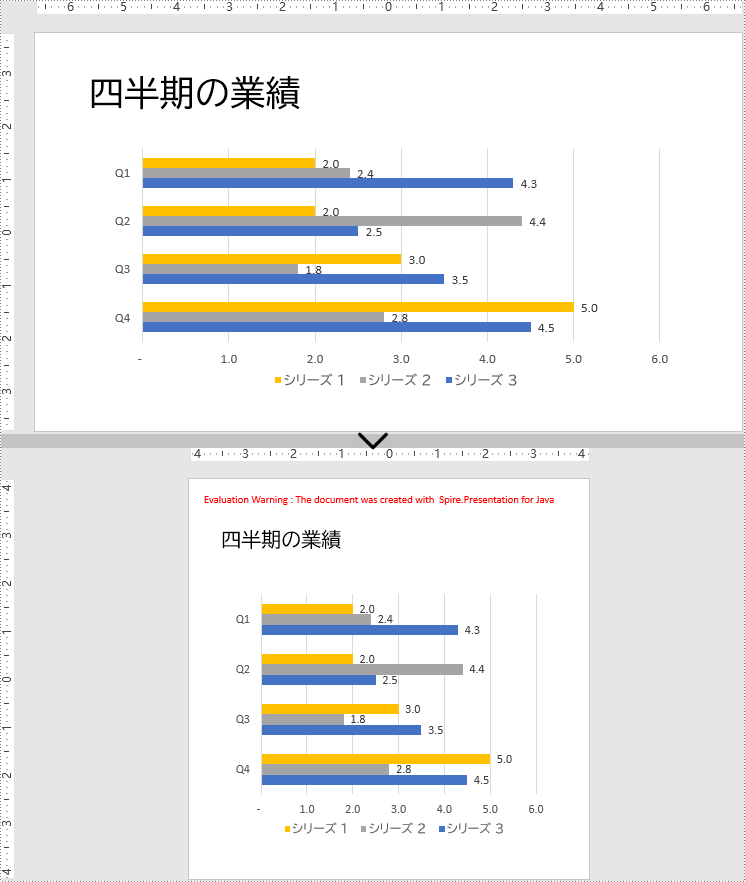
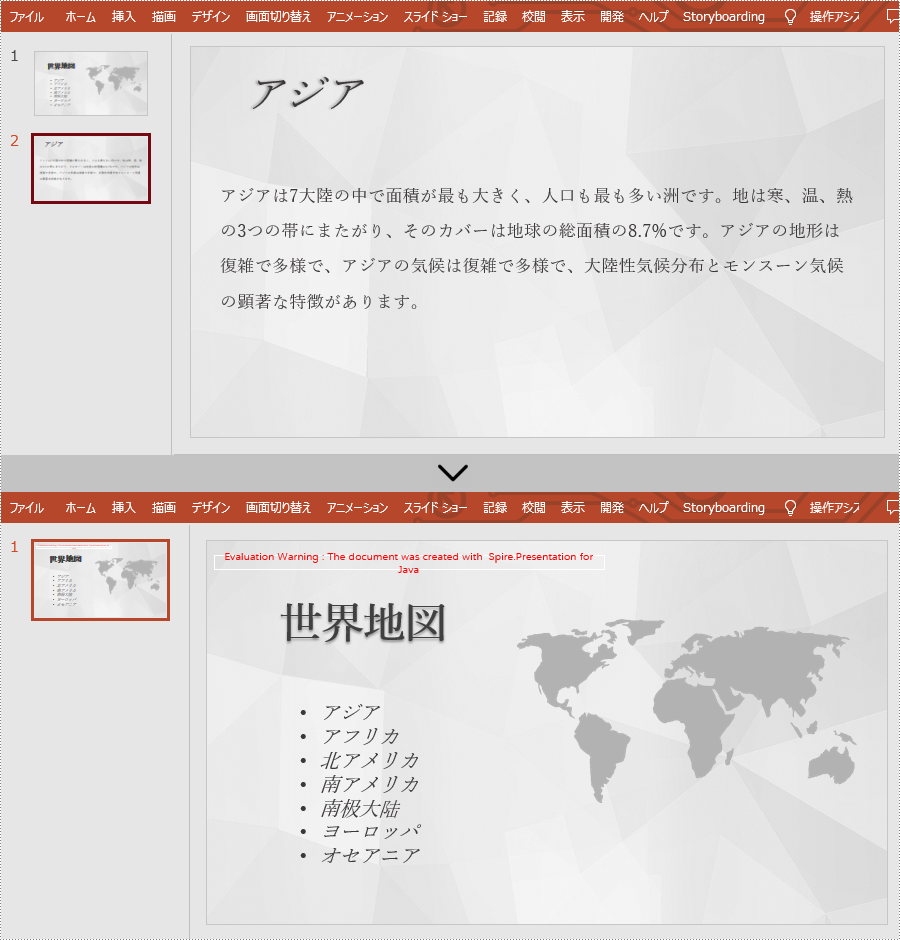
情報を論理的な順序で提示することは、効果的な PowerPoint プレゼンテーションにとって非常に重要です。スライドを並べ替えることで、プレゼンテーションの構成を調整し、メッセージを最大限に伝えることができます。戦略的にスライドを配置することで、動的で魅力的なプレゼンテーションを作成することが可能です。
この記事では、Java で Spire.Presentation for Java ライブラリを使用して PowerPoint ドキュメント内のスライドを並べ替える方法について説明します。
まず、Spire.Presentation for Java を Java プロジェクトに追加する必要があります。JAR ファイルは、このリンクからダウンロードできます。Maven を使用する場合は、次のコードをプロジェクトの pom.xml ファイルに追加する必要があります。
<repositories>
    <repository>
        <id>com.e-iceblue</id>
        <name>e-iceblue</name>
        <url>https://repo.e-iceblue.com/nexus/content/groups/public/</url>
    </repository>
</repositories>
<dependencies>
    <dependency>
        <groupId>e-iceblue</groupId>
        <artifactId>spire.presentation</artifactId>
        <version>9.10.2</version>
    </dependency>
</dependencies>PowerPoint プレゼンテーション内のスライドを並べ替えるには、2 つのプレゼンテーションオブジェクトを作成します。1 つは元のドキュメントを読み込むため、もう 1 つは新しいドキュメントを作成するために使用します。元のドキュメントからスライドを希望する順序で新しいドキュメントにコピーすることで、スライドを効果的に並べ替えることができます。
以下は、Java を使用して PowerPoint ドキュメント内のスライドを並べ替える手順です。
import com.spire.presentation.FileFormat;
import com.spire.presentation.Presentation;

public class ReorderSlides {

    public static void main(String[] args) throws Exception {

        // Presentationオブジェクトを作成
        Presentation presentation = new Presentation();

        // PowerPointファイルを読み込む
        presentation.loadFromFile("Sample.pptx");

        // 新しいスライド順序を配列で指定
        int[] newSlideOrder = new int[] { 1, 4, 3, 2 };

        // 別のPresentationオブジェクトを作成
        Presentation new_presentation = new Presentation();

        // デフォルトのスライドを削除
        new_presentation.getSlides().removeAt(0);

        // 配列をループで処理
        for (int i = 0; i < newSlideOrder.length; i++)
        {
            // 元のPowerPointファイルからスライドを新しい順序で新しいPowerPointドキュメントに追加
            new_presentation.getSlides().append(presentation.getSlides().get(newSlideOrder[i] - 1));
        }

        // 新しいプレゼンテーションをファイルに保存
        new_presentation.saveToFile("output/新しい順序でのプレゼンテーション.pptx", FileFormat.AUTO);

        // リソースを解放
        presentation.dispose();
        new_presentation.dispose();
    }
}
結果ドキュメントから評価メッセージを削除したい場合、または機能制限を取り除く場合は、についてこのメールアドレスはスパムボットから保護されています。閲覧するにはJavaScriptを有効にする必要があります。にお問い合わせ、30 日間有効な一時ライセンスを取得してください。
PowerPoint ドキュメントにフッターを追加、変更、削除することは、ドキュメントに付加情報と組織構造を提供できるため、非常に重要です。フッターにページ番号、日付、作成者情報、またはカスタムテキストを含めることで、オーディエンスはプレゼンテーションの内容をよりよく理解し、ドキュメントのバージョンを追跡することができます。また、フッターはドキュメントの専門性と整頓性を高め、視覚的に魅力的で読みやすくします。フッターを変更することで、情報の更新やフォーマットの調整を行うことができ、ドキュメントを最新の状態に保ち、一貫性を維持することができます。フッターを削除することで、特定の要件やデザインの好みに基づいてドキュメントの外観をカスタマイズすることができます。この記事では、Java プロジェクト内で Spire.Presentation for Java を使用して、PowerPoint ドキュメントにフッターを追加、変更、削除する方法を紹介します。
まず、Spire.Presentation for Java を Java プロジェクトに追加する必要があります。JAR ファイルは、このリンクからダウンロードできます。Maven を使用する場合は、次のコードをプロジェクトの pom.xml ファイルに追加する必要があります。
<repositories>
    <repository>
        <id>com.e-iceblue</id>
        <name>e-iceblue</name>
        <url>https://repo.e-iceblue.com/nexus/content/groups/public/</url>
    </repository>
</repositories>
<dependencies>
    <dependency>
        <groupId>e-iceblue</groupId>
        <artifactId>spire.presentation</artifactId>
        <version>9.4.5</version>
    </dependency>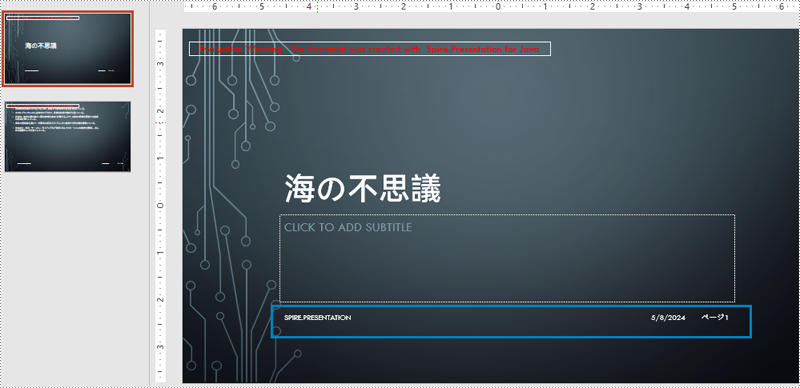
</dependencies>Spire.Presentation を使用すると、PowerPoint ドキュメントの各ページの下部に一貫性のあるフッターコンテンツを簡単に追加できます。フッタープレースホルダー、ページ番号プレースホルダー、時刻プレースホルダーを追加することで、各ページのフッターコンテンツが一致することを確認できます。具体的な手順は以下のとおりです。
import com.spire.presentation.*;

public class AddFooterToSlides {

    public static void main(String[] args) throws Exception {

        // Presentationオブジェクトを作成します
        Presentation presentation = new Presentation();

        // ファイルからプレゼンテーションをロードします
        presentation.loadFromFile("Sample.pptx");

        // フッターを表示します
        presentation.setFooterVisible(true);

        // フッターテキストを「Spire.Presentation」に設定します
        presentation.setFooterText("Spire.Presentation");

        // スライド番号を表示します
        presentation.setSlideNumberVisible(true);

        // プレゼンテーションの各スライドを反復処理します
        for (int i = 0; i < presentation.getSlides().getCount(); i++) {
            ISlide slide = presentation.getSlides().get(i);
            for (int j = 0; j < slide.getShapes().getCount(); j++) {
                IShape shape = slide.getShapes().get(j);
                if (shape.getPlaceholder() != null) {
                    // スライド番号プレースホルダーの場合
                    if (shape.getPlaceholder().getType().equals(PlaceholderType.SLIDE_NUMBER)) {
                        ParagraphEx textParagraph = ((IAutoShape) shape).getTextFrame().getTextRange().getParagraph();
                        String text = textParagraph.getText();

                        // スライド番号のテキストを「スライドX」に変更します
                        textParagraph.setText("ページ" + text);
                    }
                }
            }
        }

        // 日付と時刻を表示します
        presentation.setDateTimeVisible(true);

        // 日付と時刻の書式を設定します
        presentation.setDateTime(java.util.Calendar.getInstance().getTime(), "yyyy/MM/dd");

        // 変更されたプレゼンテーションをファイルに保存します
        presentation.saveToFile("output/フッターの挿入.pptx", FileFormat.PPTX_2016);

        // Presentationオブジェクトのリソースを解放します
        presentation.dispose();
    }
}
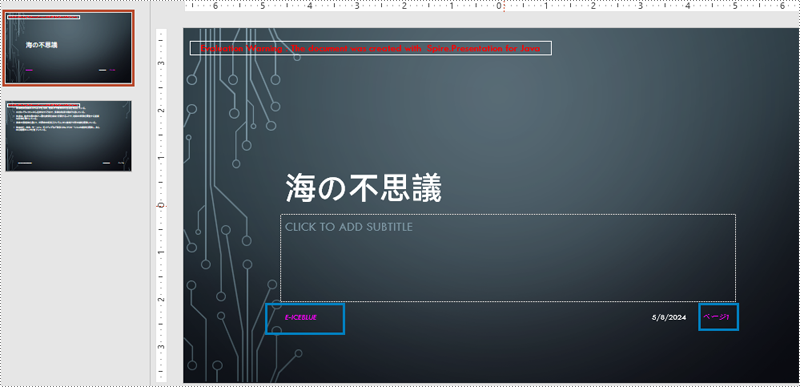
PowerPoint ドキュメントのフッターを変更するには、各スライドのすべての図形を検査して、フッタープレースホルダー、ページ番号プレースホルダーなどを特定する必要があります。これらのプレースホルダーを認識することで、各タイプのコンテンツと形式を個別に設定することができます。具体的な手順は以下のとおりです。
import com.spire.presentation.*;
import com.spire.presentation.drawing.FillFormatType;
import java.awt.*;

public class ModifySlideFooter {
    public static void main(String[] args) throws Exception {
        // Presentationのオブジェクトを作成する
        Presentation presentation = new Presentation();

        // ファイルからプレゼンテーションを読み込む
        presentation.loadFromFile("output/フッターの挿入.pptx");

        // 最初のスライドを取得する
        ISlide slide = presentation.getSlides().get(0);

        // スライド上の図形を繰り返し処理する
        for (int i = 0; i < slide.getShapes().getCount(); i++) {
            // 図形がプレースホルダーかどうかをチェックする
            if (slide.getShapes().get(i).getPlaceholder() != null) {
                // プレースホルダーの種類を取得する
                PlaceholderType type = slide.getShapes().get(i).getPlaceholder().getType();

                // フッタープレースホルダーの場合
                if (type == PlaceholderType.FOOTER) {
                    // 図形をIAutoShape型に変換する
                    IAutoShape autoShape = (IAutoShape) slide.getShapes().get(i);

                    // テキストの内容を「E-ICEBLUE」に設定する
                    autoShape.getTextFrame().setText("E-ICEBLUE");

                    // テキストのフォントを変更する
                    ChangeFont(autoShape.getTextFrame().getParagraphs().get(0));
                }
                // スライド番号プレースホルダーの場合
                if (type == PlaceholderType.SLIDE_NUMBER) {
                    // 図形をIAutoShape型に変換する
                    IAutoShape autoShape = (IAutoShape) slide.getShapes().get(i);

                    // テキストのフォントを変更する
                    ChangeFont(autoShape.getTextFrame().getParagraphs().get(0));
                }
            }
        }

        // 変更されたプレゼンテーションをファイルに保存する
        presentation.saveToFile("output/フッターの変更.pptx", FileFormat.PPTX_2016);

        // Presentationオブジェクトのリソースを解放する
        presentation.dispose();
    }

    static void ChangeFont(ParagraphEx paragraph) {
        // 段落内の各テキスト範囲を繰り返し処理する
        for (int i = 0; i < paragraph.getTextRanges().getCount(); i++) {
            // テキストスタイルをイタリックに設定する
            paragraph.getTextRanges().get(i).isItalic(TriState.TRUE);

            // テキストのフォントを設定する
            paragraph.getTextRanges().get(i).setEastAsianFont(new TextFont("Times New Roman"));

            // テキストのフォントサイズを34に設定する
            paragraph.getTextRanges().get(i).setFontHeight(12);

            // テキストの色を設定する
            paragraph.getTextRanges().get(i).getFill().setFillType(FillFormatType.SOLID);
            paragraph.getTextRanges().get(i).getFill().getSolidColor().setColor(Color.magenta);
        }
    }
}
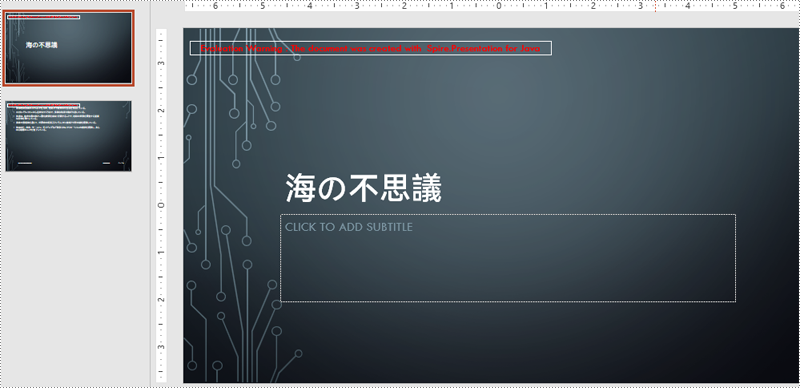
PowerPoint ドキュメントのフッターを削除するには、まずスライド内のフッタープレースホルダー、ページ番号プレースホルダー、時刻プレースホルダーなどのコンテンツを取得する必要があります。これらのプレースホルダーが特定されたら、スライド上の図形のコレクションからそれらを検索して削除することができます。具体的な手順は以下のとおりです。
import com.spire.presentation.*;

public class RemoveSlideFooter {
    public static void main(String[] args) throws Exception {
        // Presentationのオブジェクトを作成する
        Presentation presentation = new Presentation();

        // ファイルからプレゼンテーションを読み込む
        presentation.loadFromFile("output/フッターの挿入.pptx");

        // 最初のスライドを取得する
        ISlide slide = presentation.getSlides().get(0);

        // スライド上の図形を逆順で繰り返し処理する
        for (int i = slide.getShapes().getCount() - 1; i >= 0; i--) {
            // 図形がプレースホルダーかどうかをチェックする
            if (slide.getShapes().get(i).getPlaceholder() != null) {
                // プレースホルダーの種類を取得する
                PlaceholderType type = slide.getShapes().get(i).getPlaceholder().getType();
                // フッタープレースホルダーの場合
                if (type == PlaceholderType.FOOTER) {
                    // スライドから削除する
                    slide.getShapes().removeAt(i);
                }
                // スライド番号プレースホルダーの場合
                if (type == PlaceholderType.SLIDE_NUMBER) {
                    // スライドから削除する
                    slide.getShapes().removeAt(i);
                }
                // 日付と時刻プレースホルダーの場合
                if (type == PlaceholderType.DATE_AND_TIME) {
                    // スライドから削除する
                    slide.getShapes().removeAt(i);
                }
            }
        }

        // 変更されたプレゼンテーションをファイルに保存する
        presentation.saveToFile("output/フッターの削除.pptx", FileFormat.PPTX_2016);
        // Presentationオブジェクトのリソースを解放する
        presentation.dispose();
    }
}
結果ドキュメントから評価メッセージを削除したい場合、または機能制限を取り除く場合は、についてこのメールアドレスはスパムボットから保護されています。閲覧するにはJavaScriptを有効にする必要があります。にお問い合わせ、30 日間有効な一時ライセンスを取得してください。
PowerPoint プレゼンテーションを印刷すると、デジタルスライドを共有、配布、または参照用に使用できる具体的なドキュメントに変換できます。会議のための配布資料、プレゼンテーションのための資料、またはアーカイブ目的のための物理的なコピーが必要かどうかにかかわらず、PowerPoint プレゼンテーションを印刷することは、コンテンツを物理的なオブジェクトに変換する汎用性の高い方法です。
この記事では、Spire.Presentation for Java を使用して、Java で PowerPoint ドキュメントを印刷する方法について説明します。
まず、Spire.Presentation for Java を Java プロジェクトに追加する必要があります。JAR ファイルは、このリンクからダウンロードできます。Maven を使用する場合は、次のコードをプロジェクトの pom.xml ファイルに追加する必要があります。
<repositories>
    <repository>
        <id>com.e-iceblue</id>
        <name>e-iceblue</name>
        <url>https://repo.e-iceblue.com/nexus/content/groups/public/</url>
    </repository>
</repositories>
<dependencies>
    <dependency>
        <groupId>e-iceblue</groupId>
        <artifactId>spire.presentation</artifactId>
        <version>9.4.5</version>
    </dependency>
</dependencies>PowerPoint のプレゼンテーションを印刷することは、コンピュータ上のデフォルトプリンタとデフォルトの印刷設定を使用して簡単に行うことができます。
デフォルトプリンタで PowerPoint ファイルを印刷するには、以下の手順に従ってください。
import com.spire.presentation.Presentation;
import com.spire.presentation.PresentationPrintDocument;

public class PrintWithDefaultPrinter {

    public static void main(String[] args) throws Exception {

        // Presentation オブジェクトを作成します
        Presentation presentation = new Presentation();

        // PowerPointファイルをロードします
        presentation.loadFromFile("Sample.pptx");

        // PresentationPrintDocument オブジェクトを作成します
        PresentationPrintDocument printDocument = new PresentationPrintDocument(presentation);

        // ドキュメントを印刷します
        printDocument.print();

        // リソースを解放します
        presentation.dispose();
        printDocument.dispose();
    }
}PowerPoint プレゼンテーションをデフォルトのプリンタではなく、特定のプリンタを使用して印刷したい場合は、以下の手順で簡単に行うことができます。
import com.spire.presentation.Presentation;
import com.spire.presentation.printing.PrinterSettings;

public class PrintWithSpecifiedPrinter {

    public static void main(String[] args) throws Exception {

        // プレゼンテーションオブジェクトを作成します
        Presentation presentation = new Presentation();

        // PowerPointファイルをロードします
        presentation.loadFromFile("Sample.pptx");

        // PrinterSettingsオブジェクトを作成します
        PrinterSettings printerSettings = new PrinterSettings();

        // プリンター名を指定します
        printerSettings.setPrinterName("HP ColorLaserJet MFP M278-M281 PCL-6 (V4)");

        // ドキュメントを印刷します
        presentation.print(printerSettings);

        // リソースを解放します
        presentation.dispose();
    }
}複数のスライドを 1 ページに印刷することは、紙の使用量を最適化し、PowerPoint プレゼンテーションからコンパクトな配布資料や参考資料を作成する便利な方法です。
以下は、Java を使用して複数のスライドを 1 ページに印刷する手順です。
import com.spire.presentation.PageSlideCount;
import com.spire.presentation.Presentation;
import com.spire.presentation.printing.Duplex;
import com.spire.presentation.printing.PrinterSettings;

public class PrintMultipleSlidesOnOnePage {

    public static void main(String[] args) throws Exception {

        // Presentationオブジェクトを作成します
        Presentation presentation = new Presentation();

        // PowerPointファイルをロードします
        presentation.loadFromFile("Sample.pptx");

        // 印刷用の1ページあたりのスライド数を設定します
        presentation.setSlideCountPerPageForPrint(PageSlideCount.Two);

        // PrinterSettingsオブジェクトを作成します
        PrinterSettings printerSettings = new PrinterSettings();

        // ドキュメントを印刷します
        presentation.print(printerSettings);

        // リソースを解放します
        presentation.dispose();
    }
}グレースケールで印刷することで、スライドからカラー要素を削除し、プレゼンテーションの単色バージョンを得ることができます。
以下は、Java を使用して PowerPoint をグレースケールで印刷する手順です。
import com.spire.presentation.Presentation;
import com.spire.presentation.printing.PrinterSettings;

public class PrintInGrayScale {

    public static void main(String[] args) throws Exception {

        // Presentationオブジェクトを作成します
        Presentation presentation = new Presentation();

        // PowerPointファイルをロードします
        presentation.loadFromFile("Sample.pptx");

        // グレースケール印刷モードを有効にします
        presentation.setGrayLevelForPrint(true);

        // PrinterSettingsオブジェクトを作成します
        PrinterSettings printerSettings = new PrinterSettings();

        // ドキュメントを印刷します
        presentation.print(printerSettings);

        // リソースを解放します
        presentation.dispose();
    }
}PowerPoint のスライドを用紙の両面に印刷することは、紙の消費量を減らし、よりコンパクトな配布資料や文書を作成できるため、実用的で環境に優しいオプションとなります。
PowerPoint ファイルを用紙の両面に印刷する手順は次のとおりです。
import com.spire.presentation.Presentation;
import com.spire.presentation.printing.Duplex;
import com.spire.presentation.printing.PrinterSettings;

public class PrintInDuplexMode {

    public static void main(String[] args) throws Exception {

        // Presentationオブジェクトを作成します
        Presentation presentation = new Presentation();

        // PowerPointファイルをロードします
        presentation.loadFromFile("Sample.pptx");

        // PrinterSettingsオブジェクトを作成します
        PrinterSettings printerSettings = new PrinterSettings();

        // 両面印刷モードを有効にします
        printerSettings.setDuplex(Duplex.Default);

        // ドキュメントを印刷します
        presentation.print(printerSettings);

        // リソースを解放します
        presentation.dispose();
    }
}PowerPoint プレゼンテーションで印刷範囲を設定することで、印刷するスライドを制御することができ、特定の需要に応じて印刷をカスタマイズすることができます。
印刷するスライドの範囲を指定するには、以下の手順に従ってください。
import com.spire.presentation.Presentation;
import com.spire.presentation.printing.PrintRange;
import com.spire.presentation.printing.PrinterSettings;

public class SetPrintRange {

    public static void main(String[] args) throws Exception {

        // Presentationオブジェクトを作成します
        Presentation presentation = new Presentation();

        // PowerPointファイルをロードします
        presentation.loadFromFile("Sample.pptx");

        // PrinterSettingsオブジェクトを作成します
        PrinterSettings printerSettings = new PrinterSettings();

        // 印刷するスライドの範囲を指定します
        printerSettings.setPrintRange(PrintRange.SomePages);
        printerSettings.setFromPage(1);
        printerSettings.setToPage(4);

        // ドキュメントを印刷します
        presentation.print(printerSettings);

        // リソースを解放します
        presentation.dispose();
    }
}コピー数を設定することで、印刷したいスライドの複製数を簡単に指定できます。
印刷する部数を指定するには、次の手順に従います。
import com.spire.presentation.Presentation;
import com.spire.presentation.printing.PrinterSettings;

public class SetCopies {

    public static void main(String[] args) throws Exception {

        // Presentationオブジェクトを作成します
        Presentation presentation = new Presentation();

        // PowerPointファイルをロードします
        presentation.loadFromFile("Sample.pptx");

        // PrinterSettingsオブジェクトを作成します
        PrinterSettings printerSettings = new PrinterSettings();

        // 印刷するコピーの数を指定します
        printerSettings.setCopies((short)2);

        // ドキュメントを印刷します
        presentation.print(printerSettings);

        // リソースを解放します
        presentation.dispose();
    }
}結果ドキュメントから評価メッセージを削除したい場合、または機能制限を取り除く場合は、についてこのメールアドレスはスパムボットから保護されています。閲覧するにはJavaScriptを有効にする必要があります。にお問い合わせ、30 日間有効な一時ライセンスを取得してください。
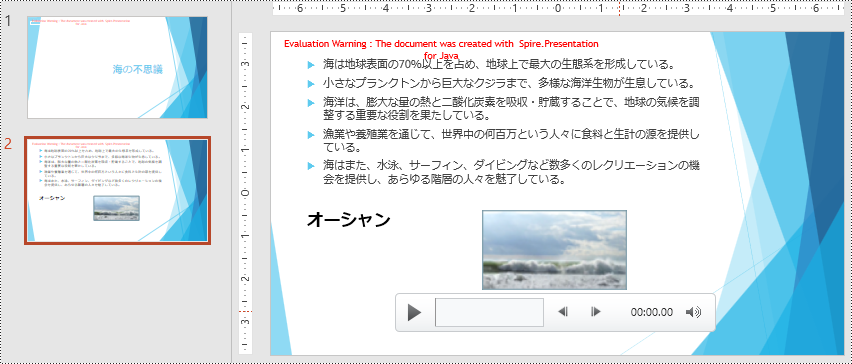
テキストや画像に比べ、動画は人を惹きつける魅力があります。プレゼンテーションに動画を含めることで、聴衆の注目を集めやすくなり、複雑な概念を効率的かつ分かりやすく説明できるだけでなく、プレゼンテーションをよりダイナミックでクリエイティブに見せることができます。この記事では、Spire.Presentation for Java を使用して、Java で PowerPoint にビデオを挿入、置換、抽出する方法について説明します。
まず、Spire.Presentation for Java を Java プロジェクトに追加する必要があります。JAR ファイルは、このリンクからダウンロードできます。Maven を使用する場合は、次のコードをプロジェクトの pom.xml ファイルに追加する必要があります。
<repositories>
    <repository>
        <id>com.e-iceblue</id>
        <name>e-iceblue</name>
        <url>https://repo.e-iceblue.com/nexus/content/groups/public/</url>
    </repository>
</repositories>
<dependencies>
    <dependency>
        <groupId>e-iceblue</groupId>
        <artifactId>spire.presentation</artifactId>
        <version>9.2.8</version>
    </dependency>
</dependencies>プレゼンテーションにビデオを挿入することにより、プレゼンテーション中にコンピュータ上でそれを探すことなく、瞬時にあなたの聴衆とビデオを共有することができます。次の手順では、PowerPoint プレゼンテーションに動画を挿入する方法を説明します:
import com.spire.presentation.*;
import com.spire.presentation.drawing.FillFormatType;

import java.awt.*;
import java.awt.geom.Rectangle2D;

public class InsertVideoPresentation {
    public static void main(String []args) throws Exception {
        // Presentationのインスタンスを作成する
        Presentation presentation = new Presentation();

        // PowerPoint文書を読み込む
        presentation.loadFromFile("サンプル.pptx");

        // スライドを取得する
        ISlide slide = presentation.getSlides().get(1);

        // 説明テキストを追加する
        Rectangle2D.Double rec_title = new Rectangle2D.Double(50, 280, 160, 50);
        IAutoShape shape_title = slide.getShapes().appendShape(ShapeType.RECTANGLE, rec_title);
        shape_title.getLine().setFillType(FillFormatType.NONE);
        shape_title.getFill().setFillType(FillFormatType.NONE);
        ParagraphEx para_title = new ParagraphEx();
        para_title.setText("オーシャン");
        para_title.setAlignment(TextAlignmentType.CENTER);
        para_title.getTextRanges().get(0).setLatinFont(new TextFont("HarmonyOS Sans SC"));
        para_title.getTextRanges().get(0).setFontHeight(28);
        para_title.getTextRanges().get(0).isBold(TriState.TRUE);
        para_title.getTextRanges().get(0).getFill().setFillType(FillFormatType.SOLID);
        para_title.getTextRanges().get(0).getFill().getSolidColor().setColor(Color.BLACK);
        shape_title.getTextFrame().getParagraphs().append(para_title);

        // 最初のスライドにビデオを追加する
        Rectangle2D.Double videoRect = new Rectangle2D.Double(presentation.getSlideSize().getSize().getWidth() / 2 - 125, 300, 240, 130);
        IVideo video = slide.getShapes().appendVideoMedia("Ocean1.mp4", videoRect);

        // ビデオのサムネイル画像を設定する
        video.getPictureFill().getPicture().setUrl("https://i.postimg.cc/90L2HjGP/2024-03-01-151539.png");

        // 結果の文書を保存する
        presentation.saveToFile("ビデオの挿入.pptx", FileFormat.PPTX_2013);
        presentation.dispose();
    }
}
あなたは、既存のビデオはよくあなたの文をサポートすることができないと思われる場合は、別の適切なものと置き換えることができます。次の手順では、PowerPoint プレゼンテーションで既存の動画を別の動画に置き換える方法を示します:
import com.spire.presentation.*;

import java.io.File;
import java.io.FileInputStream;

public class ReplaceVideo {
    public static void main(String []args) throws Exception {
        // プレゼンテーションのインスタンスを作成します
        Presentation ppt = new Presentation();
        // PowerPoint ドキュメントを読み込みます
        ppt.loadFromFile("ビデオの挿入.pptx");

        // 最初のスライドを取得します
        ISlide iSlide = ppt.getSlides().get(1);

        // ビデオをバイト配列に読み込みます
        File file = new File("Ocean2.mp4");
        FileInputStream fileInputStream = new FileInputStream(file);
        byte[] data = new byte[(int) file.length()];
        fileInputStream.read(data);

        // ドキュメントのビデオコレクションに読み込まれたビデオを追加します
        VideoData videoData = ppt.getVideos().append(data);

        // 最初のスライド上のすべての図形をループします
        for (Object shape : iSlide.getShapes()) {
            // 現在の図形が IVIdeo 型であるかどうかをチェックします
            if (shape instanceof IVideo) {
                IVideo video = (IVideo) shape;
                // 読み込まれたビデオで元のビデオを置き換えます
                video.setEmbeddedVideoData(videoData);
                // ビデオのサムネイル画像を変更します
                video.getPictureFill().getPicture().setUrl("https://i.postimg.cc/vZWYqC4B/2024-03-01-153019.png");
            }
        }
        // 結果のドキュメントを保存します
        ppt.saveToFile("ビデオの置き換え.pptx", FileFormat.PPTX_2013);
    }
}
あなたは、PowerPoint プレゼンテーション内のビデオが好きで、他の場所でそれらを使用したい場合は、抽出し、ディスクに保存することができます。以下の手順では、PowerPoint プレゼンテーションから動画を抽出する方法を説明します:
import com.spire.presentation.*;

public class ExtractVideo {
    public static void main(String []args) throws Exception {
        // プレゼンテーションのインスタンスを作成します
        Presentation presentation = new Presentation();

        // PowerPoint ドキュメントを読み込みます
        presentation.loadFromFile("ビデオの置き換え.pptx");

        int i = 0;
        // 出力ファイルパスを指定します
        String videoPath = String.format("output/Videos/Video{0}.mp4", i);

        // ドキュメント内のすべてのスライドをループします
        for (Object slideObj : presentation.getSlides()) {
            ISlide slide = (ISlide) slideObj;
            // 各スライド上のすべての図形をループします
            for (Object shapeObj : slide.getShapes()) {
                IShape shape = (IShape) shapeObj;
                // 図形が IVideo 型であるかどうかをチェックします
                if (shape instanceof IVideo) {
                    // ビデオを指定されたパスに保存します
                    ((IVideo) shape).getEmbeddedVideoData().saveToFile(videoPath);
                    i++;
                }
            }
        }
    }
}結果ドキュメントから評価メッセージを削除したい場合、または機能制限を取り除く場合は、についてこのメールアドレスはスパムボットから保護されています。閲覧するにはJavaScriptを有効にする必要があります。にお問い合わせ、30 日間有効な一時ライセンスを取得してください。
PowerPoint プレゼンテーションのドキュメント プロパティは、プレゼンテーションの管理と整理において非常に価値があります。タイトル、著者、キーワードなどのプロパティに含まれる情報は、簡潔な要約を提供し、分類や検索の支援を行い、包括的なプレゼンテーションの履歴の維持に貢献します。しかし、いくつかの不要なドキュメント プロパティは削除する必要があります。これにより、ドキュメントの管理に影響を及ぼすことを防ぐことができます。この記事では、Spire.Presentation for Java を使用して、PowerPoint プレゼンテーションのドキュメントプロパティを追加、取得、または削除する方法を説明します。
まず、Spire.Presentation for Java を Java プロジェクトに追加する必要があります。JAR ファイルは、このリンクからダウンロードできます。Maven を使用する場合は、次のコードをプロジェクトの pom.xml ファイルに追加する必要があります。
<repositories>
    <repository>
        <id>com.e-iceblue</id>
        <name>e-iceblue</name>
        <url>https://repo.e-iceblue.com/nexus/content/groups/public/</url>
    </repository>
</repositories>
<dependencies>
    <dependency>
        <groupId>e-iceblue</groupId>
        <artifactId>spire.presentation</artifactId>
        <version>8.7.3</version>
    </dependency>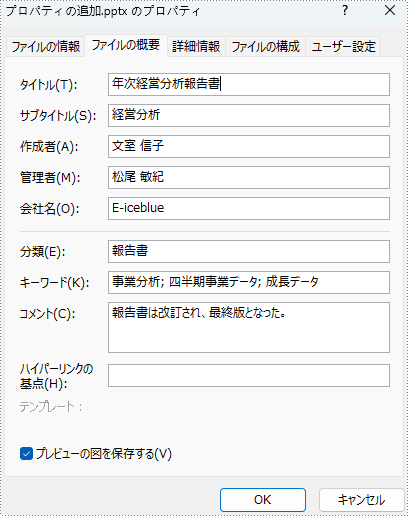
</dependencies>Spire.Presentation for Java では、Presentation.getDocumentProperty() メソッドでドキュメントプロパティを取得した後、IDocumentProperty クラスのメソッドでプレゼンテーションのドキュメントプロパティを設定、取得することができます。PowerPoint プレゼンテーションにドキュメントプロパティを追加するための詳細な手順は次のとおりです。
import com.spire.presentation.FileFormat;
import com.spire.presentation.IDocumentProperty;
import com.spire.presentation.Presentation;

public class addPresentationProperties {
    public static void main(String[] args) throws Exception {
        //Presentationクラスのオブジェクトを作成する
        Presentation presentation = new Presentation();

        //プレゼンテーションを読み込む
        presentation.loadFromFile("サンプル.pptx");

        //プレゼンテーションのドキュメント プロパティを取得し、プロパティ情報を設定する
        IDocumentProperty property = presentation.getDocumentProperty();
        property.setTitle("年次経営分析報告書");
        property.setSubject("経営分析");
        property.setAuthor("文室 信子");
        property.setManager("松尾 敏紀");
        property.setCompany("E-iceblue");
        property.setCategory("報告書");
        property.setKeywords("事業分析; 四半期事業データ; 成長データ");
        property.setComments("報告書は改訂され、最終版となった。");

        //プレゼンテーションを保存する
        presentation.saveToFile("プロパティの追加.pptx", FileFormat.AUTO);
        presentation.dispose();
    }
}
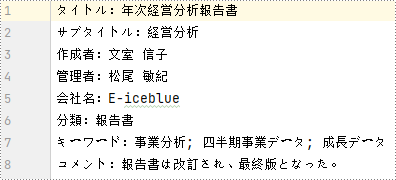
PowerPoint プレゼンテーションからドキュメントプロパティを取得するための詳細な手順は以下のとおりです。
import com.spire.presentation.IDocumentProperty;
import com.spire.presentation.Presentation;

import java.io.FileWriter;

public class retrievePresentationProperties {
    public static void main(String[] args) throws Exception {
        //Presentationクラスのオブジェクトを作成する
        Presentation presentation = new Presentation();

        //プレゼンテーションを読み込む
        presentation.loadFromFile("プロパティの追加.pptx");

        //プレゼンテーションのドキュメント プロパティを取得する
        IDocumentProperty property = presentation.getDocumentProperty();

        //文書のプロパティ データを取得し、テキスト ファイルに書き込む
        String properties = "タイトル:" + property.getTitle() + "\r\n"
                + "サブタイトル:" + property.getSubject() + "\r\n"
                + "作成者:" + property.getAuthor() + "\r\n"
                + "管理者:" + property.getManager() + "\r\n"
                + "会社名:" + property.getCompany() + "\r\n"
                + "分類:" + property.getCategory() + "\r\n"
                + "キーワード:" + property.getKeywords() + "\r\n"
                + "コメント:" + property.getComments();
        FileWriter presentationProperties = new FileWriter("プロパティの取得.txt");
        presentationProperties.write(properties);
        presentationProperties.close();
    }
}
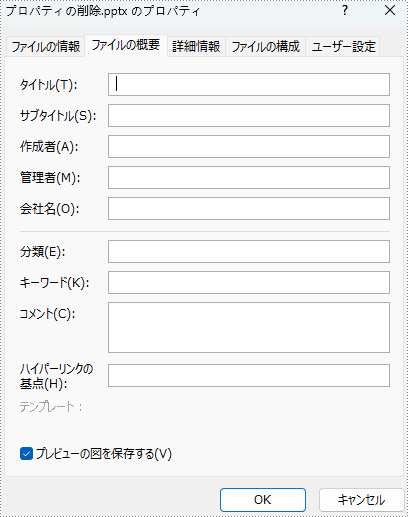
プレゼンテーションからドキュメント プロパティを削除するのは、プロパティを追加するのと似ています。プロパティ データを空値に設定するだけで、ドキュメント プロパティを削除することができます。詳細は以下の通りです。
import com.spire.presentation.FileFormat;
import com.spire.presentation.IDocumentProperty;
import com.spire.presentation.Presentation;

public class deletePresentationProperties {
    public static void main(String[] args) throws Exception {
        //Presentationクラスのオブジェクトを作成する
        Presentation presentation = new Presentation();

        //プレゼンテーションを読み込む
        presentation.loadFromFile("プロパティの追加.pptx");

        //プレゼンテーションのドキュメント プロパティを取得し、プロパティを空白に設定する
        IDocumentProperty property = presentation.getDocumentProperty();
        property.setTitle(" ");
        property.setSubject("");
        property.setAuthor("");
        property.setManager("");
        property.setCompany("");
        property.setCategory("");
        property.setKeywords("");
        property.setComments("");

        //プレゼンテーションを保存する
        presentation.saveToFile("プロパティの削除.pptx", FileFormat.AUTO);
        presentation.dispose();
    }
}
結果ドキュメントから評価メッセージを削除したい場合、または機能制限を取り除く場合は、についてこのメールアドレスはスパムボットから保護されています。閲覧するにはJavaScriptを有効にする必要があります。にお問い合わせ、30 日間有効な一時ライセンスを取得してください。
スライドサイズは、PowerPoint プレゼンテーションのビジュアルデザインの最も重要な側面の1つです。 スライドサイズはプレゼンテーションの縦横比と寸法を決定し、プレゼンテーションの全体的な外観と雰囲気に大きな影響を与えます。 デフォルトのスライドサイズがビジュアルデザインの要件を満たしていなかったり、プレゼンテーション画面のサイズに合わない場合は、スライドサイズを別のプリセットサイズに変更するか、スライドサイズをカスタマイズする必要があります。 この記事では、Spire.Presentation for Java を使用して、Java プログラムを通じて PowerPoint プレゼンテーションのスライドサイズを変更する方法を紹介します。
まず、Spire.Presentation for Java を Java プロジェクトに追加する必要があります。JAR ファイルは、このリンクからダウンロードできます。Maven を使用する場合は、次のコードをプロジェクトの pom.xml ファイルに追加する必要があります。
<repositories>
    <repository>
        <id>com.e-iceblue</id>
        <name>e-iceblue</name>
        <url>https://repo.e-iceblue.com/nexus/content/groups/public/</url>
    </repository>
</repositories>
<dependencies>
    <dependency>
        <groupId>e-iceblue</groupId>
        <artifactId>spire.presentation</artifactId>
        <version>8.7.3</version>
    </dependency>
</dependencies>Spire.Presentation for Java には、スライドサイズをプリセットサイズに変更する Presentation.getSlideSize().setType() メソッドがあります。 その手順は以下の通りです。
import com.spire.presentation.FileFormat;
import com.spire.presentation.Presentation;
import com.spire.presentation.SlideSizeType;

public class changeSlideSizePreset {
    public static void main(String[] args) throws Exception {
        //Presentationクラスのオブジェクトを作成する
        Presentation pt = new Presentation();

        //プレゼンテーションを読み込み
        pt.loadFromFile("サンプル.pptx");

        //このプレゼンテーションのスライドサイズのタイプをA4に設定する
        pt.getSlideSize().setType(SlideSizeType.A4);

        //プレゼンテーションを保存する
        pt.saveToFile("A4.pptx", FileFormat.AUTO);
        pt.dispose();
    }
}
スライドサイズをカスタマイズするには、まずスライドサイズの種類をカスタムに変更する必要があります。 次に、Presentation.getSlideSize().setSize() メソッドを使用して、スライドサイズをカスタマイズします。 手順は以下の通りです。
import com.spire.presentation.FileFormat;
import com.spire.presentation.Presentation;
import com.spire.presentation.SlideSizeType;

import java.awt.*;

public class changeSlideSizeCustom {
    public static void main(String[] args) throws Exception {
        //Presentationクラスのオブジェクトを作成する
        Presentation pt = new Presentation();

        //プレゼンテーションを読み込み
        pt.loadFromFile("サンプル.pptx");

        //このプレゼンテーションのスライドサイズのタイプをカスタムに設定する
        pt.getSlideSize().setType(SlideSizeType.CUSTOM);

        //スライドサイズを設定する
        pt.getSlideSize().setSize(new Dimension(600, 600));

        //プレゼンテーションを保存する
        pt.saveToFile("カスタム.pptx", FileFormat.AUTO);
        pt.dispose();
    }
}
結果ドキュメントから評価メッセージを削除したい場合、または機能制限を取り除く場合は、についてこのメールアドレスはスパムボットから保護されています。閲覧するにはJavaScriptを有効にする必要があります。にお問い合わせ、30 日間有効な一時ライセンスを取得してください。
PowerPoint プレゼンテーションの背景は、プレゼンテーションの基調や雰囲気を設定し、スライドの美的センスや効果を大きく向上させることができます。PowerPoint プレゼンテーションには、単色背景、グラデーション背景、画像背景、テクスチャ背景、パターン背景の5種類の背景があり、それぞれ異なる使用シナリオに適用されます。例えば、プロのビジネスプレゼンテーションでは、クリーンでシンプルな単色背景が有効であり、クリエイティブなプレゼンテーションでは、魅力的で興味深い画像背景を使用して、観客の注意を引きつけることができます。この記事では、Spire.Presentation for Java を使って、Java プログラムで PowerPoint プレゼンテーションの背景を設定する方法を紹介します。
まず、Spire.Presentation for Java を Java プロジェクトに追加する必要があります。JAR ファイルは、このリンクからダウンロードできます。Maven を使用する場合は、次のコードをプロジェクトの pom.xml ファイルに追加する必要があります。
<repositories>
    <repository>
        <id>com.e-iceblue</id>
        <name>e-iceblue</name>
        <url>https://repo.e-iceblue.com/nexus/content/groups/public/</url>
    </repository>
</repositories>
<dependencies>
    <dependency>
        <groupId>e-iceblue</groupId>
        <artifactId>spire.presentation</artifactId>
        <version>8.7.3</version>
    </dependency>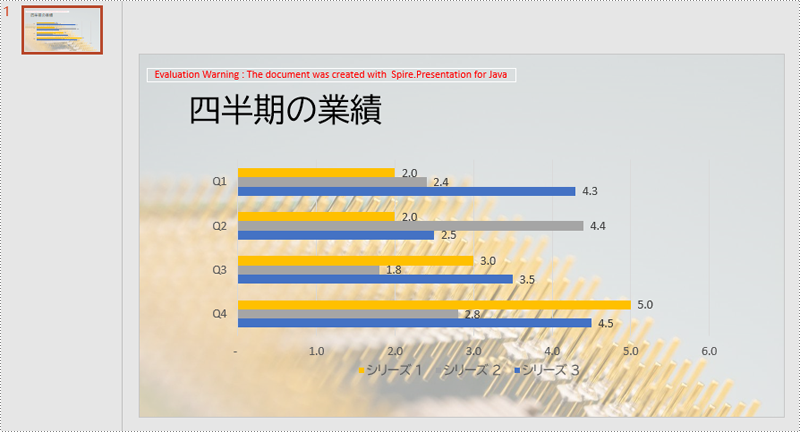
</dependencies>カスタムスライド背景を設定する前に、SlideBackground.setType(BackgroundType.CUSTOM) メソッドを使用して、カスタム背景の設定を許可する必要があります。次に、SlideBackground.getFill().setFillType(FillFormatType.SOLID) メソッドを使用して、背景の種類を単色背景に設定し、FileFormat.getSolidColor().setColor() メソッドを使用して、背景色を設定します。
具体的な操作手順は以下の通りです。
import com.spire.presentation.FileFormat;
import com.spire.presentation.ISlide;
import com.spire.presentation.Presentation;
import com.spire.presentation.SlideBackground;
import com.spire.presentation.drawing.BackgroundType;
import com.spire.presentation.drawing.FillFormat;
import com.spire.presentation.drawing.FillFormatType;

import java.awt.*;

public class SolidColor {
    public static void main(String[] args) throws Exception {
        //Presentationクラスのオブジェクトを作成する
        Presentation ppt = new Presentation();

        //PowerPointプレゼンテーションを読み込む
        ppt.loadFromFile("サンプル.pptx");

        //最初のスライドを取得する
        ISlide slide = ppt.getSlides().get(0);

        //スライドの背景を取得する
        SlideBackground background = slide.getSlideBackground();

        //背景タイプをカスタムに設定する
        background.setType(BackgroundType.CUSTOM);

        //背景の塗りつぶしタイプを単色に設定する
        background.getFill().setFillType(FillFormatType.SOLID);

        //背景色を設定する
        FillFormat fillFormat = background.getFill();
        fillFormat.getSolidColor().setColor(new Color(199, 213, 237));

        //プレゼンテーションを保存する
        ppt.saveToFile("単色背景.pptx", FileFormat.AUTO);
    }
}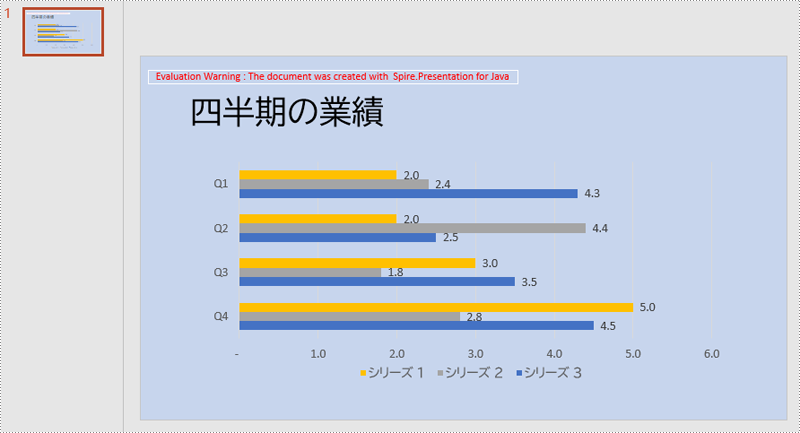
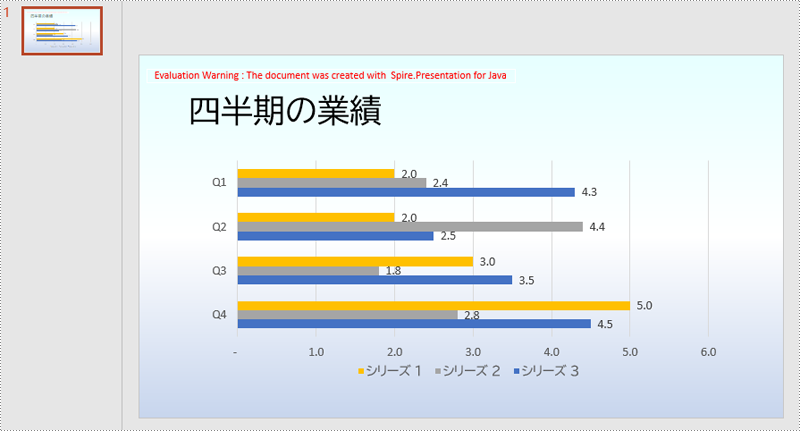
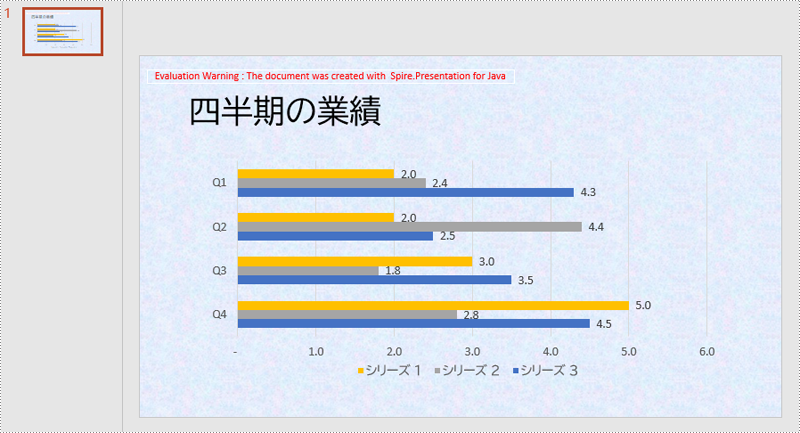
グラデーション背景は、背景タイプをグラデーション背景に設定し、グラデーションの種類、ストップポイント、色、および角度を設定することで設定できます。具体的な手順は以下の通りです。
import com.spire.presentation.FileFormat;
import com.spire.presentation.ISlide;
import com.spire.presentation.Presentation;
import com.spire.presentation.SlideBackground;
import com.spire.presentation.drawing.*;

import java.awt.*;

public class Gradient {
    public static void main(String[] args) throws Exception {
        //Presentationクラスのオブジェクトを作成する
        Presentation ppt = new Presentation();

        //PowerPointプレゼンテーションを読み込む
        ppt.loadFromFile("サンプル.pptx");

        //最初のスライドを取得する
        ISlide slide = ppt.getSlides().get(0);

        //スライドの背景を取得する
        SlideBackground background = slide.getSlideBackground();

        //背景タイプをカスタムに設定する
        background.setType(BackgroundType.CUSTOM);

        //背景の塗りつぶしタイプをグラデーションに設定する
        background.getFill().setFillType(FillFormatType.GRADIENT);

        //グラデーションの種類を線形グラデーションに設定する
        GradientFillFormat gradient = background.getFill().getGradient();
        gradient.setGradientShape(GradientShapeType.LINEAR);

        //グラデーションのストップを追加し、色を設定する
        gradient.getGradientStops().append(0f, new Color(230, 255, 255));
        gradient.getGradientStops().append(0.5f, new Color(255, 255, 255));
        gradient.getGradientStops().append(1f, new Color(199, 213, 237));

        //グラデーションの角度を設定する
        gradient.getLinearGradientFill().setAngle(90);

        //プレゼンテーションを保存する
        ppt.saveToFile("グラデーション背景.pptx", FileFormat.AUTO);
    }
}
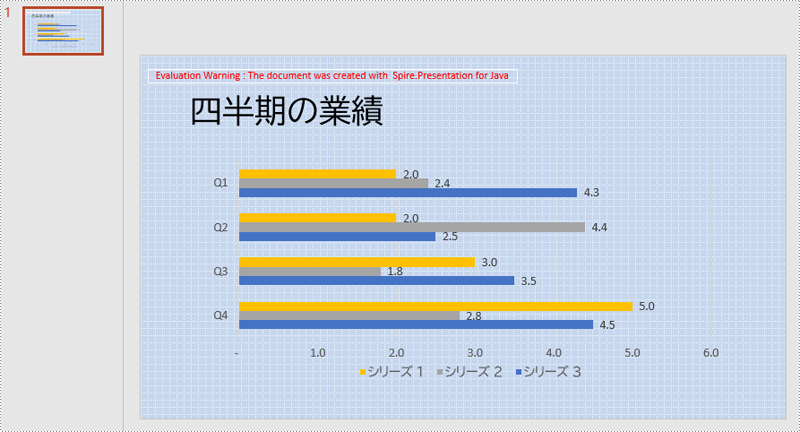
スライドの背景に画像を設定する場合、背景の種類を画像に設定し、次に画像の塗りつぶしタイプをストレッチ塗りつぶしに設定し、最後に背景画像を設定する必要があります。具体的な手順は以下の通りです。
import com.spire.presentation.FileFormat;
import com.spire.presentation.ISlide;
import com.spire.presentation.Presentation;
import com.spire.presentation.SlideBackground;
import com.spire.presentation.drawing.*;

import javax.imageio.ImageIO;
import java.io.File;

public class Picture {
    public static void main(String[] args) throws Exception {
        //Presentationクラスのオブジェクトを作成する
        Presentation ppt = new Presentation();

        //PowerPointプレゼンテーションを読み込む
        ppt.loadFromFile("サンプル.pptx");

        //画像を読み込む
        IImageData image = ppt.getImages().append(ImageIO.read(new File("背景.jpg")));

        //最初のスライドを取得する
        ISlide slide = ppt.getSlides().get(0);

        //スライドの背景を取得する
        SlideBackground background = slide.getSlideBackground();

        //背景タイプをカスタムに設定する
        background.setType(BackgroundType.CUSTOM);

        //背景の塗りつぶしタイプを画像に設定する
        background.getFill().setFillType(FillFormatType.PICTURE);

        //画像の塗りつぶしタイプをストレッチに設定する
        PictureFillFormat pictureFillFormat = background.getFill().getPictureFill();
        pictureFillFormat.setFillType(PictureFillType.STRETCH);

        //画像背景の透明度を設定する
        pictureFillFormat.getPicture().setTransparency(50);

        //背景画像を設定する
        pictureFillFormat.getPicture().setEmbedImage(image);

        //プレゼンテーションを保存する
        ppt.saveToFile("画像背景.pptx", FileFormat.AUTO);
    }
}
テクスチャの背景の設定は、画像背景の設定に似ています。 違いは、画像の塗りつぶしタイプをタイル状の塗りつぶしに変更する必要があることと、テクスチャの配置を設定できることです。 手順は以下の通りです。
import com.spire.presentation.*;
import com.spire.presentation.drawing.*;

import javax.imageio.ImageIO;
import java.io.File;

public class Texture {
    public static void main(String[] args) throws Exception {
        //Presentationクラスのオブジェクトを作成する
        Presentation ppt = new Presentation();

        //PowerPointプレゼンテーションを読み込む
        ppt.loadFromFile("サンプル.pptx");

        //テクスチャ画像を読み込む
        IImageData image = ppt.getImages().append(ImageIO.read(new File("テクスチャ.png")));

        //最初のスライドを取得する
        ISlide slide = ppt.getSlides().get(0);

        //スライドの背景を取得する
        SlideBackground background = slide.getSlideBackground();

        //背景タイプをカスタムに設定する
        background.setType(BackgroundType.CUSTOM);

        //背景の塗りつぶしタイプを画像に設定する
        background.getFill().setFillType(FillFormatType.PICTURE);

        //画像の塗りつぶしタイプをタイル状に設定する
        PictureFillFormat pictureFillFormat = background.getFill().getPictureFill();
        pictureFillFormat.setFillType(PictureFillType.TILE);

        //テクスチャの配置を設定する
        pictureFillFormat.setAlignment(RectangleAlignment.TOP_LEFT);

        //テクスチャの背景の透明度を設定する
        pictureFillFormat.getPicture().setTransparency(50);

        //背景のテクスチャを設定する
        pictureFillFormat.getPicture().setEmbedImage(image);

        //プレゼンテーションを保存する
        ppt.saveToFile("テクスチャの背景.pptx", FileFormat.AUTO);
    }
}
パターン背景を設定する場合、パターンタイプとパターンの前景色と背景色を設定する必要があります。 詳しい手順は以下の通り。
結果ドキュメントから評価メッセージを削除したい場合、または機能制限を取り除く場合は、についてこのメールアドレスはスパムボットから保護されています。閲覧するにはJavaScriptを有効にする必要があります。にお問い合わせ、30 日間有効な一時ライセンスを取得してください。
まず、Spire.Presentation for Java を Java プロジェクトに追加する必要があります。JAR ファイルは、このリンクからダウンロードできます。Maven を使用する場合は、次のコードをプロジェクトの pom.xml ファイルに追加する必要があります。
<repositories>
    <repository>
        <id>com.e-iceblue</id>
        <name>e-iceblue</name>
        <url>https://repo.e-iceblue.com/nexus/content/groups/public/</url>
    </repository>
</repositories>
<dependencies>
    <dependency>
        <groupId>e-iceblue</groupId>
        <artifactId>spire.presentation</artifactId>
        <version>8.5.2</version>
    </dependency>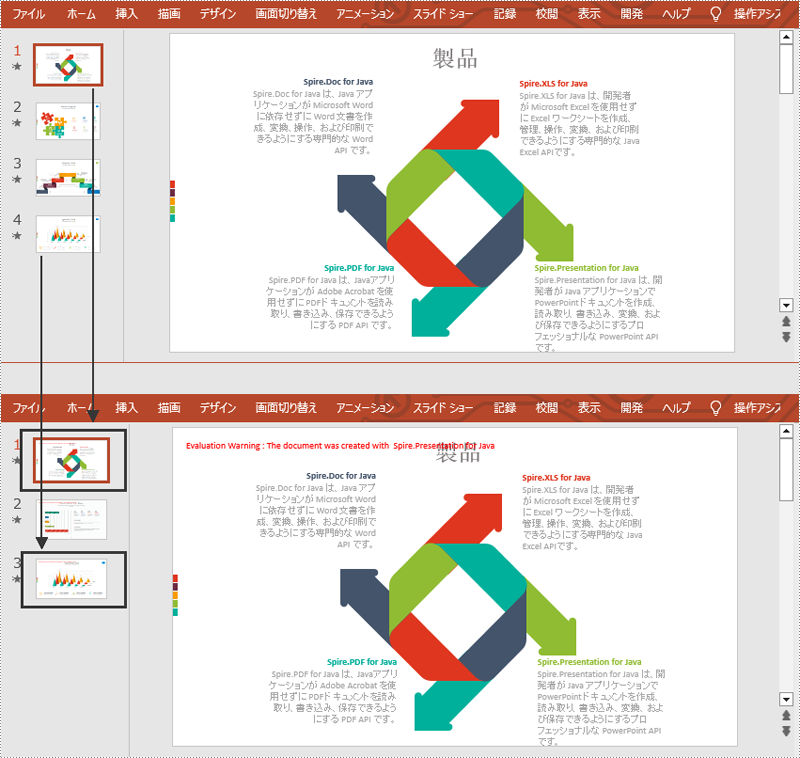
</dependencies>Spire.Presentation for Java が提供する Presentation.getSlides().insert() と Presentation.getSlides().append() メソッドは、それぞれ指定された場所へのスライドの挿入と追加をサポートします。以下に詳細な操作方法を示します。
import com.spire.presentation.FileFormat;
import com.spire.presentation.Presentation;

public class CopySlidesBetweenPPT {
    public static void main(String[] args) throws Exception {
        //sample1をロードするためのPresentationオブジェクトを作成する
        Presentation pptOne= new Presentation();
        pptOne.loadFromFile("sample1.pptx");

        //sample2をロードするための別のPresentationオブジェクトを作成する
        Presentation pptTwo = new Presentation();
        pptTwo.loadFromFile("sample2.pptx");

        //sample1のスライドをsample2の指定された場所に挿入する
        pptTwo.getSlides().insert(0,pptOne.getSlides().get(0));

        //sample1のスライドをsample2の最後に追加する
        pptTwo.getSlides().append(pptOne.getSlides().get(3));

        //sample2を別のファイルに保存する
        pptTwo.saveToFile("output/CopySlidesBetweenPPT.pptx", FileFormat.PPTX_2013);
        pptTwo.dispose();
    }
}
結果ドキュメントから評価メッセージを削除したい場合、または機能制限を取り除く場合は、についてこのメールアドレスはスパムボットから保護されています。閲覧するにはJavaScriptを有効にする必要があります。にお問い合わせ、30 日間有効な一時ライセンスを取得してください。
スライドは PowerPoint ドキュメントの重要な要素の1つで、著者が共有したい情報やアイデアが含まれています。PowerPoint ドキュメントを編集する際には、新しいスライドを作成したり、不要なスライドを削除したり、一時的にスライドを非表示にしたりするなど、スライドに対して操作を実行することは避けられません。この記事では、Spire.Presentation for Java を使用して PowerPoint でスライドを追加、隠す、または削除する方法を示します。
まず、Spire.Presentation for Java を Java プロジェクトに追加する必要があります。JAR ファイルは、このリンクからダウンロードできます。Maven を使用する場合は、次のコードをプロジェクトの pom.xml ファイルに追加する必要があります。
<repositories>
    <repository>
        <id>com.e-iceblue</id>
        <name>e-iceblue</name>
        <url>https://repo.e-iceblue.com/nexus/content/groups/public/</url>
    </repository>
</repositories>
<dependencies>
    <dependency>
        <groupId>e-iceblue</groupId>
        <artifactId>spire.presentation</artifactId>
        <version>7.12.0</version>
    </dependency>
</dependencies>Spire.Presentation for Java が提供する Presentation.getSlides().append() メソッドを使用すると、PowerPoint で最後のスライドの後に新しいスライドを追加できます。詳細な手順は次のとおりです。
import com.spire.presentation.*;

public class AddNewSlideinPowerPoint {
    public static void main(String[] args) throws Exception {
        //Presentationクラスのインスタンスを初期化する
        Presentation presentation = new Presentation();

        //PowerPointドキュメントをロードする
        presentation.loadFromFile("Sample.pptx");

        //PowerPointの最後の後に新しい空白のスライドを追加する
        presentation.getSlides().append();

        //結果ドキュメントを保存する
        presentation.saveToFile("AddSlide.pptx", FileFormat.PPTX_2013);
    }
}
他の情報を追加するには、特定のスライドの前にスライドを挿入する必要がある場合もあります。以下に詳細な操作手順を示します。
import com.spire.presentation.*;

public class InsertSlideinPowerPoint {
    public static void main(String[] args) throws Exception {
        //Presentationクラスのインスタンスを初期化する
        Presentation presentation = new Presentation();

        //PowerPointドキュメントをロードする
        presentation.loadFromFile("Sample.pptx");

        //2枚目のスライドの前に空白のスライドを挿入する
        presentation.getSlides().insert(1);

        //結果ドキュメントを保存する
        presentation.saveToFile("InsertSlide.pptx", FileFormat.PPTX_2013);
    }
}
プレゼンテーション中は、直接削除するのではなく、一時的に表示したくないスライドを非表示にすることができます。以下は、特定の PowerPoint スライドを非表示または表示にする手順です。
import com.spire.presentation.*;

public class HideUnhideSlides {
    public static void main(String[] args) throws Exception {
        //Presentationクラスのインスタンスを初期化する
        Presentation presentation = new Presentation();

        //PowerPointドキュメントをロードする
        presentation.loadFromFile("Sample.pptx");

        //2枚目のスライドを取得する
        ISlide slide = presentation.getSlides().get(1);

        //スライドを隠す
        slide.setHidden(true);

        //スライドの隠しを解除する
        //slide.setHidden(false);

        //結果ドキュメントを保存する
        presentation.saveToFile("HideSlide.pptx", FileFormat.PPTX_2010);
    }
}
Spire.Presemtation for Java が提供する Presentation.getSlides().removeAt(int index) メソッドは、ドキュメントから指定したスライドを削除することをサポートします。詳細な手順は次のとおりです。
import com.spire.presentation.*;

public class DeletePowerPointSlide {
    public static void main(String[] args) throws Exception {
        //Presentationクラスのインスタンスを初期化する
        Presentation presentation = new Presentation();

        //PowerPointドキュメントをロードする
        presentation.loadFromFile("Sample.pptx ");

        //2枚目のスライドを削除する
        presentation.getSlides().removeAt(1);

        //結果ドキュメントを保存する
        presentation.saveToFile("RemoveSlide.pptx", FileFormat.PPTX_2013);
    }
}
結果ドキュメントから評価メッセージを削除したい場合、または機能制限を取り除く場合は、についてこのメールアドレスはスパムボットから保護されています。閲覧するにはJavaScriptを有効にする必要があります。にお問い合わせ、30 日間有効な一時ライセンスを取得してください。