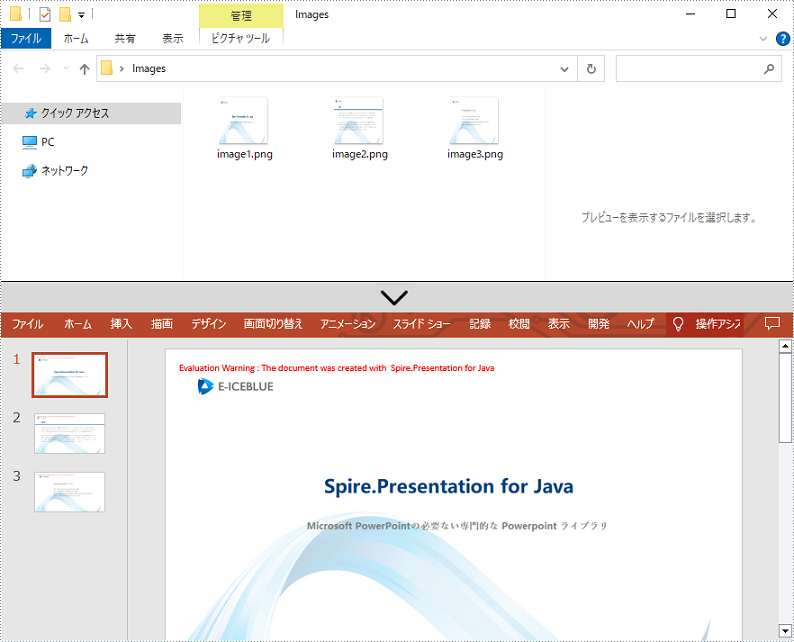
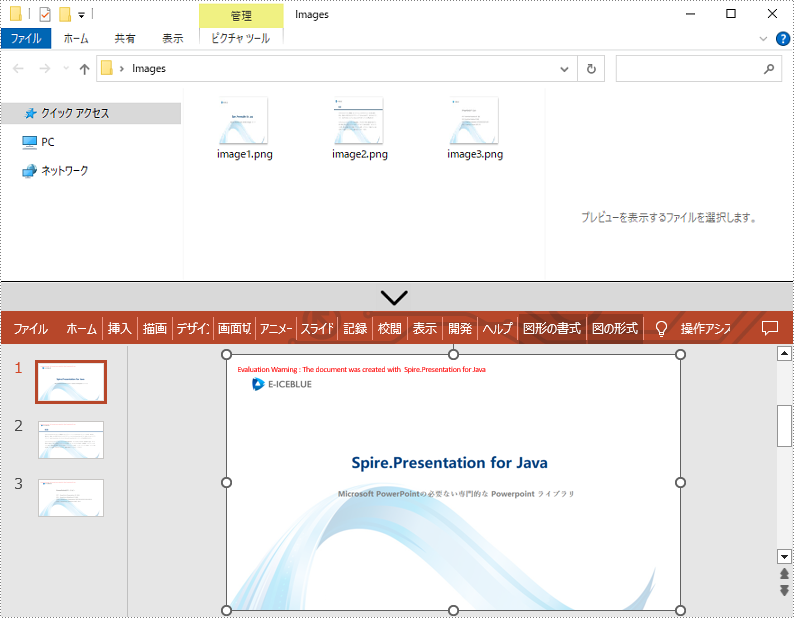
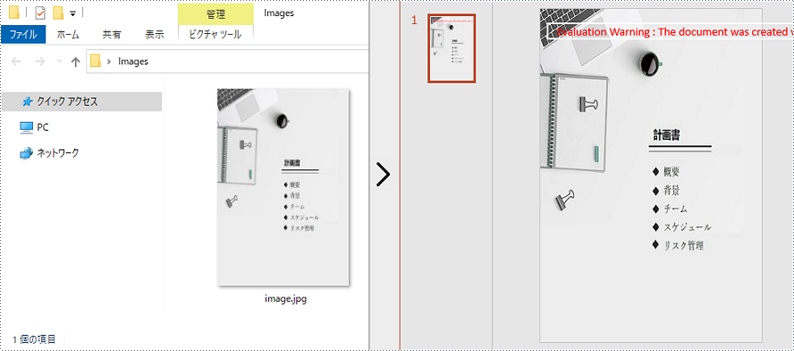
画像ファイルは、人々の日常生活で最もよく使われるドキュメントの一形態です。時折、特定のフォルダ内の全ての画像ファイルを取り出し、PowerPoint プレゼンテーション用のスライドに変換する必要が生じます。お客様の要件に応じて、画像をシェイプやスライドの背景に変換することが可能です。この記事では、Spire.Presentation for Java を使用して画像を PowerPoint ドキュメントに変換する方法を示します。
Spire.Presentation for Java をインストールします
まず、Spire.Presentation for Java を Java プロジェクトに追加する必要があります。JAR ファイルは、このリンクからダウンロードできます。Maven を使用する場合は、次のコードをプロジェクトの pom.xml ファイルに追加する必要があります。
<repositories>
    <repository>
        <id>com.e-iceblue</id>
        <name>e-iceblue</name>
        <url>https://repo.e-iceblue.com/nexus/content/groups/public/</url>
    </repository>
</repositories>
<dependencies>
    <dependency>
        <groupId>e-iceblue</groupId>
        <artifactId>spire.presentation</artifactId>
        <version>8.9.4</version>
    </dependency>
</dependencies>
画像を PowerPoint の背景に変換する
PowerPoint の各スライドの背景として画像が変換される場合、それらは移動や拡大縮小ができません。以下は、Spire.Presentation for Java を使用して、画像を PowerPoint ファイルに背景画像として変換する手順です。
- Presentation オブジェクトを作成します。
- スライドのサイズの種類を Sreen16x9 に設定します。
- フォルダーから画像の パスを取得します。
- 画像をループします。
- Presentation.getImages().append() メソッドを使用して、特定の画像を取得し、ドキュメントの画像コレクションに追加します。
- Presentation.getSlides().append() メソッドを使用して、ドキュメントにスライドを追加します。
- SlideBackground オブジェクトの下にあるメソッドを使用して、画像をスライドの背景として設定します。
- Presentation.saveToFile() メソッドを使用して、結果文書を保存します。
- Java
import com.spire.presentation.*;
import com.spire.presentation.drawing.*;

import javax.imageio.ImageIO;
import java.awt.image.BufferedImage;
import java.io.File;
import java.io.FileInputStream;

public class ConvertImagesAsBackground {

    public static void main(String[] args) throws Exception {

        //Presentationオブジェクトを作成する
        Presentation presentation = new Presentation();

        //スライドのサイズの種類を設定する
        presentation.getSlideSize().setType(SlideSizeType.SCREEN_16_X_9);

        //デフォルトのスライドを削除する
        presentation.getSlides().removeAt(0);

        //フォルダーから画像ファイルを取得する
        File directoryPath = new File("C:\\Users\\Administrator\\Desktop\\Images");
        File[] picFiles  = directoryPath.listFiles();

        //画像をループする
        for (int i = 0; i < picFiles.length; i++)
        {
            //スライドを追加する
            ISlide slide = presentation.getSlides().append();

            //特定の画像を取得する
            String imageFile = picFiles[i].getAbsolutePath();

            //画像コレクションに追加する
            BufferedImage bufferedImage =  ImageIO.read(new FileInputStream(imageFile));
            IImageData imageData = presentation.getImages().append(bufferedImage);

            //画像をスライドの背景画像として設定する
            slide.getSlideBackground().setType(BackgroundType.CUSTOM);
            slide.getSlideBackground().getFill().setFillType(FillFormatType.PICTURE);
            slide.getSlideBackground().getFill().getPictureFill().setFillType(PictureFillType.STRETCH);
            slide.getSlideBackground().getFill().getPictureFill().getPicture().setEmbedImage(imageData);
        }

        //結果文書を保存する
        presentation.saveToFile("ImagesToBackground.pptx", FileFormat.PPTX_2013);
    }
}
画像を PowerPoint の図形に変換する
PowerPoint ファイルで画像を移動可能かつサイズ変更可能にしたい場合は、それらを図形として変換することができます。以下は、Spire.Presentation for Java を使用して PowerPoint 文書内の画像を図形に変換する手順です。
- Presentation オブジェクトを作成します。
- スライドのサイズの種類を Sreen16x9 に設定します。
- フォルダーから画像のパスを取得します。
- 画像をループします。
- Presentation.getImages().append() メソッドを使用して、特定の画像を取得し、ドキュメントの画像コレクションに追加します。
- Presentation.getSlides().append() メソッドを使用して、ドキュメントにスライドを追加します。
- ISlide.getShapes().appendShape() メソッドを使用して、スライドと同じサイズの図形を追加します。
- FillFormat オブジェクトの下にあるメソッドを使用して、図形を画像で塗りつぶします。
- Presentation.saveToFile() メソッドを使用して、結果文書を保存します。
- Java
import com.spire.presentation.*;
import com.spire.presentation.drawing.*;

import javax.imageio.ImageIO;
import java.awt.geom.Rectangle2D;
import java.awt.image.BufferedImage;
import java.io.File;
import java.io.FileInputStream;

public class ConvertImageToShape {

    public static void main(String[] args) throws Exception {

        //Presentationオブジェクトを作成する
        Presentation presentation = new Presentation();

        //スライドのサイズの種類を設定する
        presentation.getSlideSize().setType(SlideSizeType.SCREEN_16_X_9);

        //デフォルトのスライドを削除する
        presentation.getSlides().removeAt(0);

        //フォルダーから画像ファイルを取得する
        File directoryPath = new File("C:\\Users\\Administrator\\Desktop\\Images");
        File[] picFiles  = directoryPath.listFiles();

        //画像をループする
        for (int i = 0; i < picFiles.length; i++)
        {
            //スライドを追加する
            ISlide slide = presentation.getSlides().append();

            //特定の画像を取得する
            String imageFile = picFiles[i].getAbsolutePath();

            //画像コレクションに追加する
            BufferedImage bufferedImage =  ImageIO.read(new FileInputStream(imageFile));
            IImageData imageData = presentation.getImages().append(bufferedImage);

            //スライドと同じサイズの図形を追加する
            IAutoShape shape = slide.getShapes().appendShape(ShapeType.RECTANGLE, new Rectangle2D.Float(0, 0, (float) presentation.getSlideSize().getSize().getWidth(), (float)presentation.getSlideSize().getSize().getHeight()));

            //図形を画像で塗りつぶす
            shape.getLine().setFillType(FillFormatType.NONE);
            shape.getFill().setFillType(FillFormatType.PICTURE);
            shape.getFill().getPictureFill().setFillType(PictureFillType.STRETCH);
            shape.getFill().getPictureFill().getPicture().setEmbedImage(imageData);
        }

        //結果文書を保存する
        presentation.saveToFile("ImagesToShape.pptx", FileFormat.PPTX_2013);
    }
}
画像をカスタマスライドサイズの PowerPoint に変換する
もし画像のアスペクト比が 16:9 ではない場合や、標準のスライドサイズでない場合は、画像の実際のサイズに基づいてスライドを作成することができます。これにより、画像が過度に伸びたり圧縮されたりするのを防ぐことができます。以下は、Spire.Presentation for Java を使用してカスタマイズされたスライドサイズで PowerPoint 文書に画像を変換する手順です。
- Presentation オブジェクトを作成します。
- PdfUnitConvertor オブジェクトを作成し、ピクセルをポイントに変換するために使用します。
- フォルダから画像のパスを取得します。
- 画像をループします。
- Presentation.getImages().append() メソッドを使用して、特定の画像を取得し、ドキュメントの画像コレクションに追加します。
- 画像の幅と高さを取得し、ポイントに変換します。
- Presentation.getSlideSize().setSize() メソッドを使用して、スライドサイズを画像のサイズに基づいて設定します。
- Presentation.getSlides().append() メソッドを使用して、ドキュメントにスライドを追加します。
- SlideBackground オブジェクトの下にあるメソッドを使用して、画像をスライドの背景画像として設定します。
- Presentation.saveToFile() メソッドを使用して、結果文書を保存します。
- Java
import com.spire.pdf.graphics.PdfGraphicsUnit;
import com.spire.pdf.graphics.PdfUnitConvertor;
import com.spire.presentation.*;
import com.spire.presentation.drawing.*;

import javax.imageio.ImageIO;
import java.awt.*;
import java.awt.image.BufferedImage;
import java.io.File;
import java.io.FileInputStream;

public class CustomizeSlideSize {

    public static void main(String[] args) throws Exception {

        //Presentationオブジェクトを作成する
        Presentation presentation = new Presentation();

        //デフォルトのスライドを削除する
        presentation.getSlides().removeAt(0);

        //フォルダーから画像ファイルを取得する
        File directoryPath = new File("C:\\Users\\Administrator\\Desktop\\Images");
        File[] picFiles  = directoryPath.listFiles();

        //PdfUnitConvertor オブジェクトを作成する
        PdfUnitConvertor convertor = new PdfUnitConvertor();

        //画像をループする
        for (int i = 0; i < picFiles.length; i++)
        {
            //特定の画像を取得する
            String imageFile = picFiles[i].getAbsolutePath();

            //画像コレクションに追加する
            BufferedImage bufferedImage =  ImageIO.read(new FileInputStream(imageFile));
            IImageData imageData = presentation.getImages().append(bufferedImage);

            //画像の高さと幅をピクセル単位で取得する
            int height = imageData.getHeight();
            int width = imageData.getWidth();

            //ピクセルをポイントに変換する
            float widthPoint = convertor.convertUnits(width, PdfGraphicsUnit.Pixel, PdfGraphicsUnit.Point);
            float heightPoint= convertor.convertUnits(height, PdfGraphicsUnit.Pixel, PdfGraphicsUnit.Point);

            //スライドのサイズを設定する
            presentation.getSlideSize().setSize(new Dimension((int)widthPoint, (int)heightPoint));

            //スライドを追加する
            ISlide slide = presentation.getSlides().append();

            //画像をスライドの背景画像として設定する
            slide.getSlideBackground().setType(BackgroundType.CUSTOM);
            slide.getSlideBackground().getFill().setFillType(FillFormatType.PICTURE);
            slide.getSlideBackground().getFill().getPictureFill().setFillType(PictureFillType.STRETCH);
            slide.getSlideBackground().getFill().getPictureFill().getPicture().setEmbedImage(imageData);
        }

        //結果文書を保存する
        presentation.saveToFile("CustomizeSlideSize.pptx", FileFormat.PPTX_2013);
    }
}
一時ライセンスを申請する
結果ドキュメントから評価メッセージを削除したい場合、または機能制限を取り除く場合は、についてこのメールアドレスはスパムボットから保護されています。閲覧するにはJavaScriptを有効にする必要があります。にお問い合わせ、30 日間有効な一時ライセンスを取得してください。


