チュートリアル
簡単にライブラリーを使用するためのチュートリアルコレクション

Spire.XLS for Java は、Excel ファイルのデジタル署名を追加および削除するための Workbook.addDigitalSignature() メソッドと Workbook.removeAllDigitalSignatures() メソッドを提供しています。この記事では、Java アプリケーション(Java8)で Excel ファイルがデジタル署名されているかどうかを検出し、デジタル署名に関する情報を取得する方法を紹介します。
まず、Spire. XLS for Java を Java プロジェクトに追加する必要があります。JAR ファイルは、このリンクからダウンロードできます。Maven を使用する場合は、次のコードをプロジェクトの pom.xml ファイルに追加する必要があります。
<repositories>
    <repository>
        <id>com.e-iceblue</id>
        <name>e-iceblue</name>
        <url> https://repo.e-iceblue.com/nexus/content/groups/public/</url>
    </repository>
</repositories>
<dependencies>
    <dependency>
        <groupId>e-iceblue</groupId>
        <artifactId>spire.xls</artifactId>
        <version>14.4.4</version>
    </dependency>
</dependencies>Spire.XLS for Java の Workbook.isDigitallySigned() メソッドを使用して、Excel ドキュメントがデジタル署名されているかどうかを確認できます。
手順
import com.spire.xls.*;
public class CheckDigitalSignatureExcel {
public static void main(String[] args) throws Exception {
// Workbookのインスタンスを作成します
Workbook workbook = new Workbook();
// Excelドキュメントを読み込みます
workbook.loadFromFile("サンプル.xlsx");
// Excelドキュメントがデジタルに署名されているかどうかを検出します
Boolean signature = workbook.isDigitallySigned();
// 結果を出力します
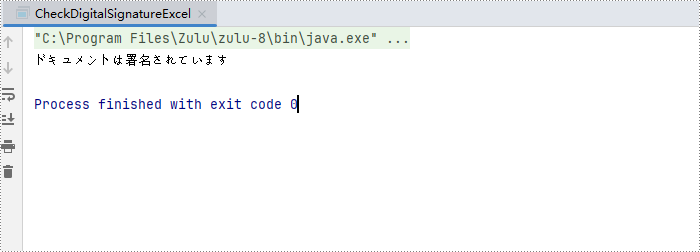
if (signature) {
System.out.println("ドキュメントは署名されています");
}
else
{
System.out.println("ドキュメントは署名されていません");
}
}
}
Spire.XLS for Java の Workbook.getDigitalSignatures() メソッドを使用して、Excel ドキュメントのデジタル署名詳細を取得できます。
手順
import com.spire.xls.*;
import com.spire.xls.core.interfaces.IDigitalSignature;
import com.spire.xls.core.interfaces.IDigitalSignatures;
import java.security.PrivateKey;
import java.security.cert.X509Certificate;
import java.util.Date;
public class getSignatureInfoExcel {
public static void main(String[] args) throws Exception {
// Workbookのインスタンスを作成します
Workbook workbook = new Workbook();
// Excelドキュメントを読み込みます
workbook.loadFromFile("サンプル.xlsx");
// デジタル署名のコレクションを取得します
IDigitalSignatures signatures = workbook.getDigitalSignatures();
// デジタル署名の詳細情報を取得します
for (IDigitalSignature digitalSignature : (Iterable) signatures) {
X509Certificate info = digitalSignature.getX509Certificate();
PrivateKey privateKey = digitalSignature.getPrivateKey();
String comment = digitalSignature.getComments();
Date date = digitalSignature.getSignTime();
// Excelデジタル署名の結果を出力します
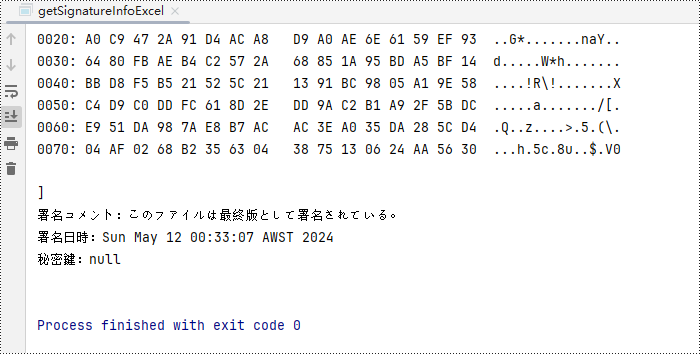
System.out.println("署名証明書:" + info + "\n" +
"署名コメント:" + comment + "\n" +
"署名日時:" + date + "\n" +
"秘密鍵:" + privateKey + "\n");
}
}
} 
結果ドキュメントから評価メッセージを削除したい場合、または機能制限を取り除く場合は、についてこのメールアドレスはスパムボットから保護されています。閲覧するにはJavaScriptを有効にする必要があります。にお問い合わせ、30 日間有効な一時ライセンスを取得してください。
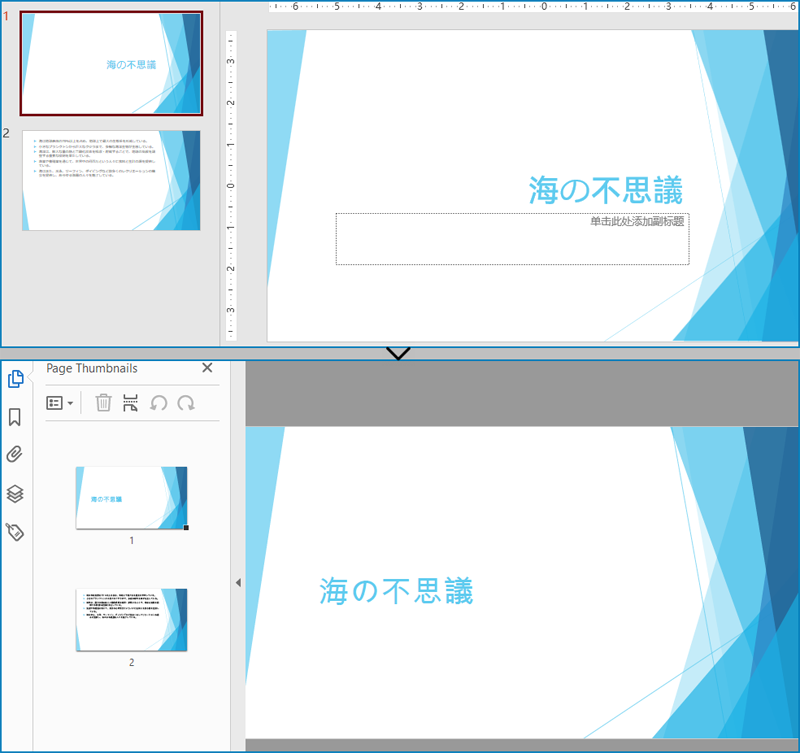
OpenDocument プレゼンテーション ドキュメント形式は、一般的に ODP と呼ばれ、Open Document Format ファイルのファイル拡張子の 1 つです。スライドショー プレゼンテーションのオープンソース表示形式として機能するように設計されています。ドキュメントの書式が維持されるようにするには、ODP ファイルを PDF に変換する必要がある場合があります。この記事では、Spire.Presentation for Java を使用してこの機能を実現する方法を説明します。
まず、Spire.Presentation for Java を Java プロジェクトに追加する必要があります。JAR ファイルは、このリンクからダウンロードできます。Maven を使用する場合は、次のコードをプロジェクトの pom.xml ファイルに追加する必要があります。
<repositories>
    <repository>
        <id>com.e-iceblue</id>
        <name>e-iceblue</name>
        <url>https://repo.e-iceblue.com/nexus/content/groups/public/</url>
    </repository>
</repositories>
<dependencies>
    <dependency>
        <groupId>e-iceblue</groupId>
        <artifactId>spire.presentation</artifactId>
        <version>9.4.5</version>
    </dependency>
</dependencies>Spire.Presentation for Java を使用して ODP を PDF に変換するには、以下の手順に従って簡単かつ迅速に行うことができます。
import com.spire.presentation.*;

public class ODPtoPDF {
    public static void main(String[] args) throws Exception {

        // Presentationのインスタンスを作成する
        Presentation presentation = new Presentation();

        // サンプルのODPファイルをロードする
        presentation.loadFromFile("サンプル.odp", FileFormat.ODP);

        // PDFとして保存する
        presentation.saveToFile("output/ODPをPDFに変換.pdf", FileFormat.PDF);
    }
}
結果ドキュメントから評価メッセージを削除したい場合、または機能制限を取り除く場合は、についてこのメールアドレスはスパムボットから保護されています。閲覧するにはJavaScriptを有効にする必要があります。にお問い合わせ、30 日間有効な一時ライセンスを取得してください。
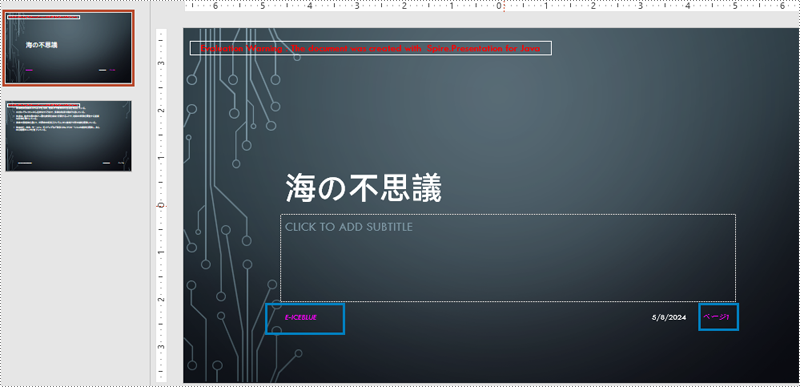
PowerPoint ドキュメントにフッターを追加、変更、削除することは、ドキュメントに付加情報と組織構造を提供できるため、非常に重要です。フッターにページ番号、日付、作成者情報、またはカスタムテキストを含めることで、オーディエンスはプレゼンテーションの内容をよりよく理解し、ドキュメントのバージョンを追跡することができます。また、フッターはドキュメントの専門性と整頓性を高め、視覚的に魅力的で読みやすくします。フッターを変更することで、情報の更新やフォーマットの調整を行うことができ、ドキュメントを最新の状態に保ち、一貫性を維持することができます。フッターを削除することで、特定の要件やデザインの好みに基づいてドキュメントの外観をカスタマイズすることができます。この記事では、Java プロジェクト内で Spire.Presentation for Java を使用して、PowerPoint ドキュメントにフッターを追加、変更、削除する方法を紹介します。
まず、Spire.Presentation for Java を Java プロジェクトに追加する必要があります。JAR ファイルは、このリンクからダウンロードできます。Maven を使用する場合は、次のコードをプロジェクトの pom.xml ファイルに追加する必要があります。
<repositories>
    <repository>
        <id>com.e-iceblue</id>
        <name>e-iceblue</name>
        <url>https://repo.e-iceblue.com/nexus/content/groups/public/</url>
    </repository>
</repositories>
<dependencies>
    <dependency>
        <groupId>e-iceblue</groupId>
        <artifactId>spire.presentation</artifactId>
        <version>9.4.5</version>
    </dependency>
</dependencies>Spire.Presentation を使用すると、PowerPoint ドキュメントの各ページの下部に一貫性のあるフッターコンテンツを簡単に追加できます。フッタープレースホルダー、ページ番号プレースホルダー、時刻プレースホルダーを追加することで、各ページのフッターコンテンツが一致することを確認できます。具体的な手順は以下のとおりです。
import com.spire.presentation.*;
public class AddFooterToSlides {
public static void main(String[] args) throws Exception {
// Presentationオブジェクトを作成します
Presentation presentation = new Presentation();
// ファイルからプレゼンテーションをロードします
presentation.loadFromFile("Sample.pptx");
// フッターを表示します
presentation.setFooterVisible(true);
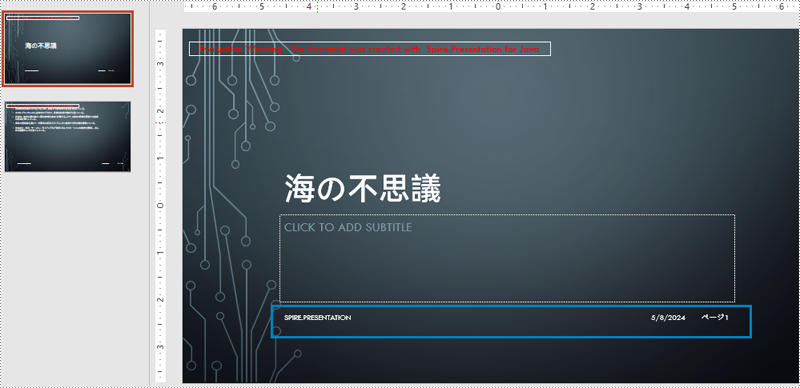
// フッターテキストを「Spire.Presentation」に設定します
presentation.setFooterText("Spire.Presentation");
// スライド番号を表示します
presentation.setSlideNumberVisible(true);
// プレゼンテーションの各スライドを反復処理します
for (int i = 0; i < presentation.getSlides().getCount(); i++) {
ISlide slide = presentation.getSlides().get(i);
for (int j = 0; j < slide.getShapes().getCount(); j++) {
IShape shape = slide.getShapes().get(j);
if (shape.getPlaceholder() != null) {
// スライド番号プレースホルダーの場合
if (shape.getPlaceholder().getType().equals(PlaceholderType.SLIDE_NUMBER)) {
ParagraphEx textParagraph = ((IAutoShape) shape).getTextFrame().getTextRange().getParagraph();
String text = textParagraph.getText();
// スライド番号のテキストを「スライドX」に変更します
textParagraph.setText("ページ" + text);
}
}
}
}
// 日付と時刻を表示します
presentation.setDateTimeVisible(true);
// 日付と時刻の書式を設定します
presentation.setDateTime(java.util.Calendar.getInstance().getTime(), "yyyy/MM/dd");
// 変更されたプレゼンテーションをファイルに保存します
presentation.saveToFile("output/フッターの挿入.pptx", FileFormat.PPTX_2016);
// Presentationオブジェクトのリソースを解放します
presentation.dispose();
}
}
PowerPoint ドキュメントのフッターを変更するには、各スライドのすべての図形を検査して、フッタープレースホルダー、ページ番号プレースホルダーなどを特定する必要があります。これらのプレースホルダーを認識することで、各タイプのコンテンツと形式を個別に設定することができます。具体的な手順は以下のとおりです。
import com.spire.presentation.*;
import com.spire.presentation.drawing.FillFormatType;
import java.awt.*;

public class ModifySlideFooter {
    public static void main(String[] args) throws Exception {
        // Presentationのオブジェクトを作成する
        Presentation presentation = new Presentation();

        // ファイルからプレゼンテーションを読み込む
        presentation.loadFromFile("output/フッターの挿入.pptx");

        // 最初のスライドを取得する
        ISlide slide = presentation.getSlides().get(0);

        // スライド上の図形を繰り返し処理する
        for (int i = 0; i < slide.getShapes().getCount(); i++) {
            // 図形がプレースホルダーかどうかをチェックする
            if (slide.getShapes().get(i).getPlaceholder() != null) {
                // プレースホルダーの種類を取得する
                PlaceholderType type = slide.getShapes().get(i).getPlaceholder().getType();

                // フッタープレースホルダーの場合
                if (type == PlaceholderType.FOOTER) {
                    // 図形をIAutoShape型に変換する
                    IAutoShape autoShape = (IAutoShape) slide.getShapes().get(i);

                    // テキストの内容を「E-ICEBLUE」に設定する
                    autoShape.getTextFrame().setText("E-ICEBLUE");

                    // テキストのフォントを変更する
                    ChangeFont(autoShape.getTextFrame().getParagraphs().get(0));
                }
                // スライド番号プレースホルダーの場合
                if (type == PlaceholderType.SLIDE_NUMBER) {
                    // 図形をIAutoShape型に変換する
                    IAutoShape autoShape = (IAutoShape) slide.getShapes().get(i);

                    // テキストのフォントを変更する
                    ChangeFont(autoShape.getTextFrame().getParagraphs().get(0));
                }
            }
        }

        // 変更されたプレゼンテーションをファイルに保存する
        presentation.saveToFile("output/フッターの変更.pptx", FileFormat.PPTX_2016);

        // Presentationオブジェクトのリソースを解放する
        presentation.dispose();
    }

    static void ChangeFont(ParagraphEx paragraph) {
        // 段落内の各テキスト範囲を繰り返し処理する
        for (int i = 0; i < paragraph.getTextRanges().getCount(); i++) {
            // テキストスタイルをイタリックに設定する
            paragraph.getTextRanges().get(i).isItalic(TriState.TRUE);

            // テキストのフォントを設定する
            paragraph.getTextRanges().get(i).setEastAsianFont(new TextFont("Times New Roman"));

            // テキストのフォントサイズを34に設定する
            paragraph.getTextRanges().get(i).setFontHeight(12);

            // テキストの色を設定する
            paragraph.getTextRanges().get(i).getFill().setFillType(FillFormatType.SOLID);
            paragraph.getTextRanges().get(i).getFill().getSolidColor().setColor(Color.magenta);
        }
    }
}
PowerPoint ドキュメントのフッターを削除するには、まずスライド内のフッタープレースホルダー、ページ番号プレースホルダー、時刻プレースホルダーなどのコンテンツを取得する必要があります。これらのプレースホルダーが特定されたら、スライド上の図形のコレクションからそれらを検索して削除することができます。具体的な手順は以下のとおりです。
import com.spire.presentation.*;

public class RemoveSlideFooter {
    public static void main(String[] args) throws Exception {
        // Presentationのオブジェクトを作成する
        Presentation presentation = new Presentation();

        // ファイルからプレゼンテーションを読み込む
        presentation.loadFromFile("output/フッターの挿入.pptx");

        // 最初のスライドを取得する
        ISlide slide = presentation.getSlides().get(0);

        // スライド上の図形を逆順で繰り返し処理する
        for (int i = slide.getShapes().getCount() - 1; i >= 0; i--) {
            // 図形がプレースホルダーかどうかをチェックする
            if (slide.getShapes().get(i).getPlaceholder() != null) {
                // プレースホルダーの種類を取得する
                PlaceholderType type = slide.getShapes().get(i).getPlaceholder().getType();
                // フッタープレースホルダーの場合
                if (type == PlaceholderType.FOOTER) {
                    // スライドから削除する
                    slide.getShapes().removeAt(i);
                }
                // スライド番号プレースホルダーの場合
                if (type == PlaceholderType.SLIDE_NUMBER) {
                    // スライドから削除する
                    slide.getShapes().removeAt(i);
                }
                // 日付と時刻プレースホルダーの場合
                if (type == PlaceholderType.DATE_AND_TIME) {
                    // スライドから削除する
                    slide.getShapes().removeAt(i);
                }
            }
        }

        // 変更されたプレゼンテーションをファイルに保存する
        presentation.saveToFile("output/フッターの削除.pptx", FileFormat.PPTX_2016);
        // Presentationオブジェクトのリソースを解放する
        presentation.dispose();
    }
}
結果ドキュメントから評価メッセージを削除したい場合、または機能制限を取り除く場合は、についてこのメールアドレスはスパムボットから保護されています。閲覧するにはJavaScriptを有効にする必要があります。にお問い合わせ、30 日間有効な一時ライセンスを取得してください。
PowerPoint プレゼンテーションを印刷すると、デジタルスライドを共有、配布、または参照用に使用できる具体的なドキュメントに変換できます。会議のための配布資料、プレゼンテーションのための資料、またはアーカイブ目的のための物理的なコピーが必要かどうかにかかわらず、PowerPoint プレゼンテーションを印刷することは、コンテンツを物理的なオブジェクトに変換する汎用性の高い方法です。
この記事では、Spire.Presentation for Java を使用して、Java で PowerPoint ドキュメントを印刷する方法について説明します。
まず、Spire.Presentation for Java を Java プロジェクトに追加する必要があります。JAR ファイルは、このリンクからダウンロードできます。Maven を使用する場合は、次のコードをプロジェクトの pom.xml ファイルに追加する必要があります。
<repositories>
    <repository>
        <id>com.e-iceblue</id>
        <name>e-iceblue</name>
        <url>https://repo.e-iceblue.com/nexus/content/groups/public/</url>
    </repository>
</repositories>
<dependencies>
    <dependency>
        <groupId>e-iceblue</groupId>
        <artifactId>spire.presentation</artifactId>
        <version>9.4.5</version>
    </dependency>
</dependencies>PowerPoint のプレゼンテーションを印刷することは、コンピュータ上のデフォルトプリンタとデフォルトの印刷設定を使用して簡単に行うことができます。
デフォルトプリンタで PowerPoint ファイルを印刷するには、以下の手順に従ってください。
import com.spire.presentation.Presentation;
import com.spire.presentation.PresentationPrintDocument;

public class PrintWithDefaultPrinter {

    public static void main(String[] args) throws Exception {

        // Presentation オブジェクトを作成します
        Presentation presentation = new Presentation();

        // PowerPointファイルをロードします
        presentation.loadFromFile("Sample.pptx");

        // PresentationPrintDocument オブジェクトを作成します
        PresentationPrintDocument printDocument = new PresentationPrintDocument(presentation);

        // ドキュメントを印刷します
        printDocument.print();

        // リソースを解放します
        presentation.dispose();
        printDocument.dispose();
    }
}PowerPoint プレゼンテーションをデフォルトのプリンタではなく、特定のプリンタを使用して印刷したい場合は、以下の手順で簡単に行うことができます。
import com.spire.presentation.Presentation;
import com.spire.presentation.printing.PrinterSettings;

public class PrintWithSpecifiedPrinter {

    public static void main(String[] args) throws Exception {

        // プレゼンテーションオブジェクトを作成します
        Presentation presentation = new Presentation();

        // PowerPointファイルをロードします
        presentation.loadFromFile("Sample.pptx");

        // PrinterSettingsオブジェクトを作成します
        PrinterSettings printerSettings = new PrinterSettings();

        // プリンター名を指定します
        printerSettings.setPrinterName("HP ColorLaserJet MFP M278-M281 PCL-6 (V4)");

        // ドキュメントを印刷します
        presentation.print(printerSettings);

        // リソースを解放します
        presentation.dispose();
    }
}複数のスライドを 1 ページに印刷することは、紙の使用量を最適化し、PowerPoint プレゼンテーションからコンパクトな配布資料や参考資料を作成する便利な方法です。
以下は、Java を使用して複数のスライドを 1 ページに印刷する手順です。
import com.spire.presentation.PageSlideCount;
import com.spire.presentation.Presentation;
import com.spire.presentation.printing.Duplex;
import com.spire.presentation.printing.PrinterSettings;

public class PrintMultipleSlidesOnOnePage {

    public static void main(String[] args) throws Exception {

        // Presentationオブジェクトを作成します
        Presentation presentation = new Presentation();

        // PowerPointファイルをロードします
        presentation.loadFromFile("Sample.pptx");

        // 印刷用の1ページあたりのスライド数を設定します
        presentation.setSlideCountPerPageForPrint(PageSlideCount.Two);

        // PrinterSettingsオブジェクトを作成します
        PrinterSettings printerSettings = new PrinterSettings();

        // ドキュメントを印刷します
        presentation.print(printerSettings);

        // リソースを解放します
        presentation.dispose();
    }
}グレースケールで印刷することで、スライドからカラー要素を削除し、プレゼンテーションの単色バージョンを得ることができます。
以下は、Java を使用して PowerPoint をグレースケールで印刷する手順です。
import com.spire.presentation.Presentation;
import com.spire.presentation.printing.PrinterSettings;

public class PrintInGrayScale {

    public static void main(String[] args) throws Exception {

        // Presentationオブジェクトを作成します
        Presentation presentation = new Presentation();

        // PowerPointファイルをロードします
        presentation.loadFromFile("Sample.pptx");

        // グレースケール印刷モードを有効にします
        presentation.setGrayLevelForPrint(true);

        // PrinterSettingsオブジェクトを作成します
        PrinterSettings printerSettings = new PrinterSettings();

        // ドキュメントを印刷します
        presentation.print(printerSettings);

        // リソースを解放します
        presentation.dispose();
    }
}PowerPoint のスライドを用紙の両面に印刷することは、紙の消費量を減らし、よりコンパクトな配布資料や文書を作成できるため、実用的で環境に優しいオプションとなります。
PowerPoint ファイルを用紙の両面に印刷する手順は次のとおりです。
import com.spire.presentation.Presentation;
import com.spire.presentation.printing.Duplex;
import com.spire.presentation.printing.PrinterSettings;

public class PrintInDuplexMode {

    public static void main(String[] args) throws Exception {

        // Presentationオブジェクトを作成します
        Presentation presentation = new Presentation();

        // PowerPointファイルをロードします
        presentation.loadFromFile("Sample.pptx");

        // PrinterSettingsオブジェクトを作成します
        PrinterSettings printerSettings = new PrinterSettings();

        // 両面印刷モードを有効にします
        printerSettings.setDuplex(Duplex.Default);

        // ドキュメントを印刷します
        presentation.print(printerSettings);

        // リソースを解放します
        presentation.dispose();
    }
}PowerPoint プレゼンテーションで印刷範囲を設定することで、印刷するスライドを制御することができ、特定の需要に応じて印刷をカスタマイズすることができます。
印刷するスライドの範囲を指定するには、以下の手順に従ってください。
import com.spire.presentation.Presentation;
import com.spire.presentation.printing.PrintRange;
import com.spire.presentation.printing.PrinterSettings;

public class SetPrintRange {

    public static void main(String[] args) throws Exception {

        // Presentationオブジェクトを作成します
        Presentation presentation = new Presentation();

        // PowerPointファイルをロードします
        presentation.loadFromFile("Sample.pptx");

        // PrinterSettingsオブジェクトを作成します
        PrinterSettings printerSettings = new PrinterSettings();

        // 印刷するスライドの範囲を指定します
        printerSettings.setPrintRange(PrintRange.SomePages);
        printerSettings.setFromPage(1);
        printerSettings.setToPage(4);

        // ドキュメントを印刷します
        presentation.print(printerSettings);

        // リソースを解放します
        presentation.dispose();
    }
}コピー数を設定することで、印刷したいスライドの複製数を簡単に指定できます。
印刷する部数を指定するには、次の手順に従います。
import com.spire.presentation.Presentation;
import com.spire.presentation.printing.PrinterSettings;

public class SetCopies {

    public static void main(String[] args) throws Exception {

        // Presentationオブジェクトを作成します
        Presentation presentation = new Presentation();

        // PowerPointファイルをロードします
        presentation.loadFromFile("Sample.pptx");

        // PrinterSettingsオブジェクトを作成します
        PrinterSettings printerSettings = new PrinterSettings();

        // 印刷するコピーの数を指定します
        printerSettings.setCopies((short)2);

        // ドキュメントを印刷します
        presentation.print(printerSettings);

        // リソースを解放します
        presentation.dispose();
    }
}結果ドキュメントから評価メッセージを削除したい場合、または機能制限を取り除く場合は、についてこのメールアドレスはスパムボットから保護されています。閲覧するにはJavaScriptを有効にする必要があります。にお問い合わせ、30 日間有効な一時ライセンスを取得してください。
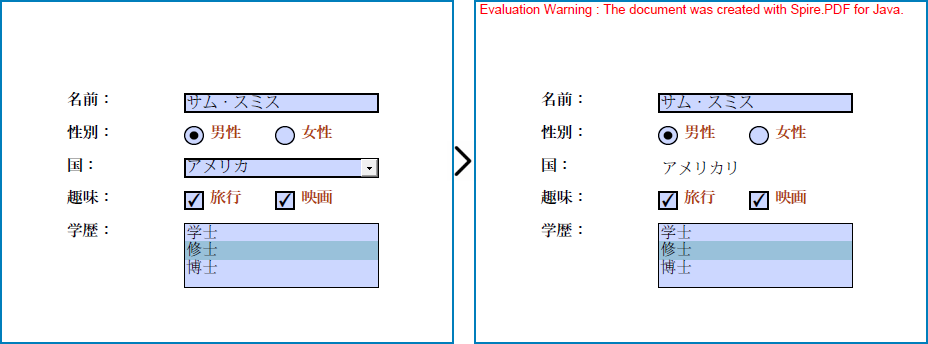
フォームフィールドは、PDF ドキュメントでユーザーから情報を収集するために頻繁に使用されます。場合によっては、PDF のフォームフィールドを平坦化(フラット化)する必要がある場合があります。たとえば、PDF アンケートのフォームフィールドに入力した情報を他の閲覧者が編集できないようにしたい場合などです。この記事では、Spire.PDF for Java を使用して Java で PDF のフォームフィールドをフラット化する方法を紹介します。
まず、Spire. PDF for Java を Java プロジェクトに追加する必要があります。JAR ファイルは、このリンクからダウンロードできます。Maven を使用する場合は、次のコードをプロジェクトの pom.xml ファイルに追加する必要があります。
<repositories>
    <repository>
        <id>com.e-iceblue</id>
        <name>e-iceblue</name>
        <url> https://repo.e-iceblue.com/nexus/content/groups/public/</url>
    </repository>
</repositories>
<dependencies>
    <dependency>
        <groupId>e-iceblue</groupId>
        <artifactId>spire.pdf</artifactId>
        <version>10.4.4</version>
    </dependency>
</dependencies>以下は、Spire.PDF for Java を使用して PDF ドキュメント内の特定のフォームフィールドをフラット化する手順です。
import com.spire.pdf.PdfDocument;
import com.spire.pdf.fields.PdfField;
import com.spire.pdf.widget.PdfFormWidget;

public class FlattenPDFFormField {
    public static void main(String[] args){
        // PdfDocumentのインスタンスを作成します
        PdfDocument pdf = new PdfDocument();
        // PDFドキュメントをロードします
        pdf.loadFromFile("サンプル.pdf");

        // フォームウィジェットコレクションを取得します
        PdfFormWidget formWidget = (PdfFormWidget)pdf.getForm();
        // 名前で特定のフォームフィールドを取得します
        PdfField form = formWidget.getFieldsWidget().get("国");
        // インデックスで特定のフォームフィールドを取得します
        // PdfField form = formWidget.getFieldsWidget().get(2);
        // フォームをフラット化します
        form.setFlatten(true);

        // 結果のドキュメントを保存します
        pdf.saveToFile("output/特定のフォームフィールドをフラット.pdf");
        pdf.close();
    }
}
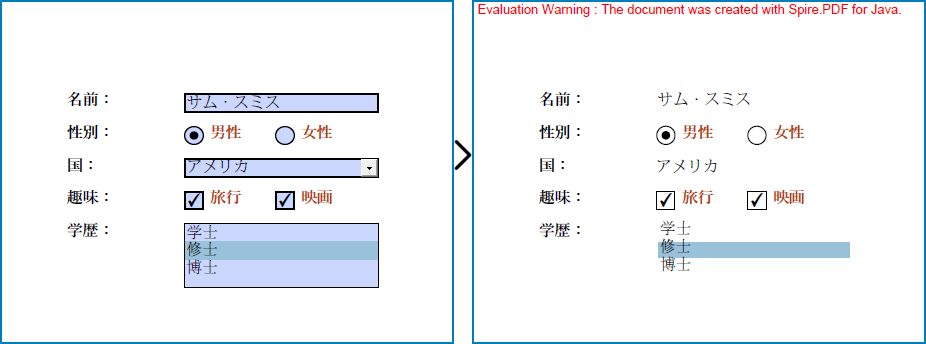
以下は、Spire.PDF for Java を使用して PDF ドキュメント内のすべてのフォームフィールドをフラット化する手順です。
import com.spire.pdf.PdfDocument;

public class FlattenAllPDFFormFields {
    public static void main(String[] args){
        // PdfDocumentのインスタンスを作成します
        PdfDocument pdf = new PdfDocument();
        // PDFドキュメントをロードします
        pdf.loadFromFile("サンプル.pdf");

        // ドキュメント内のすべてのフォームをフラット化します
        pdf.getForm().isFlatten(true);

        // 結果のドキュメントを保存します
        pdf.saveToFile("output/すべてのフォームフィールドをフラット.pdf");
    }
}
結果ドキュメントから評価メッセージを削除したい場合、または機能制限を取り除く場合は、についてこのメールアドレスはスパムボットから保護されています。閲覧するにはJavaScriptを有効にする必要があります。にお問い合わせ、30 日間有効な一時ライセンスを取得してください。
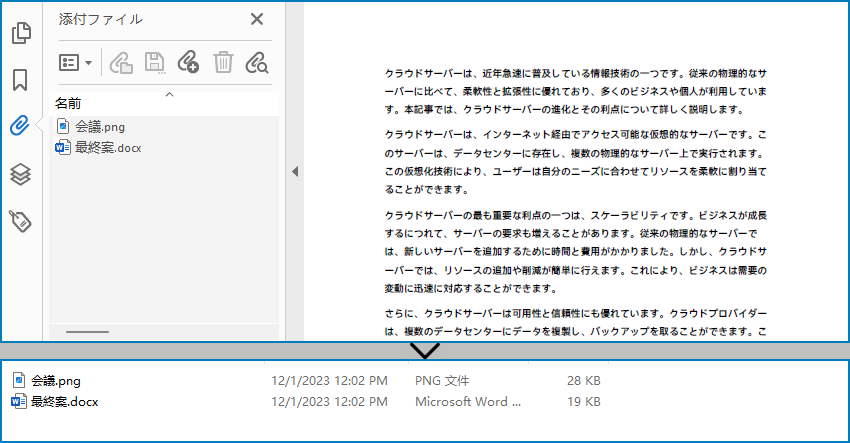
多くのユーザーは、PDF ドキュメント内に添付ファイルとして様々なファイルを保存しています。これらの添付ファイルは必要に応じて抽出され、他の目的で使用することができます。基本的に、PDF には2種類の添付ファイルがあります。ドキュメントレベルの添付ファイルと注釈添付ファイルです。以下に、それらの違いを示します。
この記事では、Spire.PDF for Java を使用して、Java で PDF ドキュメントからこれら 2 種類の添付ファイルを抽出する方法について説明します。
まず、Spire. PDF for Java を Java プロジェクトに追加する必要があります。JAR ファイルは、このリンクからダウンロードできます。Maven を使用する場合は、次のコードをプロジェクトの pom.xml ファイルに追加する必要があります。
<repositories>
    <repository>
        <id>com.e-iceblue</id>
        <name>e-iceblue</name>
        <url> https://repo.e-iceblue.com/nexus/content/groups/public/</url>
    </repository>
</repositories>
<dependencies>
    <dependency>
        <groupId>e-iceblue</groupId>
        <artifactId>spire.pdf</artifactId>
        <version>10.4.4</version>
    </dependency>
</dependencies>PDF ドキュメントのドキュメントレベルの添付ファイルは、PdfDocument.getAttachments() メソッドを使用して取得できます。以下の手順は、添付ファイルを抽出してローカルフォルダに保存する方法を示しています。
import com.spire.pdf.PdfDocument;
import com.spire.pdf.attachments.PdfAttachmentCollection;

import java.io.*;

public class ExtractAttachments {

    public static void main(String[] args) throws Exception {

        // PdfDocumentオブジェクトを作成します
        PdfDocument doc = new PdfDocument();

        // 添付ファイルを含むPDFファイルをロードします
        doc.loadFromFile("サンプル.pdf");

        // PDFドキュメントの添付ファイルコレクションを取得します
        PdfAttachmentCollection attachments = doc.getAttachments();

        // コレクションをループします
        for (int i = 0; i < attachments.getCount(); i++) {

            // 出力ファイルのパスと名前を指定します
            File file = new File("output/添付ファイル/" + attachments.get(i).getFileName());
            OutputStream output = new FileOutputStream(file);
            BufferedOutputStream bufferedOutput = new BufferedOutputStream(output);

            // 特定の添付ファイルを取得してファイルに書き込みます
            bufferedOutput.write(attachments.get(i).getData());
            bufferedOutput.close();
        }
    }
}
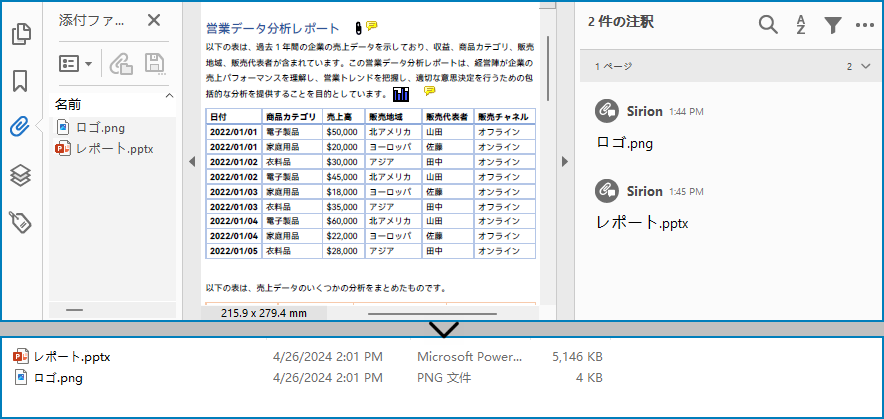
注釈添付ファイルはページベースの要素です。特定のページから注釈を取得するには、PdfPageBase.getAnnotationsWidget() メソッドを使用します。その後、特定の注釈が注釈添付ファイルかどうかを判断する必要があります。以下の手順は、ドキュメント全体から注釈添付ファイルを抽出してローカルフォルダに保存する方法です。
import com.spire.pdf.PdfDocument;
import com.spire.pdf.annotations.PdfAnnotationCollection;
import com.spire.pdf.annotations.PdfAttachmentAnnotationWidget;

import java.io.*;

public class ExtractAnnotationAttachments {

    public static void main(String[] args) throws Exception {

        // PdfDocumentオブジェクトを作成します
        PdfDocument doc = new PdfDocument();

        // 添付ファイルを含むPDFファイルをロードします
        doc.loadFromFile("サンプル1.pdf");

        // ページをループします
        for (int i = 0; i < doc.getPages().getCount(); i++) {

            // 注釈コレクションを取得します
            PdfAnnotationCollection collection = doc.getPages().get(i).getAnnotationsWidget();

            // 注釈をループします
            for (Object annotation : collection) {

                // 注釈がPdfAttachmentAnnotationWidgetのインスタンスかどうかを判別します
                if (annotation instanceof PdfAttachmentAnnotationWidget) {

                    // ドキュメントから注釈の添付ファイルを保存します
                    String fullPath = ((PdfAttachmentAnnotationWidget) annotation).getFileName();
                    String fileName = fullPath.substring(fullPath.lastIndexOf("/") + 1);
                    File file = new File("output/注釈添付ファイル/" + fileName);
                    OutputStream output = new FileOutputStream(file);
                    BufferedOutputStream bufferedOutput = new BufferedOutputStream(output);
                    bufferedOutput.write(((PdfAttachmentAnnotationWidget) annotation).getData());
                    bufferedOutput.close();
                }
            }
        }
    }
}
結果ドキュメントから評価メッセージを削除したい場合、または機能制限を取り除く場合は、についてこのメールアドレスはスパムボットから保護されています。閲覧するにはJavaScriptを有効にする必要があります。にお問い合わせ、30 日間有効な一時ライセンスを取得してください。
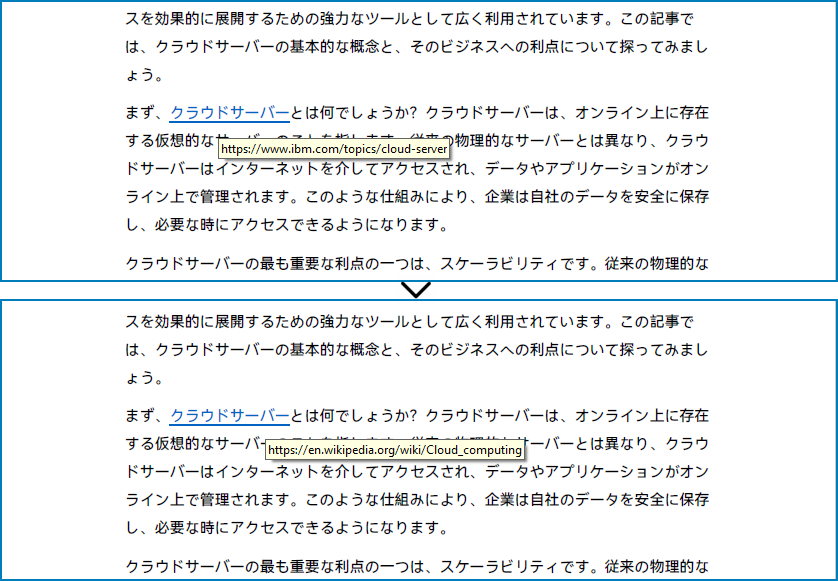
PDF ドキュメント内のハイパーリンクは、便利なナビゲーションや外部リソースへのアクセスを提供します。ただし、ドキュメントの整合性を保つためにこれらのハイパーリンクを削除または更新する必要がある場合があります。この記事では、Spire.PDF for Java を使用して PDF 内のハイパーリンクを効率的に更新または削除する方法について説明します。
まず、Spire. PDF for Java を Java プロジェクトに追加する必要があります。JAR ファイルは、このリンクからダウンロードできます。Maven を使用する場合は、次のコードをプロジェクトの pom.xml ファイルに追加する必要があります。
<repositories>
    <repository>
        <id>com.e-iceblue</id>
        <name>e-iceblue</name>
        <url> https://repo.e-iceblue.com/nexus/content/groups/public/</url>
    </repository>
</repositories>
<dependencies>
    <dependency>
        <groupId>e-iceblue</groupId>
        <artifactId>spire.pdf</artifactId>
        <version>10.4.4</version>
    </dependency>
</dependencies>Spire.PDF for Java では、PdfUriAnnotationWidget.setUri() メソッドを使用して URL をリセットするのに役立ちます。以下に詳細な手順を示します。
import com.spire.pdf.PdfDocument;
import com.spire.pdf.PdfPageBase;
import com.spire.pdf.annotations.PdfAnnotationCollection;
import com.spire.pdf.annotations.PdfUriAnnotationWidget;

public class UpdateHyperlinks {
    public static void main(String[] args) throws Exception {

        // PdfDocumentオブジェクトを作成します
        PdfDocument document = new PdfDocument();

        // サンプルのPDFファイルを読み込みます
        document.loadFromFile("サンプル.pdf");

        // 最初のページを取得します
        PdfPageBase page = document.getPages().get(0);

        // 注釈コレクションを取得します
        PdfAnnotationCollection widgetCollection = page.getAnnotationsWidget();

        // 最初のURL注釈ウィジェットを取得します
        PdfUriAnnotationWidget uriWidget = (PdfUriAnnotationWidget) widgetCollection.get(0);

        // URLをリセットします
        uriWidget.setUri("https://en.wikipedia.org/wiki/Cloud_computing");

        // ファイルに保存します
        document.saveToFile("output/PDFハイパーリンクの更新.pdf");
        document.close();
    }
}
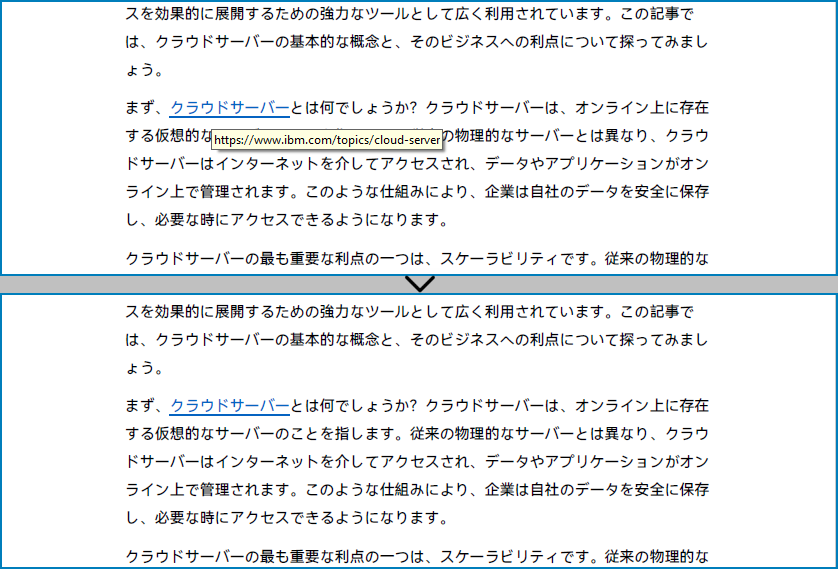
また、Spire.PDF for Java では、PdfAnnotationCollection.removeAt() メソッドも提供されており、ユーザーはハイパーリンクを削除することができます。このメソッドを使用してハイパーリンクを削除すると、ハイパーリンクの視覚的な外観は変わらず、ただしリンク自体は削除されます。以下に PDF 内のハイパーリンクを削除する方法の手順を示します。
import com.spire.pdf.PdfDocument;
import com.spire.pdf.PdfPageBase;
import com.spire.pdf.annotations.PdfAnnotationCollection;

public class RemoveHyperlinks {
    public static void main(String[] args) throws Exception {

        // PdfDocumentオブジェクトを作成します
        PdfDocument document = new PdfDocument();

        // サンプルのPDFファイルを読み込みます
        document.loadFromFile("サンプル.pdf");

        // 最初のページを取得します
        PdfPageBase page = document.getPages().get(0);

        // 注釈コレクションを取得します
        PdfAnnotationCollection widgetCollection = page.getAnnotationsWidget();

        // ドキュメント内の2番目の注釈(ハイパーリンク)を削除します
        widgetCollection.removeAt(0);

        // ファイルに保存します
        document.saveToFile("output/PDFハイパーリンクの削除.pdf");
        document.close();
    }
}
結果ドキュメントから評価メッセージを削除したい場合、または機能制限を取り除く場合は、についてこのメールアドレスはスパムボットから保護されています。閲覧するにはJavaScriptを有効にする必要があります。にお問い合わせ、30 日間有効な一時ライセンスを取得してください。
PDF 文書内のテキストを検索して強調表示することは、多くの個人や組織にとって非常に重要な作業です。研究を行う学生であれ、契約書をレビューする専門家であれ、デジタル記録を整理するアーキビストであれ、特定の情報を素早く見つけて強調する能力は非常に貴重です。
この記事では、Spire.PDF for Java ライブラリを使用して、Java で PDF 文書内のテキストを検索して強調表示する方法を説明します。
まず、Spire. PDF for Java を Java プロジェクトに追加する必要があります。JAR ファイルは、このリンクからダウンロードできます。Maven を使用する場合は、次のコードをプロジェクトの pom.xml ファイルに追加する必要があります。
<repositories>
    <repository>
        <id>com.e-iceblue</id>
        <name>e-iceblue</name>
        <url> https://repo.e-iceblue.com/nexus/content/groups/public/</url>
    </repository>
</repositories>
<dependencies>
    <dependency>
        <groupId>e-iceblue</groupId>
        <artifactId>spire.pdf</artifactId>
        <version>10.4.4</version>
    </dependency>
</dependencies>Spire.PDF for Java では、PdfTextFinder クラスを使用してページ内の特定のテキストを検索することができます。検索操作を実行する前に、PdfTextFinder.getOptions.setTextFindParameter() メソッドを使用して、WholeWord や IgnoreCase などの検索オプションを設定できます。テキストが見つかったら、ハイライトを適用してテキストを視覚的に区別することができます。
以下は、Java を使用して PDF 内の特定のページでテキストを検索し、強調表示する手順です。
import com.spire.ms.System.Collections.Generic.List;
import com.spire.pdf.FileFormat;
import com.spire.pdf.PdfDocument;
import com.spire.pdf.PdfPageBase;
import com.spire.pdf.texts.PdfTextFinder;
import com.spire.pdf.texts.PdfTextFragment;
import com.spire.pdf.texts.TextFindParameter;
import java.awt.*;
import java.util.EnumSet;
public class FindAndHighlightTextInPage {
public static void main(String[] args) {
// PdfDocumentオブジェクトを作成する
PdfDocument doc = new PdfDocument();
// PDFファイルを読み込む
doc.loadFromFile("サンプル.pdf");
// 特定のページを取得する
PdfPageBase page = doc.getPages().get(0);
// ページに基づいてPdfTextFinderオブジェクトを作成する
PdfTextFinder finder = new PdfTextFinder(page);
// 検索オプションを指定する
finder.getOptions().setTextFindParameter(EnumSet.of(TextFindParameter.WholeWord));
finder.getOptions().setTextFindParameter(EnumSet.of(TextFindParameter.IgnoreCase));
// 指定したテキストのインスタンスを検索する
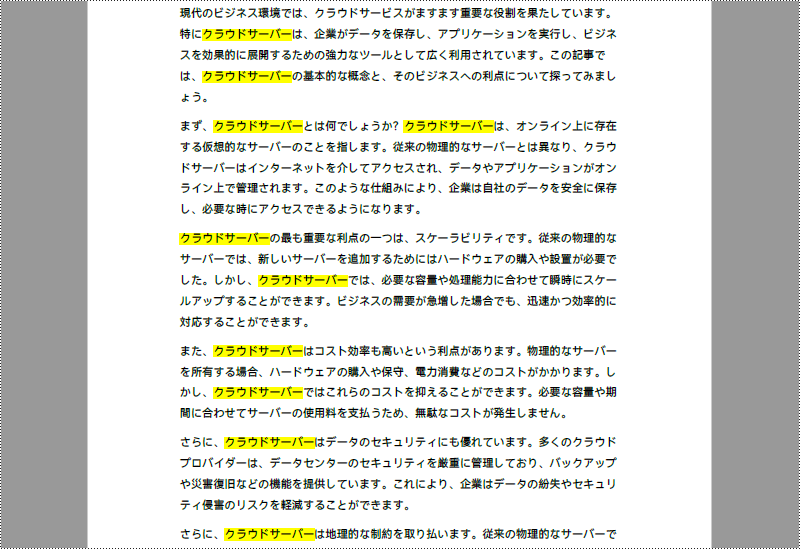
List results = finder.find("クラウドサーバー");
// 検索結果を反復処理する
for (int i = 0; i < results.size(); i++)
{
// Get a finding result
PdfTextFragment fragment = (PdfTextFragment)results.get(i);
// Highlight the text
fragment.highLight();
}
// 別のPDFファイルに保存する
doc.saveToFile("output/PDFページ内のテキストをハイライト.pdf", FileFormat.PDF);
doc.dispose();
}
}
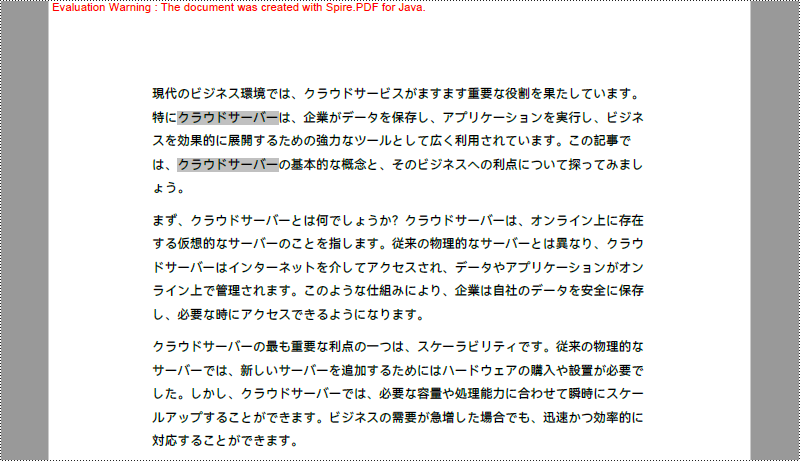
ドキュメント内の特定のセクションや情報に注目させるために、ユーザはページ内の矩形領域内で指定されたテキストを見つけて強調表示することができます。こ の矩形領域は、PdfTextFinder.getOptions().setFindArea() メソッドを用いて定義することができます。
以下は、Java を使用して PDF ページの矩形領域内のテキストを検索して強調表示する手順です。
import com.spire.ms.System.Collections.Generic.List;
import com.spire.pdf.FileFormat;
import com.spire.pdf.PdfDocument;
import com.spire.pdf.PdfPageBase;
import com.spire.pdf.texts.PdfTextFinder;
import com.spire.pdf.texts.PdfTextFragment;
import com.spire.pdf.texts.TextFindParameter;

import java.awt.*;
import java.awt.geom.Rectangle2D;
import java.util.EnumSet;

public class FindAndHighlightTextInRectangle {

    public static void main(String[] args) {

        // PdfDocumentオブジェクトを作成します
        PdfDocument doc = new PdfDocument();

        // PDFファイルをロードします
        doc.loadFromFile("サンプル.pdf");

        // 特定のページを取得します
        PdfPageBase page = doc.getPages().get(0);

        // ページに基づいてPdfTextFinderオブジェクトを作成します
        PdfTextFinder finder = new PdfTextFinder(page);

        // テキストを検索するための長方形の領域を指定します
        finder.getOptions().setFindArea(new Rectangle2D.Float(0,0,841,180));

        // その他のオプションを指定します
        finder.getOptions().setTextFindParameter(EnumSet.of(TextFindParameter.WholeWord));
        finder.getOptions().setTextFindParameter(EnumSet.of(TextFindParameter.IgnoreCase));

        // 指定したテキストのインスタンスを長方形の領域内で検索します
        List results  = finder.find("クラウドサーバー");

        // 検索結果を反復処理します
        for (int i = 0; i < results.size(); i++) {
            // テキストのインスタンスを取得します
            PdfTextFragment fragment = (PdfTextFragment)results.get(i);
            // テキストをハイライト表示します
            fragment.highLight(Color.lightGray);
        }

        // 別のPDFファイルに保存します
        doc.saveToFile("output/矩形領域内のPDFテキストをハイライト.pdf", FileFormat.PDF);

        // リソースを解放します
        doc.dispose();
    }
}
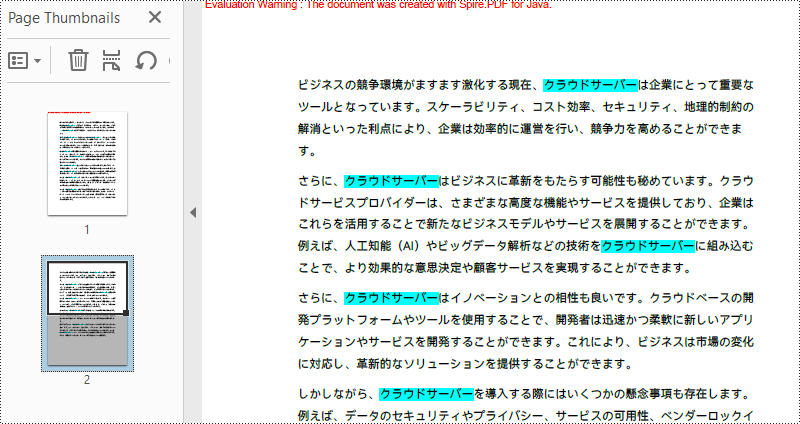
最初のコード例では、特定のページのテキストを強調表示する方法を示します。文書全体のテキストを強調表示するには、文書の各ページを走査して検索操作を実行し、特定されたテキストに強調表示を適用します。
Java を使って PDF 文書全体のテキストを検索し、強調表示する手順は以下のとおりです。
import com.spire.ms.System.Collections.Generic.List;
import com.spire.pdf.FileFormat;
import com.spire.pdf.PdfDocument;
import com.spire.pdf.PdfPageBase;
import com.spire.pdf.texts.PdfTextFinder;
import com.spire.pdf.texts.PdfTextFragment;
import com.spire.pdf.texts.TextFindParameter;

import java.awt.*;
import java.util.EnumSet;

public class FindAndHighlightTextInDocument {

    public static void main(String[] args) {

        // PdfDocumentオブジェクトを作成します
        PdfDocument doc = new PdfDocument();

        // PDFファイルをロードします
        doc.loadFromFile("サンプル.pdf");

        // PDFファイル内のページを反復処理します
        for (Object pageObj : doc.getPages()) {

            // 特定のページを取得します
            PdfPageBase page = (PdfPageBase) pageObj;

            // ページに基づいてPdfTextFinderオブジェクトを作成します
            PdfTextFinder finder = new PdfTextFinder(page);

            // 検索オプションを指定します
            finder.getOptions().setTextFindParameter(EnumSet.of(TextFindParameter.WholeWord));
            finder.getOptions().setTextFindParameter(EnumSet.of(TextFindParameter.IgnoreCase));

            // 指定したテキストのインスタンスを検索します
            List results  = finder.find("クラウドサーバー");

            // 検索結果を反復処理します
            for (int i = 0; i < results.size(); i++) {
                // テキストのインスタンスを取得します
                PdfTextFragment fragment = (PdfTextFragment) results.get(i);
                // テキストのインスタンスを強調表示します
                fragment.highLight(Color.cyan);
            }
        }

        // 別のPDFファイルに保存します
        doc.saveToFile("output/PDF文書のテキストをハイライト.pdf", FileFormat.PDF);
        // リソースを解放します
        doc.dispose();
    }
}
ドキュメント内の特定のテキストを探す場合、正規表現を使用すると検索条件の柔軟性と制御性が向上します。正規表現を利用するには、TextFindParameter を Regex として設定 し 、find() メソッドへの入力として希望の正規表現パターンを与える必要があります。
以下は、Java を使用して正規表現を使って PDF 内のテキストを検索し、強調表示する手順です。
import com.spire.ms.System.Collections.Generic.List;
import com.spire.pdf.FileFormat;
import com.spire.pdf.PdfDocument;
import com.spire.pdf.PdfPageBase;
import com.spire.pdf.texts.PdfTextFinder;
import com.spire.pdf.texts.PdfTextFragment;
import com.spire.pdf.texts.TextFindParameter;
import java.awt.*;
import java.util.EnumSet;
public class FindAndHighlightTextUsingRegex {
public static void main(String[] args) {
// PdfDocumentオブジェクトを作成します
PdfDocument doc = new PdfDocument();
// PDFファイルをロードします
doc.loadFromFile("サンプル.pdf");
// PDFファイル内のページを反復処理します
for (Object pageObj : doc.getPages()) {
// 特定のページを取得します
PdfPageBase page = (PdfPageBase) pageObj;
// ページに基づいてPdfTextFinderオブジェクトを作成します
PdfTextFinder finder = new PdfTextFinder(page);
// 検索モデルを正規表現に指定します
finder.getOptions().setTextFindParameter(EnumSet.of(TextFindParameter.Regex));
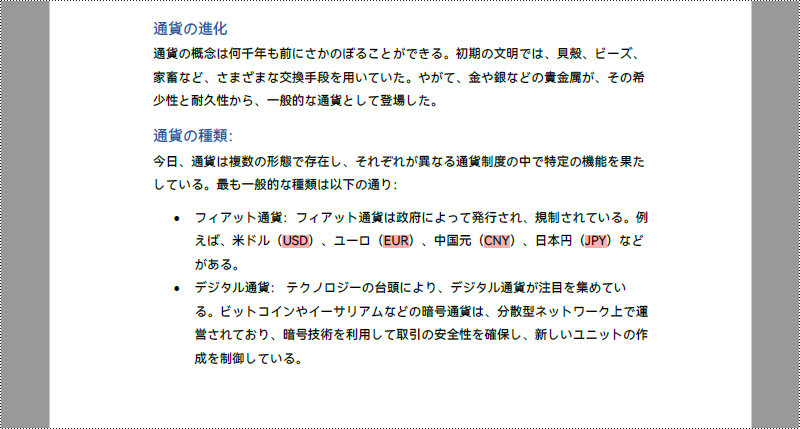
// 連続する3つの大文字にマッチする正規表現を指定します
String pattern = "[A-Z]{3}";
// 正規表現に一致するテキストを検索します
List results = finder.find(pattern);
// 検索結果を反復処理します
for (int i = 0; i < results.size(); i++) {
// テキストを取得します
PdfTextFragment fragment = (PdfTextFragment) results.get(i);
// テキストをハイライト表示します
fragment.highLight(Color.PINK);
}
}
// 別のPDFファイルに保存します
doc.saveToFile("output/正規表現でPDFテキストをハイライト.pdf", FileFormat.PDF);
// リソースを解放します
doc.dispose();
}
}
結果ドキュメントから評価メッセージを削除したい場合、または機能制限を取り除く場合は、についてこのメールアドレスはスパムボットから保護されています。閲覧するにはJavaScriptを有効にする必要があります。にお問い合わせ、30 日間有効な一時ライセンスを取得してください。
PDF 文書にヘッダーを追加することは、文書のタイトル、作成者、ページ番号などの重要な情報を表示する便利な方法です。ヘッダーは、文書の各ページの上部に表示されるテキストまたはグラフィックのセクションで、必要に応じてカスタマイズできます。この機能は、レポートや契約書など、一貫した書式が求められる専門的な文書を作成する際に特に役立ちます。この記事では、Spire.PDF for Java を使用して、Java で既存の PDF ドキュメントにヘッダーを追加する方法を説明します。
まず、Spire.PDF for Java を Java プロジェクトに追加する必要があります。JAR ファイルは、このリンクからダウンロードできます。Maven を使用する場合は、次のコードをプロジェクトの pom.xml ファイルに追加する必要があります。
<repositories>
    <repository>
        <id>com.e-iceblue</id>
        <name>e-iceblue</name>
        <url>https://repo.e-iceblue.com/nexus/content/groups/public/</url>
    </repository>
</repositories>
<dependencies>
    <dependency>
        <groupId>e-iceblue</groupId>
        <artifactId>spire.pdf</artifactId>
        <version>8.11.0</version>
    </dependency>
</dependencies>Spire.PDF for Java によって既存の PDF ドキュメントが操作されると、座標系の原点はページの左上隅に配置され、x軸は右に、y軸は下に延びています。ページにヘッダーを追加するとは、テキスト、画像、自動フィールド、形状などのコンテンツを、ページの上部の空白領域の指定された場所に追加することを意味します。
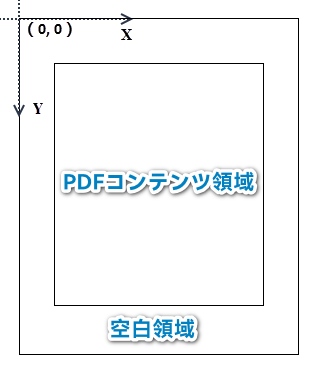
空白領域が追加したいコンテンツを収容するのに十分でない場合は、PDF ページの余白を増やすことができます。
Spire.PDF for Java では、PdfCanvas.drawString() メソッド、PdfCanvas.drawImage() メソッド、PdfCanvas.drawLine() メソッドやその他の類似メソッドを使用して、PDF ページ上にテキストや画像、図形を描画することができます。ヘッダーにページ番号、セクション、日付などの動的な情報を追加するには、自動フィールドに頼る必要があります。Spire.PDF for Java は、PdfPageNumberField クラス、PdfSectionNumberField クラス、PdfCreationDateField クラスなどを提供し、これらのデータの動的な追加を実現します。
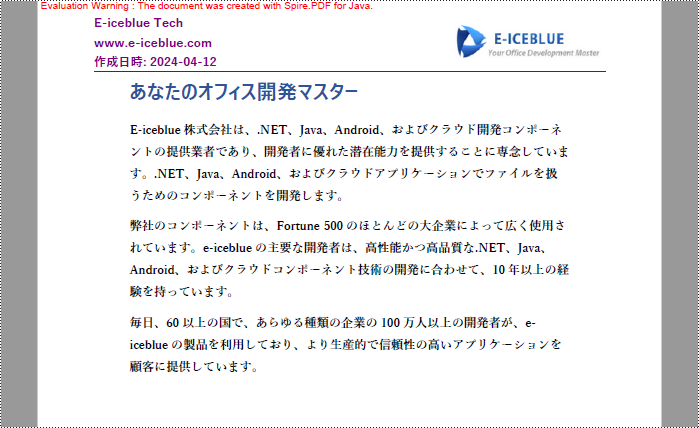
以下は、Spire.PDF for Java を使用して、テキスト、画像、日付、行からなるヘッダーを PDF 文書に追加する手順です。
import com.spire.pdf.PdfDocument;
import com.spire.pdf.PdfPageBase;
import com.spire.pdf.automaticfields.PdfCompositeField;
import com.spire.pdf.automaticfields.PdfCreationDateField;
import com.spire.pdf.graphics.*;

import java.awt.*;

public class AddHeaderToPdf {

    public static void main(String[] args) {

        //PdfDocumentオブジェクトを作成します
        PdfDocument doc = new PdfDocument();

        //PDFファイルをロードします
        doc.loadFromFile("サンプル.pdf");

        //ヘッダー用の画像をロードします
        PdfImage headerImage = PdfImage.fromFile("Logo.png");

        //画像の幅をピクセル単位で取得します
        float width = headerImage.getWidth();

        //ピクセルをポイントに変換します
        PdfUnitConvertor unitCvtr = new PdfUnitConvertor();
        float pointWidth = unitCvtr.convertUnits(width, PdfGraphicsUnit.Pixel, PdfGraphicsUnit.Point);

        //ヘッダーのテキストを指定します
        String headerText = "E-iceblue Tech\nwww.e-iceblue.com";

        //TrueTypeフォントを作成します
        PdfTrueTypeFont font = new PdfTrueTypeFont(new Font("Yu Gothic", Font.BOLD, 12),true);

        //ブラシを作成します
        PdfBrush brush = PdfBrushes.getPurple();

        //ペンを作成します
        PdfPen pen = new PdfPen(brush, 1.0f);

        //作成日時フィールドを作成します
        PdfCreationDateField creationDateField = new PdfCreationDateField(font, brush);
        creationDateField.setDateFormatString("yyyy-MM-dd");

        //静的な文字列と日付フィールドを組み合わせるための複合フィールドを作成します
        PdfCompositeField compositeField = new PdfCompositeField(font, brush, "作成日時: {0}", creationDateField);
        compositeField.setLocation(new Point(55, 48));

        //ドキュメント内のページをループします
        for (int i = 0; i < doc.getPages().getCount(); i++)
        {
            //特定のページを取得します
            PdfPageBase page = doc.getPages().get(i);

            //画像を上部の空白領域に描画します
            page.getCanvas().drawImage(headerImage, page.getActualSize().getWidth() - pointWidth - 55, 20);

            //テキストを上部の空白領域に描画します
            page.getCanvas().drawString(headerText, font, brush, 55, 10);

            //上部の空白領域に線を描画します
            page.getCanvas().drawLine(pen, new Point(55, 70), new Point((int)page.getActualSize().getWidth() - 55, 70));

            //複合フィールドを上部の空白領域に描画します
            compositeField.draw(page.getCanvas());
        }

        //ファイルに保存します
        doc.saveToFile("output/PDFにヘッダーを挿入.pdf");
        doc.dispose();
    }
}
結果ドキュメントから評価メッセージを削除したい場合、または機能制限を取り除く場合は、についてこのメールアドレスはスパムボットから保護されています。閲覧するにはJavaScriptを有効にする必要があります。にお問い合わせ、30 日間有効な一時ライセンスを取得してください。
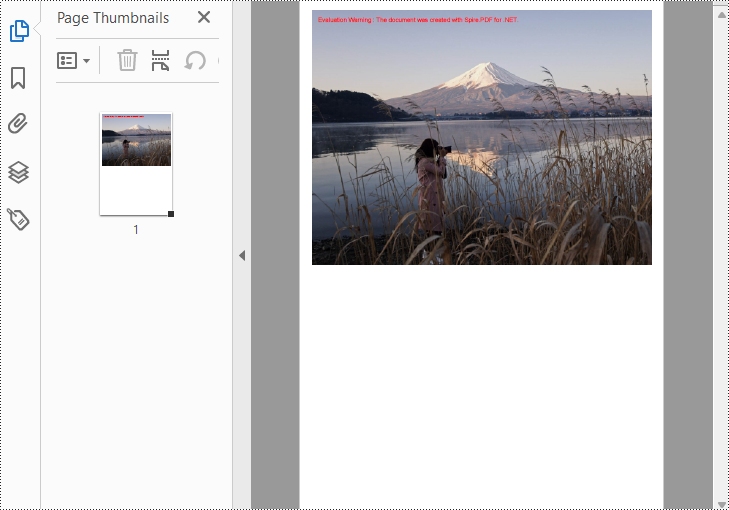
画像は、さまざまなデバイスで簡単に共有できるデバイスフレンドリーなファイル形式です。しかし、状況によっては、画像の代わりに PDF のようなより専門的なフォーマットが必要になります。この記事では、C# と VB.NET で Spire.PDF for .NET を使って画像を PDF に変換する方法を説明します。
Spire.PDF は、画像を PDF に変換する簡単な方法を提供していません。しかし、新しい PDF ドキュメントを作成し、特定のページの指定された位置に画像を描画することはできます。画像と同じページサイズで PDF を生成するかどうかによって、このトピックは以下の2つのサブトピックに分けることができます。
まず、Spire.PDF for .NET パッケージに含まれている DLL ファイルを .NET プロジェクトの参照として追加する必要があります。DLL ファイルは、このリンクからダウンロードするか、NuGet を介してインストールできます。
PM> Install-Package Spire.PDF以下は、Spire.PDF for .NET を使用して、新しい PDF ドキュメントの一部として画像を追加する手順です。
using System.Drawing;
using Spire.Pdf;
using Spire.Pdf.Graphics;

namespace AddImageToPdf
{
    class Program
    {
        static void Main(string[] args)
        {
            // PdfDocumentオブジェクトを作成します
            PdfDocument pdf = new PdfDocument();

            // 余白を設定します
            pdf.PageSettings.SetMargins(20);

            // ページを追加します
            PdfPageBase page = pdf.Pages.Add();

            // 画像を読み込みます
            Image image = Image.FromFile("サンプル.jpg");

            // 画像の幅と高さを取得します
            float width = image.PhysicalDimension.Width;
            float height = image.PhysicalDimension.Height;

            // PdfImage変数を宣言します
            PdfImage pdfImage;

            // もし画像の幅がページの幅よりも大きい場合
            if (width > page.Canvas.ClientSize.Width)
            {
                // 画像をページの幅に合わせてリサイズします
                float widthFitRate = width / page.Canvas.ClientSize.Width;
                Size size = new Size((int)(width / widthFitRate), (int)(height / widthFitRate));
                Bitmap scaledImage = new Bitmap(image, size);

                // リサイズした画像をPdfImageオブジェクトに読み込みます
                pdfImage = PdfImage.FromImage(scaledImage);
            }
            else
            {
                // オリジナルの画像をPdfImageオブジェクトに読み込みます
                pdfImage = PdfImage.FromImage(image);
            }

            // 画像を(0, 0)に描画します
            page.Canvas.DrawImage(pdfImage, 0, 0, pdfImage.Width, pdfImage.Height);

            // ファイルに保存します
            pdf.SaveToFile("画像をPDFに変換.pdf");
            pdf.Close();
        }
    }
}
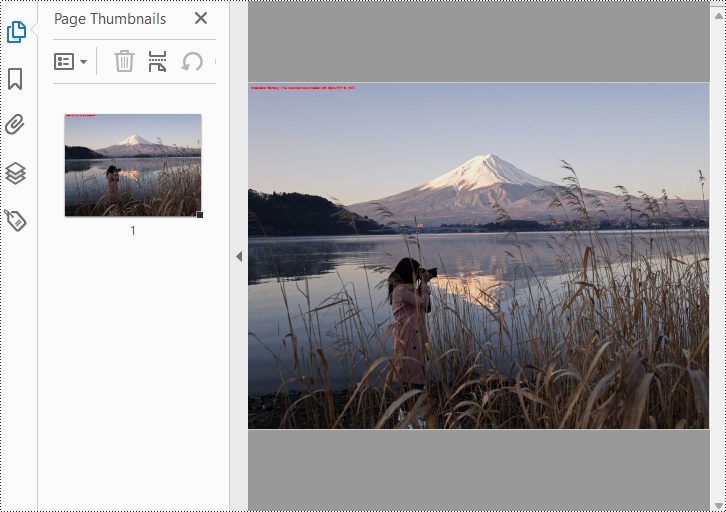
以下は、Spire.PDF for .NET を使用して、画像を画像と同じページ幅と高さで PDF に変換する手順です。
using System.Drawing;
using Spire.Pdf;
using Spire.Pdf.Graphics;

namespace ConvertImageToPdfWithSameSize
{
    class Program
    {
        static void Main(string[] args)
        {
            // PdfDocument オブジェクトを作成します
            PdfDocument doc = new PdfDocument();

            // 余白を0に設定します
            doc.PageSettings.SetMargins(0);

            // 画像を読み込みます
            Image image = Image.FromFile("サンプル.jpg");

            // 画像の幅と高さを取得します
            float width = image.PhysicalDimension.Width;
            float height = image.PhysicalDimension.Height;

            // 画像と同じサイズのページを追加します
            PdfPageBase page = doc.Pages.Add(new SizeF(width, height));

            // 画像を基に PdfImage オブジェクトを作成します
            PdfImage pdfImage = PdfImage.FromImage(image);

            // ページの (0, 0) に画像を描画します
            page.Canvas.DrawImage(pdfImage, 0, 0, pdfImage.Width, pdfImage.Height);

            // ファイルに保存します
            doc.SaveToFile("画像をPDFに変換.pdf");
        }
    }
}
結果ドキュメントから評価メッセージを削除したい場合、または機能制限を取り除く場合は、についてこのメールアドレスはスパムボットから保護されています。閲覧するにはJavaScriptを有効にする必要があります。にお問い合わせ、30 日間有効な一時ライセンスを取得してください。