チュートリアル
簡単にライブラリーを使用するためのチュートリアルコレクション

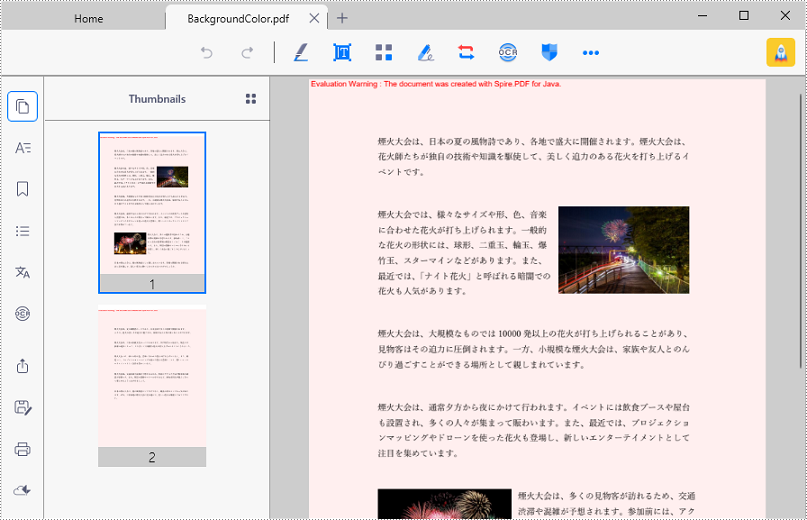
適切な背景を使用することで、PDF 文書内の異なるコンテンツ要素がより一致し、PDF 文書の視覚的印象や読みやすさが向上します。さらに、異なる使用シナリオに応じて PDF 文書に異なる背景を追加することで、文書の専門性も高めることができます。この記事では、Spire.PDF for Java を使用して PDF ドキュメントの背景色と背景画像を設定する方法を紹介します。
まず、Spire.PDF for Java を Java プロジェクトに追加する必要があります。JAR ファイルは、このリンクからダウンロードできます。Maven を使用する場合は、次のコードをプロジェクトの pom.xml ファイルに追加する必要があります。
<repositories>
    <repository>
        <id>com.e-iceblue</id>
        <name>e-iceblue</name>
        <url>https://repo.e-iceblue.com/nexus/content/groups/public/</url>
    </repository>
</repositories>
<dependencies>
    <dependency>
        <groupId>e-iceblue</groupId>
        <artifactId>spire.pdf</artifactId>
        <version>9.6.2</version>
    </dependency>
</dependencies>PDF の背景を設定するには、各ページを処理する必要があります。PDF 内のすべてのページをループし、PdfPageBase.setBackgroundColor() メソッドを使用して各ページの背景色を設定することができます。以下が詳細な手順です。
import com.spire.pdf.PdfDocument;
import com.spire.pdf.PdfPageBase;

import java.awt.*;

public class SetPDFBackgroundColor {
    public static void main(String[] args) {

        //PdfDocumentのオブジェクトを作成する
        PdfDocument pdf = new PdfDocument();

        //PDFファイルをロードする
        pdf.loadFromFile("sample.pdf");

        //PDFのページをループする
        for(int i = pdf.getPages().getCount()-1; i>=0; i--)
        {
            PdfPageBase page = pdf.getPages().get(i);

            //ページの背景色を設定する
            page.setBackgroundColor(Color.PINK);

            //背景の透明度を設定する
            page.setBackgroudOpacity(0.2f);
        }

        //PDFファイルを保存する
        pdf.saveToFile("BackgroundColor.pdf");
        pdf.dispose();
    }
}
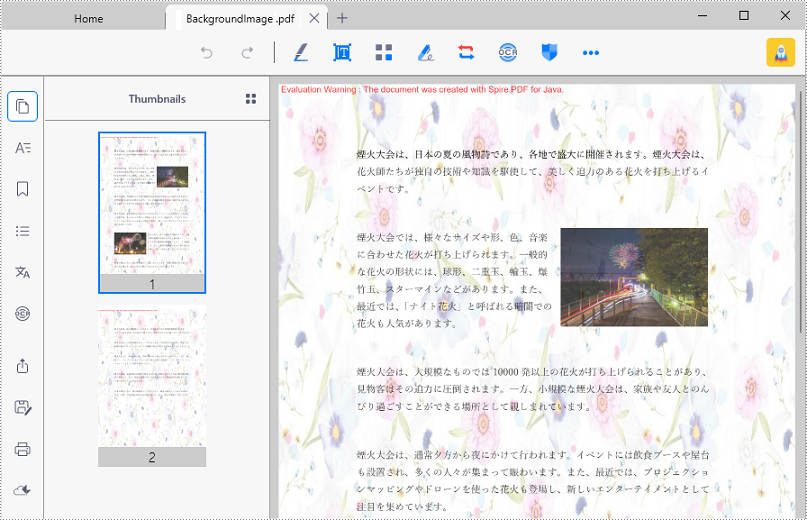
Spire.PDF for Java は、PdfPageBase.setBackgroundImage() メソッドを提供し、PDF ページに背景画像を設定することができます。PDF 文書に背景画像を追加するための詳細な手順は以下の通りです。
import com.spire.pdf.PdfDocument;
import com.spire.pdf.PdfPageBase;

import javax.imageio.ImageIO;
import java.awt.image.BufferedImage;
import java.io.File;
import java.io.IOException;

public class SetPDFBackgroundColor {
    public static void main(String[] args) throws IOException {

        //PdfDocumentのオブジェクトを作成する
        PdfDocument pdf = new PdfDocument();

        //PDFファイルをロードする
        pdf.loadFromFile("sample.pdf");

        //画像をロードする
        BufferedImage background = ImageIO.read(new File("background.jpg"));

        //PDFのページをループする
        for(int i = pdf.getPages().getCount()-1; i>=0; i--)
        {
            PdfPageBase page = pdf.getPages().get(i);

            //ロードされた画像をページの背景画像に設定する
            page.setBackgroundImage(background);

            //背景の透明度を設定する
            page.setBackgroudOpacity(0.4f);
        }

        //PDFファイルを保存する
        pdf.saveToFile("BackgroundImage.pdf);
        pdf.dispose();
    }
}
結果ドキュメントから評価メッセージを削除したい場合、または機能制限を取り除く場合は、についてこのメールアドレスはスパムボットから保護されています。閲覧するにはJavaScriptを有効にする必要があります。にお問い合わせ、30 日間有効な一時ライセンスを取得してください。
Spire.Presentation for Java 8.6.2を発表できることをうれしく思います。このバージョンは、ポリゴンの頂点数と位置を取得する機能をサポートしています。また、画像を追加したときに3 D回転効果を設定しても効果がないなど、既知の問題も修正されました。詳細は以下の内容を読んでください。
| カテゴリー | ID | 説明 |
| New feature | SPIREPPT-2152 | ポリゴンの頂点数と位置を取得する機能をサポートしています。
Presentation ppt = new Presentation();
ppt.loadFromFile(inputFile);
IAutoShape shape = (IAutoShape)ppt.getSlides().get(0).getShapes().get(0);
ArrayList<Point2D> points = shape.getPoints();
String text1 = "point count:" + " " + points.size() + "\r\n";
FileWriter writer1 = new FileWriter(outputFile, true);
writer1.append(text1);
writer1.close();
for (int i = 0; i < points.size(); i++)
{
    String text2 = "point" + i + " " + points.get(i) + "\r\n";
    FileWriter writer2 = new FileWriter(outputFile, true);
    writer2.append(text2);
    writer2.close();
} |
| Bug | SPIREPPT-2262 | 画像を追加したときに3 D回転効果を設定しても効果がない問題が修正されました。 |
| Bug | SPIREPPT-2263 | PPTファイルをロードするときに、アプリケーションが「CRC error:the file being extracted appears to be corrupted」をスローする問題が修正されました。 |
| Bug | SPIREPPT-2276 | 画像の組織図に画像を追加する順序が正しくなかった問題が修正されました。 |
| Bug | SPIREPPT-2277 | 保存されたPPTファイルがWPSツールでデータを編集すると、通貨記号が多くなる問題が修正されました。 |
Word ドキュメントのページ番号は、ページの順序とページ数を示すために各ページに付けられます。ページ番号によって、ドキュメント作成者は文書の内容を管理しやすくなり、ユーザーはドキュメント内の特定の内容をすばやく見つけることができるため、閲覧速度と閲覧体験が向上します。この記事では、Spire.Doc for Java を使って Word ドキュメントにページ番号を追加する方法を紹介します。
まず、Spire. Doc for Java を Java プロジェクトに追加する必要があります。JAR ファイルは、このリンクからダウンロードできます。Maven を使用する場合は、次のコードをプロジェクトの pom.xml ファイルに追加する必要があります。
<repositories>
    <repository>
        <id>com.e-iceblue</id>
        <name>e-iceblue</name>
        <url> https://repo.e-iceblue.com/nexus/content/groups/public/</url>
    </repository>
</repositories>
<dependencies>
    <dependency>
        <groupId>e-iceblue</groupId>
        <artifactId>spire.doc</artifactId>
        <version>11.6.0</version>
    </dependency>
</dependencies>
Word ドキュメントのページ番号は、特定のタイプのフィールドを使用して表示されます。例えば、Page フィールドは現在のページのページ番号を表示し、NumPages フィールドはドキュメント内の総ページ数を表示し、SectionPages フィールドはセクション内の総ページ数を表示します。
Spire.Doc for Java には、Paragraph.appendField(String fieldName, FieldType fieldType) メソッドがあり、Page フィールド (FieldType.Field_Page)、NumPages フィールド (FieldType.Field_Num_Pages)、SectionPages フィールド (FieldType.Field_Section_Pages) など、さまざまなタイプのフィールドをWord文書に追加できます。
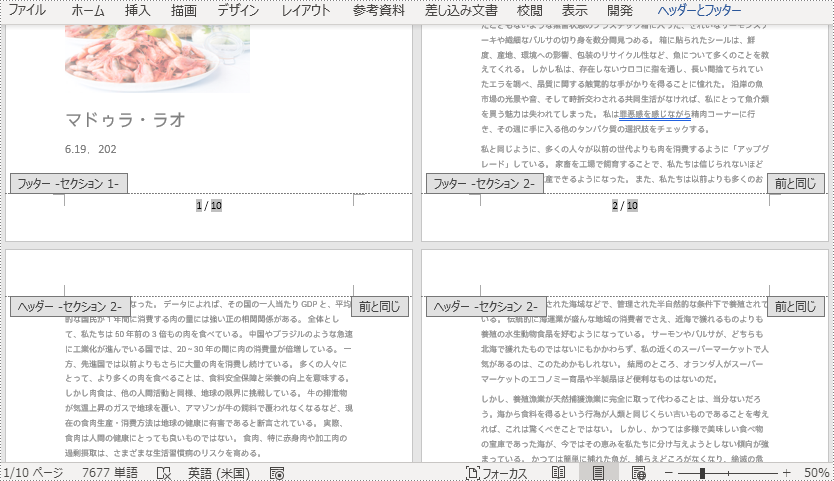
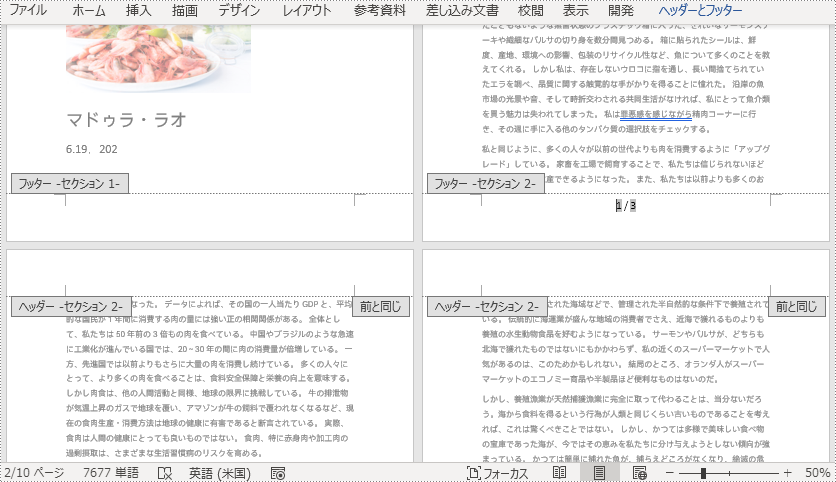
以下の手順では、Spire.Doc for Java を使用して、Word ドキュメントのフッターに Page フィールドと NumPages フィールドを追加し、現在のページ番号とドキュメント内の総ページ数を表示する方法を説明します。
import com.spire.doc.Document;
import com.spire.doc.FieldType;
import com.spire.doc.HeaderFooter;
import com.spire.doc.Section;
import com.spire.doc.documents.HorizontalAlignment;
import com.spire.doc.documents.Paragraph;

public class addPageNumbersWholeDocument {
    public static void main(String[] args) {

        //Documentのオブジェクトを作成する
        Document document = new Document();

        //Wordドキュメントを読み込む
        document.loadFromFile("サンプル.docx");

        //ドキュメントの最初のセクションを取得する
        Section section = document.getSections().get(0);

        //最初のセクションのフッターを取得する
        HeaderFooter footer = section.getHeadersFooters().getFooter();

        //フッターにPageフィールドとNumPagesフィールドを追加し、ページ番号フォーマットを設定する
        Paragraph footerParagraph = footer.addParagraph();
        footerParagraph.appendField("ページ番号", FieldType.Field_Page);
        footerParagraph.appendText(" / ");
        footerParagraph.appendField("ページ数", FieldType.Field_Num_Pages);
        footerParagraph.getFormat().setHorizontalAlignment(HorizontalAlignment.Center);
        footerParagraph.getStyle().getCharacterFormat().setFontSize(16);

        //ドキュメントを保存する
        document.saveToFile("ドキュメントのページ番号.docx");
    }
}
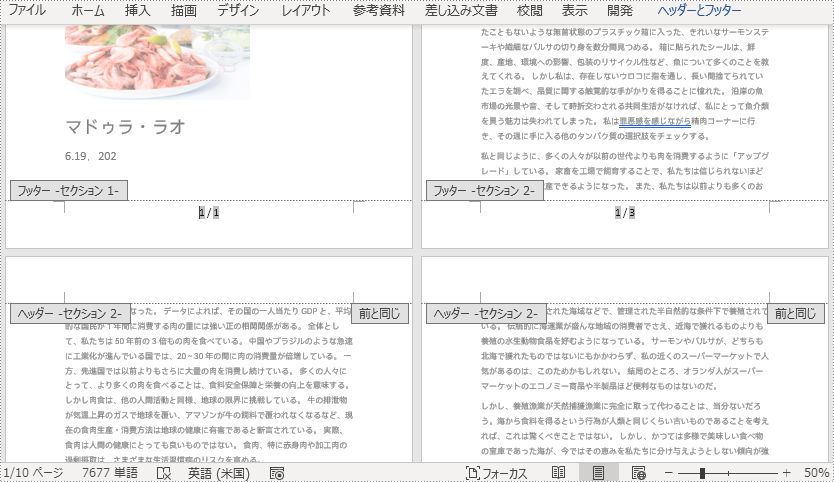
ページ番号の再配置を行うと、前のセクションのページ番号から続けるのではなく、各セクションの特定の番号からページ番号を開始することができます。
Word ドキュメントの各セクションでページ番号付けを再配置するには、ドキュメント内のすべてのセクションをループし、各セクションに Page フィールドと SectionPages フィールドを追加する必要があります。そして、Section.getPageSetup().setRestartPageNumbering(true) メソッドを使用してページ番号付けの再配置を有効にし、Section.getPageSetup().setPageStartingNumber(int value) メソッドを使用して各セクションの開始ページ番号を設定します。
import com.spire.doc.Document;
import com.spire.doc.FieldType;
import com.spire.doc.HeaderFooter;
import com.spire.doc.documents.HorizontalAlignment;
import com.spire.doc.documents.Paragraph;

public class addPageNumbersEachSection {
    public static void main(String[] args) {

        //Documentのオブジェクトを作成する
        Document document = new Document();

        //Wordドキュメントを読み込む
        document.loadFromFile("サンプル.docx");

        //ドキュメントのセクション数を取得する
        int s = document.getSections().getCount();

        //ドキュメントのセクションをループする
        for (int i = 0; i < s; i++) {

            //フッターにPageとSectionPagesフィールドを追加し、ページ番号の書式を設定する
            HeaderFooter footer = document.getSections().get(i).getHeadersFooters().getFooter();
            Paragraph footerParagraph = footer.addParagraph();
            footerParagraph.appendField("ページ番号", FieldType.Field_Page);
            footerParagraph.appendText(" / ");
            footerParagraph.appendField("ページ数", FieldType.Field_Section_Pages);
            footerParagraph.getFormat().setHorizontalAlignment(HorizontalAlignment.Center);
            footerParagraph.getStyle().getCharacterFormat().setFontSize(16);

            //ページ番号の開始ページを再設定し、開始ページ番号を設定する
            if (i == s-1)
                break;
            else {
                document.getSections().get(i + 1).getPageSetup().setRestartPageNumbering(true);
                document.getSections().get(i + 1).getPageSetup().setPageStartingNumber(1);
            }
        }

        //ドキュメントを保存する
        document.saveToFile("各セクションのページ番号.docx");
        document.dispose();
    }
}
デフォルトでは、セクションのフッターにページ番号を挿入すると、後続のセクションは自動的に前のセクションにリンクし、ページ番号を表示し続けます。特定のセクションだけにページ番号を追加したい場合は、後続のセクションと前のセクションのリンクを解除し、後続のセクションのフッターの内容を削除する必要があります。詳しい手順は以下の通りです。
import com.spire.doc.Document;
import com.spire.doc.FieldType;
import com.spire.doc.HeaderFooter;
import com.spire.doc.Section;
import com.spire.doc.documents.HorizontalAlignment;
import com.spire.doc.documents.Paragraph;

public class addPageNumbersSpecificSection {
    public static void main(String[] args) {

        //Documentのオブジェクトを作成する
        Document document = new Document();

        //Wordドキュメントを読み込む
        document.loadFromFile("サンプル.docx");

        //ドキュメントの2番目のセクションを取得する
        Section section = document.getSections().get(1);

        //2番目のセクションのフッターを取得する
        HeaderFooter footer = section.getHeadersFooters().getFooter();

        //2番目のセクションからページを再配置し、開始ページ番号を1に設定する
        section.getPageSetup().setRestartPageNumbering(true);
        section.getPageSetup().setPageStartingNumber(1);

        //フッターにPageフィールドとSectionPagesフィールドを追加し、ページ番号の書式を設定する
        Paragraph footerParagraph = footer.addParagraph();
        footerParagraph.appendField("ページ番号", FieldType.Field_Page);
        footerParagraph.appendText(" / ");
        footerParagraph.appendField("ページ数", FieldType.Field_Section_Pages);
        footerParagraph.getFormat().setHorizontalAlignment(HorizontalAlignment.Center);
        footerParagraph.getStyle().getCharacterFormat().setFontSize(16);

        //後続のセクションと2番目のセクションのリンクを解除し、後続のセクションのフッターの内容を削除する
        document.getSections().get(2).getHeadersFooters().getFooter().setLinkToPrevious(false);
        for (int i = 2; i < document.getSections().getCount(); i++) {
            document.getSections().get(i).getHeadersFooters().getFooter().getChildObjects().clear();
            document.getSections().get(i).getHeadersFooters().getFooter().addParagraph();
        }

        //ドキュメントを保存する
        document.saveToFile("特定のセクションのページ番号.docx");
    }
}
結果ドキュメントから評価メッセージを削除したい場合、または機能制限を取り除く場合は、についてこのメールアドレスはスパムボットから保護されています。閲覧するにはJavaScriptを有効にする必要があります。にお問い合わせ、30 日間有効な一時ライセンスを取得してください。
Excel ワークシートは多くの機能を備えた表計算であり、その中でも数式と関数は間違いなく最も重要な機能の一つである。数式と関数を使用することで、ユーザーはデータに対して幅広い計算、統計、論理演算を実行することができ、意味のある分析結論を迅速かつ正確に導き出すことができます。この記事では、Spire.XLS for .NET を使用して Excel ワークシートに数式と関数を追加する方法を説明します。
まず、Spire.XLS for.NET パッケージに含まれている DLL ファイルを.NETプロジェクトの参照として追加する必要があります。DLL ファイルは、このリンクからダウンロードするか、NuGet を介してインストールできます。
PM> Install-Package Spire.XLSSpire.XLS for .NET が提供する Worksheet.Range[int row, int column].Formula プロパティを使用すると、Excel ワークシートの指定したセルに数式や関数を追加することができます。 Excel のワークシートに数式や関数を追加する主な手順は以下の通りです:
using Spire.Xls;
using System;

namespace InsertFormulasAndFunctions
{
    internal class Program
    {
        static void Main(string[] args)
        {
            //Workbookのオブジェクトを作成する
            Workbook workbook = new Workbook();

            //最初のワークシートを取得する
            Worksheet worksheet = workbook.Worksheets[0];

            //currentRowとcurrentFormulaの2つの変数を宣言する
            int currentRow = 1;
            String currentFormula = null;

            //列の幅を設定する
            worksheet.SetColumnWidth(1, 32);
            worksheet.SetColumnWidth(2, 16);

            //セルにコンテンツを書き込む
            worksheet.Range[currentRow, 1].Value = "試験データ";
            worksheet.Range[currentRow, 2].NumberValue = 1;
            worksheet.Range[currentRow, 3].NumberValue = 2;
            worksheet.Range[currentRow, 4].NumberValue = 3;
            worksheet.Range[currentRow, 5].NumberValue = 4;
            worksheet.Range[currentRow, 6].NumberValue = 5;
            currentRow += 2;
            worksheet.Range[currentRow, 1].Value = "数式または関数";
            worksheet.Range[currentRow, 2].Value = "結果";

            //セルの書式を設定する
            CellRange range = worksheet.Range[currentRow, 1, currentRow, 2];
            range.Style.Font.FontName = "Yu Gothic UI";
            range.Style.KnownColor = ExcelColors.LightGreen;
            range.Style.FillPattern = ExcelPatternType.Solid;
            range.Style.Borders[BordersLineType.EdgeBottom].LineStyle = LineStyleType.Medium;
            range.Style.Font.IsBold = true;

            //算術計算
            currentFormula = "=1/2+3*4";
            worksheet.Range[++currentRow, 1].Text = "'" + currentFormula;
            worksheet.Range[++currentRow, 2].Formula = currentFormula;

            //日付関数
            currentFormula = "=TODAY()";
            worksheet.Range[++currentRow, 1].Text = "'" + currentFormula;
            worksheet.Range[currentRow, 2].Formula = currentFormula;
            worksheet.Range[currentRow, 2].Style.NumberFormat = "YYYY/MM/DD";

            //三角関数
            currentFormula = "=SIN(PI()/6)";
            worksheet.Range[++currentRow, 1].Text = "'" + currentFormula;
            worksheet.Range[currentRow, 2].Formula = currentFormula;

            //平均関数
            currentFormula = "=AVERAGE(B1:F1)";
            worksheet.Range[++currentRow, 1].Text = "'" + currentFormula;
            worksheet.Range[currentRow, 2].Formula = currentFormula;

            //合計関数
            currentFormula = "=SUM(B1:F1)";
            worksheet.Range[++currentRow, 1].Text = "'" + currentFormula;
            worksheet.Range[currentRow, 2].Formula = currentFormula;

            //ワークブックを保存する
            workbook.SaveToFile("数式と関数の追加.xlsx", FileFormat.Version2013);
        }
    }
}
Imports Spire.Xls
Imports System
Namespace InsertFormulasAndFunctions
Friend Class Program
Shared Sub Main(ByVal args() As String)
'Workbookのオブジェクトを作成する
Dim workbook As Workbook = New Workbook()
'最初のワークシートを取得する
Dim worksheet As Worksheet = workbook.Worksheets(0)
'currentRowとcurrentFormulaの2つの変数を宣言する
Dim currentRow As Integer = 1
Dim currentFormula As String = Nothing
'列の幅を設定する
worksheet.SetColumnWidth(1, 32)
worksheet.SetColumnWidth(2, 16)
'セルにコンテンツを書き込む
worksheet.Range(currentRow, 1).Value = "試験データ"
worksheet.Range(currentRow, 2).NumberValue = 1
worksheet.Range(currentRow, 3).NumberValue = 2
worksheet.Range(currentRow, 4).NumberValue = 3
worksheet.Range(currentRow, 5).NumberValue = 4
worksheet.Range(currentRow, 6).NumberValue = 5
currentRow += 2
worksheet.Range(currentRow, 1).Value = "数式または関数"
worksheet.Range(currentRow, 2).Value = "結果"
'セルの書式を設定する
Dim range As CellRange = worksheet.Range(currentRow, 1, currentRow, 2)
range.Style.Font.FontName = "Yu Gothic UI"
range.Style.KnownColor = ExcelColors.LightGreen
range.Style.FillPattern = ExcelPatternType.Solid
range.Style.Borders(BordersLineType.EdgeBottom).LineStyle = LineStyleType.Medium
range.Style.Font.IsBold = True
'算術計算
currentFormula = "=1/2+3*4""'" + currentFormulacurrentFormula
'日付関数
currentFormula = "=TODAY()""'" + currentFormula
worksheet.Range(currentRow, 2).Formula = currentFormula
worksheet.Range(currentRow, 2).Style.NumberFormat = "YYYY/MM/DD"
'三角関数
currentFormula = "=SIN(PI()/6)""'" + currentFormula
worksheet.Range(currentRow, 2).Formula = currentFormula
'平均関数
currentFormula = "=AVERAGE(B1:F1)""'" + currentFormula
worksheet.Range(currentRow, 2).Formula = currentFormula
'合計関数
currentFormula = "=SUM(B1:F1)""'" + currentFormula
worksheet.Range(currentRow, 2).Formula = currentFormula
'ワークブックを保存する
workbook.SaveToFile("数式と関数の追加.xlsx", FileFormat.Version2013)
End Sub
End Class
End Namespace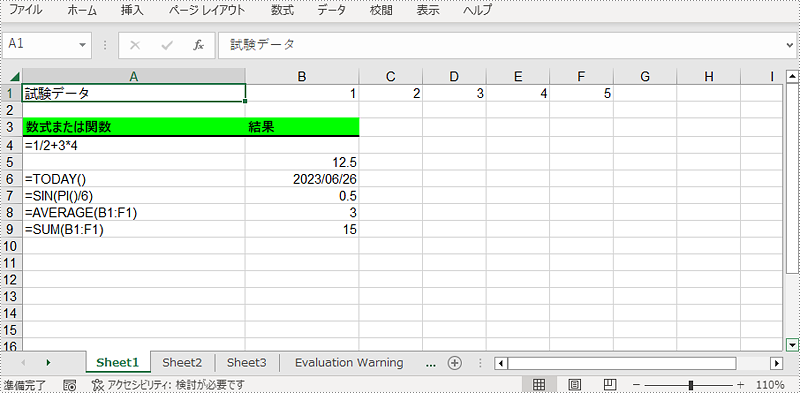
結果ドキュメントから評価メッセージを削除したい場合、または機能制限を取り除く場合は、についてこのメールアドレスはスパムボットから保護されています。閲覧するにはJavaScriptを有効にする必要があります。にお問い合わせ、30 日間有効な一時ライセンスを取得してください。
Spire.Office 8.6.0のリリースを発表できることを嬉しく思います。このバージョンでは、Spire.Doc for C++、Spire.XLS for C++、Spire.Presentation for C++、およびSpire.PDF for C++が修正されています。同じプロジェクトで2つ以上のC++製品を同時に使用し、文書をストリームで処理すると、ライセンスファイルを適用した後にプログラムが例外をスローする問題が修正されました。詳細は以下の内容を読んでください。
Spire.Doc for C++、Spire.XLS for C++、Spire.Presentation for C++、および Spire.PDF for C++ では、同じプロジェクトで2つ以上のC++製品を同時に使用し、文書をストリームで処理すると、ライセンスファイルを適用した後にプログラムが例外をスローする問題が修正されました。
セルの結合と分割は、Microsoft Excel の2つの重要な機能で、より整理された、視覚的に魅力的なスプレッドシートを作成することができます。セルの結合は、隣接するセルを結合して、複数の列や行にまたがる1つのセルを作成することができます。この機能は、表のヘッダー、タイトル、ラベルを作成したり、データをより簡潔な形式にまとめたりする際に特に便利です。
一方、セルの分割は、結合されたセルを複数のセルに分割する処理です。この機能は、結合されたセル内のデータを分割する場合や、異なる書式やスタイルをセルに適用する必要がある場合に使用できます。
この記事では、Spire.XLS for C++ を使用して C++ で Excel のセルを結合または分割する方法について説明します。
Spire.XLS for C++ をアプリケーションに組み込むには、2つの方法があります。一つは NuGet 経由でインストールする方法、もう一つは当社のウェブサイトからパッケージをダウンロードし、ライブラリをプログラムにコピーする方法です。NuGet 経由のインストールの方が便利で、より推奨されます。詳しくは、以下のリンクからご覧いただけます。
Spire.XLS for C++ を C++ アプリケーションに統合する方法
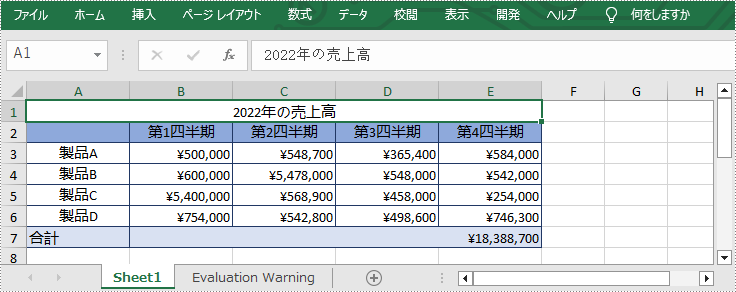
Spire.XLS for C++ が提供する IXLSRange->Merge() メソッドを使用して、特定の範囲のセルを結合することができます。詳細な手順は次のとおりです。
#include "Spire.Xls.o.h";

using namespace Spire::Xls;
using namespace std;


int main()
{
	//入出力ファイルパスを指定する
	wstring inputFile = L"Template.xlsx";
	wstring outputFile = L"MergeCells.xlsx";

	//Workbook のインスタンスを初期化する
	intrusive_ptr<Workbook> workbook = new Workbook();

	//Excel ファイルを読み込む
	workbook->LoadFromFile(inputFile.c_str());

	//最初のワークシートを取得する
	intrusive_ptr<Worksheet> sheet = dynamic_pointer_cast<Worksheet>(workbook->GetWorksheets()->Get(0));

	//特定の範囲を結合する
	intrusive_ptr<IXLSRange> range = sheet->GetRange(L"A1:E1");
	range->Merge();

	//セルのテキストを中央揃えに設定する
	range->GetStyle()->SetHorizontalAlignment(HorizontalAlignType::Center);

	//結果文書を保存する
	workbook->SaveToFile(outputFile.c_str(), ExcelVersion::Version2013);
	workbook->Dispose();
}
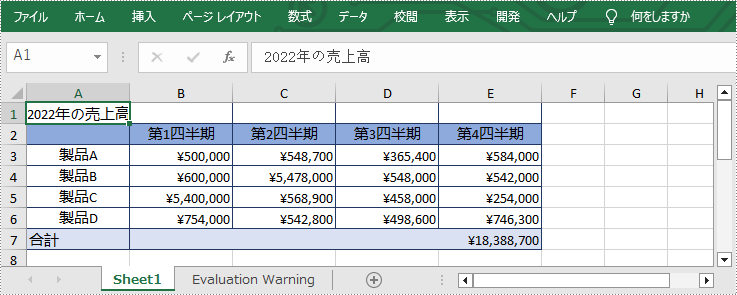
結合されたセルを分割するには、IXLSRange->UnMerge() メソッドを使用してください。詳細な手順は次のとおりです。
#include "Spire.Xls.o.h";

using namespace Spire::Xls;
using namespace std;

int main()
{
	//入出力ファイルパスを指定する
	wstring inputFile = L"MergeCells.xlsx";
	wstring outputFile = L"UnmergeCells.xlsx";

	//Workbook のインスタンスを初期化する
	intrusive_ptr<Workbook> workbook = new Workbook();

	//Excel ファイルを読み込む
	workbook->LoadFromFile(inputFile.c_str());

	//最初のワークシートを取得する
	intrusive_ptr<Worksheet> sheet = dynamic_pointer_cast<Worksheet>(workbook->GetWorksheets()->Get(0));

	//セルを分割する
	intrusive_ptr<IXLSRange> range = sheet->GetRange(L"A1");
	range->UnMerge();

	//結果文書を保存する
	workbook->SaveToFile(outputFile.c_str(), ExcelVersion::Version2013);
	workbook->Dispose();
}
Spire.XLS for C++ には、特定のワークシート内のすべての結合されたセルを取得できる Worksheet->GetMergedCells() メソッドが用意されています。次に、IXLSRange->UnMerge() メソッドを使用してセルを分割できます。詳細な手順は次のとおりです。
#include "Spire.Xls.o.h";

using namespace Spire::Xls;
using namespace std;

int main()
{
	//入出力ファイルパスを指定する
	wstring inputFile = L"Template.xlsx";
	wstring outputFile = L"UnmergeAllCells.xlsx";

	//Workbook のインスタンスを初期化する
	intrusive_ptr<Workbook> workbook = new Workbook();

	//Excel ファイルを読み込む
	workbook->LoadFromFile(inputFile.c_str());

	//最初のワークシートを取得する
	intrusive_ptr<Worksheet> sheet = dynamic_pointer_cast<Worksheet>(workbook->GetWorksheets()->Get(0));

	//そのシート内の結合されたセルを取得する
	intrusive_ptr<Spire::Common::IList<XlsRange>> range = sheet->GetMergedCells();

	//すべての結合されたセルをループする
	for (int i = 0; i < range->GetCount(); i++)
	{
		intrusive_ptr<XlsRange> cell = range->GetItem(i);
		//各セルを分割する
		cell->UnMerge();
	}

	//結果文書を保存する
	workbook->SaveToFile(outputFile.c_str(), ExcelVersion::Version2013);
	workbook->Dispose();
}
結果ドキュメントから評価メッセージを削除したい場合、または機能制限を取り除く場合は、についてこのメールアドレスはスパムボットから保護されています。閲覧するにはJavaScriptを有効にする必要があります。にお問い合わせ、30 日間有効な一時ライセンスを取得してください。
Spire.XLS for Java 13.6.5のリリースを発表できることを嬉しく思います。このバージョンでは、ExcelからPDFへの変換機能が強化されました。また、透かしを追加した後にグラフの横軸が変更されたなど、既知の問題も修正されました。詳細は以下をお読みください。
| カテゴリー | ID | 説明 |
| Bug | SPIREXLS-4691 | 透かしを追加した後にグラフの横軸が変更された問題が修正されました。 |
| Bug | SPIREXLS-4692 SPIREXLS-4735 |
「et」形式の文書を新しい文書として保存した後に内容が変更された問題が修正されました。 |
| Bug | SPIREXLS-4713 | ExcelをPDFに変換した後に内容が変更された問題が修正されました。 |
| Bug | SPIREXLS-4730 | ExcelをPDFに変換する際にアプリケーションが「Culture ID:14345 is not a supported culture」をスローした問題が修正されました。 |
| Bug | SPIREXLS-4732 | 透かしを追加した後に、文書がWPSとMicrosoft Excelで異なる表示される問題を修正しました。 |
| Bug | SPIREXLS-4739 | 文書をロードして新しい文書として保存した後に、画像が失われていた問題が修正されました。 |
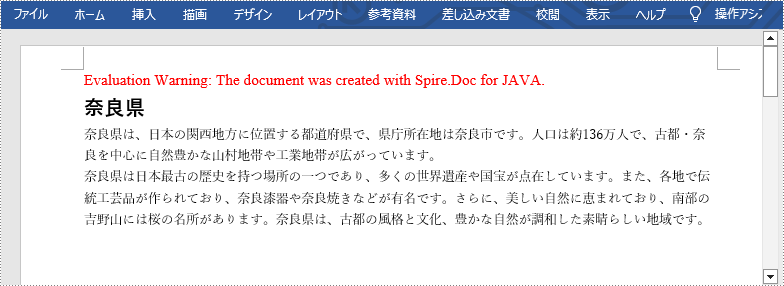
正式な文書を作成する場合、適切なフォントの選択は極めて重要です。複数のフォントを1つの文書内で使用することにより、見出しや本文、注釈など、異なる種類のコンテンツを区別することができ、文書全体の読みやすさを向上させることができます。また、異なるフォントには独自の感情的なトーンやスタイルがあります。例えば、手書き風のフォントは暖かみや親密さを表現し、セリフ体のフォントは伝統的で形式的な場面で適しています。Microsoft Word には幅広いフォント機能が用意されていますが、フォントをプログラムで設定する必要がある場合もあります。この記事では、Spire.Doc for Java を使用して Word でフォントを設定する方法を示します。
まず、Spire.Doc for Java を Java プロジェクトに追加する必要があります。JAR ファイルは、このリンクからダウンロードできます。Maven を使用する場合は、次のコードをプロジェクトの pom.xml ファイルに追加する必要があります。
<repositories>
    <repository>
        <id>com.e-iceblue</id>
        <name>e-iceblue</name>
        <url>https://repo.e-iceblue.com/nexus/content/groups/public/</url>
    </repository>
</repositories>
<dependencies>
    <dependency>
        <groupId>e-iceblue</groupId>
        <artifactId>spire.doc</artifactId>
        <version>11.6.0</version>
    </dependency>
</dependencies>
Word 文書内の異なる段落に異なるフォントを設定する場合は、複数の段落スタイルを作成し、各段落スタイルに異なるフォントを設定することができます。その後、これらの段落スタイルを特定の段落に適用します。詳細な手順は以下の通りです。
import com.spire.doc.*;
import com.spire.doc.documents.Paragraph;
import com.spire.doc.documents.ParagraphStyle;


public class SetFont {
    public static void main(String[] args){
        //Documentインスタンスを作成する
        Document document = new Document();

        //セクションを追加する
        Section section = document.addSection();

        //3 つの段落を追加して、テキストを段落に追加する
        Paragraph para1 = section.addParagraph();
        para1.appendText("奈良県");

        Paragraph para2 = section.addParagraph();
        para2.appendText("奈良県は、日本の関西地方に位置する都道府県で、県庁所在地は奈良市です。人口は約136万人で、古都・奈良を中心に自然豊かな山村地帯や工業地帯が広がっています。");

        Paragraph para3 = section.addParagraph();
        para3.appendText("奈良県は日本最古の歴史を持つ場所の一つであり、多くの世界遺産や国宝が点在しています。また、各地で伝統工芸品が作られており、奈良漆器や奈良焼きなどが有名です。さらに、美しい自然に恵まれており、南部の吉野山には桜の名所があります。奈良県は、古都の風格と文化、豊かな自然が調和した素晴らしい地域です。");

        //ParagraphStyleインスタンスを作成する
        ParagraphStyle style1 = new ParagraphStyle(document);

        //最初の段落をタイトルとして、そのフォントを設定する
        style1.setName("titleStyle");
        style1.getCharacterFormat().setFontName("Yu Gothic UI Semibold");
        style1.getCharacterFormat().setFontSize(16f);
        document.getStyles().add(style1);
        para1.applyStyle("titleStyle");

        //ParagraphStyleインスタンスを作成する
        ParagraphStyle style2 = new ParagraphStyle(document);

        //他の2つの段落を本文として、そのフォントを設定する
        style2.setName("paraStyle");
        style2.getCharacterFormat().setFontName("Yu Mincho");
        style2.getCharacterFormat().setFontSize(10f);
        document.getStyles().add(style2);
        para2.applyStyle("paraStyle");
        para3.applyStyle("paraStyle");

        //結果文書を保存する
        document.saveToFile("output/setFont.docx", FileFormat.Docx);
        document.dispose();
    }
}
結果ドキュメントから評価メッセージを削除したい場合、または機能制限を取り除く場合は、についてこのメールアドレスはスパムボットから保護されています。閲覧するにはJavaScriptを有効にする必要があります。にお問い合わせ、30 日間有効な一時ライセンスを取得してください。
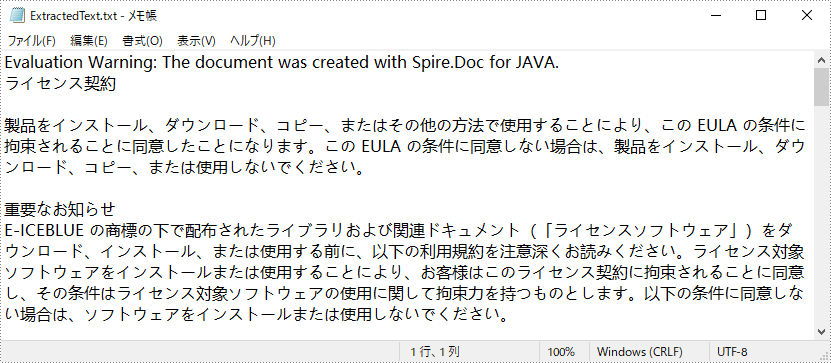
テキストと画像は、Word 文書のコンテンツを豊かにする重要な要素です。文書内のテキストや画像を個別に処理する必要がある場合、プログラムで Word 文書から抽出することができます。テキストを手動でコピーするよりも、テキストを抽出することで大規模な文書をより便利かつ効率的に処理することができます。また、画像を抽出することで文書内の画像を編集したり、他人と簡単に共有することができます。この記事では、Spire.Doc for Java を使用して Word 文書からテキストと画像を抽出する方法を示します。
まず、Spire.Doc for Java を Java プロジェクトに追加する必要があります。JAR ファイルは、このリンクからダウンロードできます。Maven を使用する場合は、次のコードをプロジェクトの pom.xml ファイルに追加する必要があります。
<repositories>
    <repository>
        <id>com.e-iceblue</id>
        <name>e-iceblue</name>
        <url>https://repo.e-iceblue.com/nexus/content/groups/public/</url>
    </repository>
</repositories>
<dependencies>
    <dependency>
        <groupId>e-iceblue</groupId>
        <artifactId>spire.doc</artifactId>
        <version>11.6.0</version>
    </dependency>
</dependencies>Spire.Doc for Java は、Word 文書からテキストを抽出し、txt ファイル形式として保存することをサポートしています。これにより、ユーザーはデバイス制限なしにテキストコンテンツを表示できます。以下は、Word 文書からテキストを抽出するための詳細な手順です。
import com.spire.doc.Document;
import java.io.FileWriter;
import java.io.IOException;

public class ExtractText {

    public static void main(String[] args) throws IOException {

        //Documentオブジェクトを作成してWord文書をロードする
        Document document = new Document();
        document.loadFromFile("sample1.docx");

        //文書から文字列としてテキストを取得する
        String text=document.getText();

        //文字列を.txtファイルに書き込む
        writeStringToTxt(text,"ExtractedText.txt");
    }
    public static void writeStringToTxt(String content, String txtFileName) throws IOException{
        FileWriter fWriter= new FileWriter(txtFileName,true);
        try {
            fWriter.write(content);
        }catch(IOException ex){
            ex.printStackTrace();
        }finally{
            try{
                fWriter.flush();
                fWriter.close();
            } catch (IOException ex) {
                ex.printStackTrace();
            }
        }
    }
}
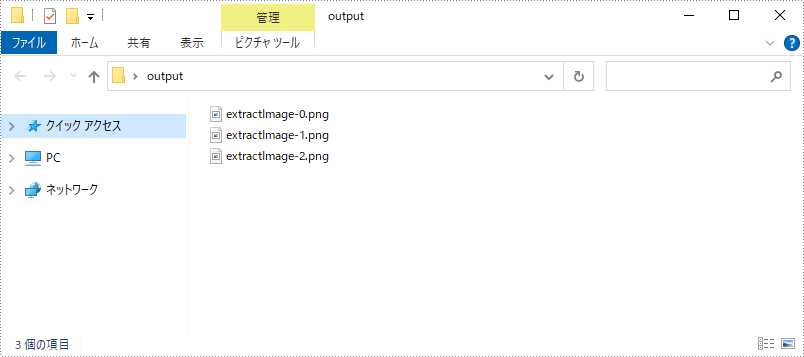
画像を抽出することにより、ユーザーは簡単に他のアプリケーションに画像データをインポートしてさらなる処理ができます。Spire.Doc for Java では、Word 文書から画像を抽出し、指定されたパスに保存することができます。以下は詳細な手順です。
import com.spire.doc.*;
import com.spire.doc.documents.*;
import com.spire.doc.fields.*;
import com.spire.doc.interfaces.*;
import javax.imageio.ImageIO;
import java.awt.image.BufferedImage;
import java.io.*;
import java.util.*;

public class ExtractImage {
    public static void main(String[] args) throws IOException {

        //Documentオブジェクトを作成してWord文書をロードする
        Document document = new Document();
        document.loadFromFile("Sample2.docx");

        //キューを作成し、ルートドキュメントの要素を追加する
        Queue nodes = new LinkedList<>();
        nodes.add(document);

        //抽出された画像を保存するためのArrayListオブジェクトを作成する
        List images = new ArrayList<>();

        //ドキュメントツリーをループする
        while (nodes.size() > 0) {
            ICompositeObject node = nodes.poll();
            for (int i = 0; i < node.getChildObjects().getCount(); i++)
            {
                IDocumentObject child = node.getChildObjects().get(i);
                if (child instanceof ICompositeObject)
                {
                    nodes.add((ICompositeObject) child);
                }
                else if (child.getDocumentObjectType() == DocumentObjectType.Picture)
                {
                    DocPicture picture = (DocPicture) child;
                    images.add(picture.getImage());
                }
            }
        }

        //画像を特定のフォルダに保存する
        for (int i = 0; i < images.size(); i++) {
            File file = new File(String.format("output/extractImage-%d.png", i));
            ImageIO.write(images.get(i), "PNG", file);
        }
    }
} 
結果ドキュメントから評価メッセージを削除したい場合、または機能制限を取り除く場合は、についてこのメールアドレスはスパムボットから保護されています。閲覧するにはJavaScriptを有効にする必要があります。にお問い合わせ、30 日間有効な一時ライセンスを取得してください。
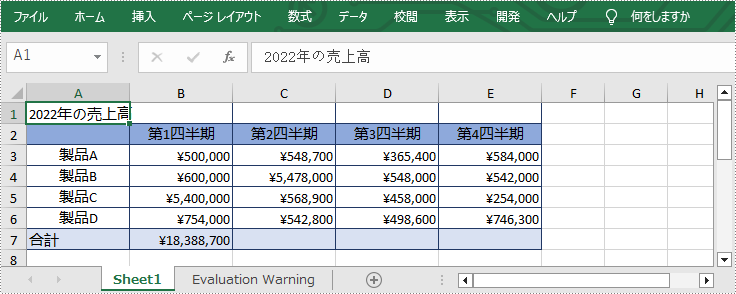
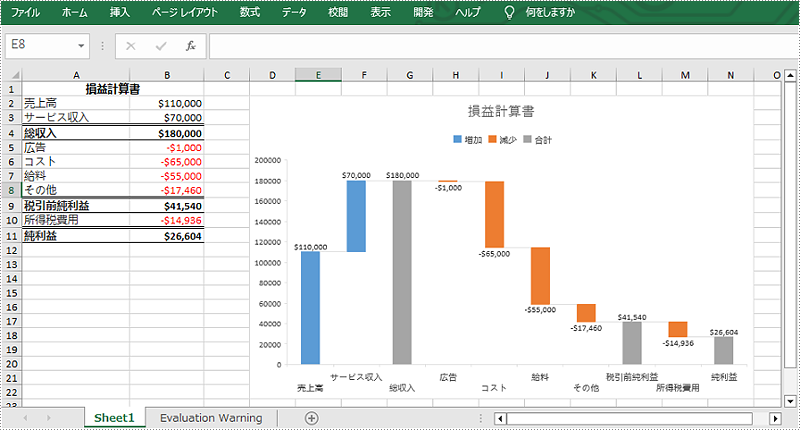
ウォーターフォールグラフ、ブリッジグラフやカスケードグラフとも呼ばれるものは、Excel で最も直感的なグラフの一つです。それは、一定期間におけるデータの積極的な影響と消極的な影響の累積効果を表示することができます。この機能は、損益計算書の可視化、プロジェクトの予算変更の表示、店舗の在庫計算など、定量分析が必要な多くの場面で役立ちます。この記事では、Spire.XLS for Java を使用して Excel でウォーターフォールグラフを作成する方法を紹介します。
まず、Spire.XLS for Java を Java プロジェクトに追加する必要があります。JAR ファイルは、このリンクからダウンロードできます。Maven を使用する場合は、次のコードをプロジェクトの pom.xml ファイルに追加する必要があります。
<repositories>
    <repository>
        <id>com.e-iceblue</id>
        <name>e-iceblue</name>
        <url>https://repo.e-iceblue.com/nexus/content/groups/public/</url>
    </repository>
</repositories>
<dependencies>
    <dependency>
        <groupId>e-iceblue</groupId>
        <artifactId>spire.xls</artifactId>
        <version>13.5.2</version>
    </dependency>
</dependencies>ウォーターフォールグラフはは財務諸表を分析する理想的なツールです。まず、Worksheet.getCharts().add() メソッドを使用して指定されたワークシートにグラフを追加します。次に、Chart.setChartType(ExcelChartType.WaterFall) メソッドを使用してグラフの種類をウォーターフォールに設定します。以下は詳細な手順です。
import com.spire.xls.*;

public class WaterfallChart {
    public static void main(String []args){
        //Workbookインスタンスを作成する
        Workbook workbook=new Workbook();

        //Excel文書を読み込む
        workbook.loadFromFile("sample.xlsx");

        //最初のワークシートを取得する
        Worksheet sheet=workbook.getWorksheets().get(0);

        //シートにウォーターフォールグラフを追加する
        Chart chart=sheet.getCharts().add();
        chart.setChartType(ExcelChartType.WaterFall);

        //グラフのデータ範囲を設定する
        chart.setDataRange(sheet.getRange().get("A2:B11"));

        //グラフの位置を設定する
        chart.setLeftColumn(4);
        chart.setTopRow(2);
        chart.setRightColumn(15);
        chart.setBottomRow(23);

        //グラフのタイトルを設定する
        chart.setChartTitle("損益計算書");

        //グラフの特定のデータポイントを合計または小計に設定する
        chart.getSeries().get(0).getDataPoints().get(2).setAsTotal(true);
        chart.getSeries().get(0).getDataPoints().get(7).setAsTotal(true);
        chart.getSeries().get(0).getDataPoints().get(9).setAsTotal(true);

        //データポイント間の接続線を表示する
        chart.getSeries().get(0).getFormat().showConnectorLines(true);

        //データポイントのデータラベルを表示する
        chart.getSeries().get(0).getDataPoints().getDefaultDataPoint().getDataLabels().hasValue(true);
        chart.getSeries().get(0).getDataPoints().getDefaultDataPoint().getDataLabels().setSize(8);

        //グラフの凡例位置を設定する
        chart.getLegend().setPosition(LegendPositionType.Top);

        //結果文書を保存する
        workbook.saveToFile("WaterfallChart.xlsx",FileFormat.Version2016);
    }
}
結果ドキュメントから評価メッセージを削除したい場合、または機能制限を取り除く場合は、についてこのメールアドレスはスパムボットから保護されています。閲覧するにはJavaScriptを有効にする必要があります。にお問い合わせ、30 日間有効な一時ライセンスを取得してください。