チュートリアル
簡単にライブラリーを使用するためのチュートリアルコレクション

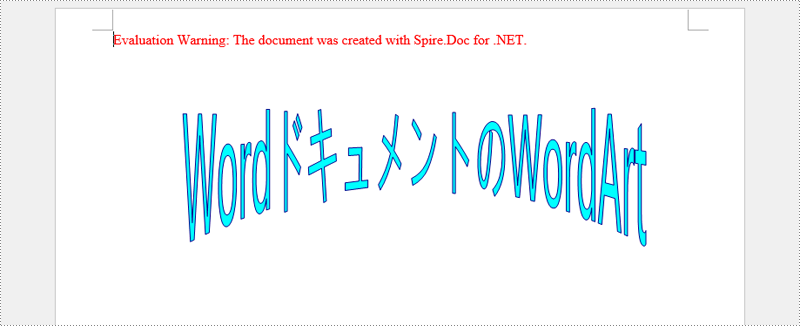
ワードアート(WordArt)は、カラフルでスタイリッシュなテキストを文書に挿入できるワード文書の機能です。さらに、テキストの形状を曲げたり、伸ばしたり、傾けたりすることもでき、特別な効果でテキストを際立たせるための手軽な方法です。この記事では、Spire.Doc for .NET を使用して、プログラムで Word 文書にワードアートを追加する方法を紹介します。
まず、Spire.Doc for .NET パッケージに含まれている DLL ファイルを .NET プロジェクトの参照として追加する必要があります。DLL ファイルは、このリンクからダウンロードするか、NuGet を介してインストールできます。
PM> Install-Package Spire.DocSpire.Doc for .NET が提供する ShapeType 列挙型は、"Text" で始まるさまざまなワードアートの形状タイプを定義しています。Word 文書でワードアートを作成するには、ShapeObject のインスタンスを初期化し、ワードアートの種類とテキスト内容を指定する必要があります。詳しい手順は以下の通りです。
using Spire.Doc;
using Spire.Doc.Documents;
using Spire.Doc.Fields;

namespace CreatWordArt
{
    class Program
    {
        static void Main(string[] args)
        {
            // ドキュメントインスタンスを作成
            Document doc = new Document();

            // セクションを追加
            Section section = doc.AddSection();

            // 段落を追加
            Paragraph paragraph = section.AddParagraph();

            // 段落にシェイプを追加し、シェイプのサイズと種類を指定
            ShapeObject shape = paragraph.AppendShape(400, 150, ShapeType.TextDeflateBottom);

            // シェイプの位置を設定
            shape.VerticalPosition = 60;
            shape.HorizontalPosition = 60;

            // WordArtのテキストを設定
            shape.WordArt.Text = "WordドキュメントのWordArt";

            // WordArtの塗りつぶしの色と輪郭の色を設定
            shape.FillColor = System.Drawing.Color.Cyan;
            shape.StrokeColor = System.Drawing.Color.DarkBlue;

            // ドキュメントを保存
            doc.SaveToFile("output/ワードアートの作成.docx", FileFormat.Docx2013);
            doc.Dispose();
        }
    }
}
結果ドキュメントから評価メッセージを削除したい場合、または機能制限を取り除く場合は、についてこのメールアドレスはスパムボットから保護されています。閲覧するにはJavaScriptを有効にする必要があります。にお問い合わせ、30 日間有効な一時ライセンスを取得してください。
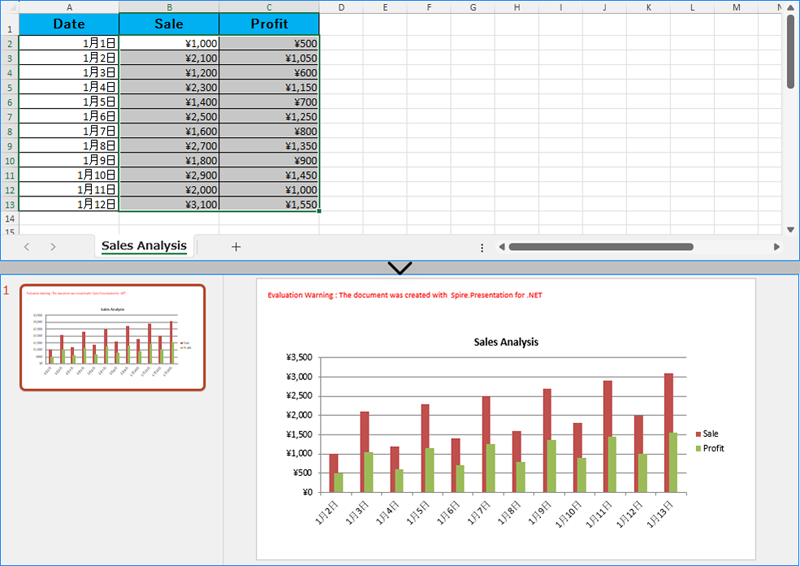
PowerPoint スライドにグラフを作成することは、複雑な情報を視覚的に表現し、聴衆が重要な洞察を理解しやすくするための強力な方法です。Excel データを直接読み取ってグラフを生成することで、データ入力プロセスを効率化し、データの正確性を確保できます。また、Excel ファイルからのチャートを PowerPoint プレゼンテーションに直接画像として挿入することで、元の書式や外観を最大限に活かすことも可能です。本記事では、.NET プログラム内で Spire.Office for .NET を使用して、Excel データから PowerPoint スライドにグラフを作成する方法をご紹介します。
まず、Spire.Office for .NET パッケージに含まれている DLL ファイルを .NET プロジェクトの参照として追加する必要があります。DLL ファイルは、このリンクからダウンロードするか、NuGet を介してインストールできます。
PM> Install-Package Spire.Office開発者は、Spire.XLS for .NET を使用して Excel ワークシートからデータを読み取り、そのデータをグラフのデータソースとして使用して、Spire.Presentation for .NET で PowerPoint スライドにグラフを作成することができます。Excel ファイルのデータを使用して PowerPoint プレゼンテーションにグラフを作成するための詳細な手順は以下のとおりです:
using Spire.Presentation;
using Spire.Presentation.Charts;
using Spire.Xls;
using System.Drawing;
using FileFormat = Spire.Presentation.FileFormat;
using IChart = Spire.Presentation.Charts.IChart;

namespace PresentationChartExcelData
{
    class Program
    {
        public static void Main(string[] args)
        {
            // Presentationクラスのインスタンスを作成
            Presentation presentation = new Presentation();

            // スライドサイズを設定
            presentation.SlideSize.Type = SlideSizeType.Screen16x9;

            // Workbookクラスのインスタンスを作成し、Excelファイルを読み込む
            Workbook workbook = new Workbook();
            workbook.LoadFromFile("Sample.xlsx");

            // Workbook内の最初のワークシートを取得
            Worksheet sheet = workbook.Worksheets[0];

            // プレゼンテーションにチャートを作成
            RectangleF rect = new RectangleF(50, 100, presentation.SlideSize.Size.Width - 100, presentation.SlideSize.Size.Height - 150);
            ISlide slide = presentation.Slides[0];
            IChart chart = slide.Shapes.AppendChart(ChartType.ColumnClustered, rect);

            // デフォルトのダミーデータをクリア
            chart.ChartData.Clear(0, 0, 5, 5);

            // ワークシート内の行を繰り返し処理
            for (int i = 0; i < sheet.AllocatedRange.RowCount; i++)
            {
                // ワークシート内の列を繰り返し処理
                for (int j = 0; j < sheet.AllocatedRange.ColumnCount; j++)
                {
                    // ワークシートのセル値をチャートデータの値として設定
                    chart.ChartData[i, j].Value = sheet.AllocatedRange[i + 1, j + 1].Value2;
                    // 数値形式をコピー
                    chart.ChartData[i, j].NumberFormat = sheet.AllocatedRange[i + 1, j + 1].NumberFormat;
                }
            }

            // チャートタイトルを設定
            chart.ChartTitle.TextProperties.Text = sheet.Name;
            chart.ChartTitle.TextProperties.IsCentered = true;
            chart.ChartTitle.Height = 25;
            chart.HasTitle = true;

            // シリーズラベルとカテゴリラベルを設定
            chart.Series.SeriesLabel = chart.ChartData["B1", "C1"];
            chart.Categories.CategoryLabels = chart.ChartData["A2", "A" + sheet.AllocatedRange.RowCount];

            // シリーズ値を設定
            chart.Series[0].Values = chart.ChartData["B2", "B" + sheet.AllocatedRange.RowCount];
            chart.Series[1].Values = chart.ChartData["C2", "C" + sheet.AllocatedRange.RowCount];

            // 軸の数値形式を設定
            chart.PrimaryCategoryAxis.NumberFormat = sheet.AllocatedRange["A2"].NumberFormat;
            chart.PrimaryValueAxis.NumberFormat = sheet.AllocatedRange["B2"].NumberFormat;

            // チャートのスタイルを設定
            chart.ChartStyle = ChartStyle.Style2;

            // オーバーラップとギャップ幅を設定
            chart.OverLap = 50;
            chart.GapWidth = 200;

            // プレゼンテーションを保存
            presentation.SaveToFile("output/ExcelデータからPowerPointグラフを作成.pptx", FileFormat.Pptx2019);
            presentation.Dispose();
            workbook.Dispose();
        }
    }
}
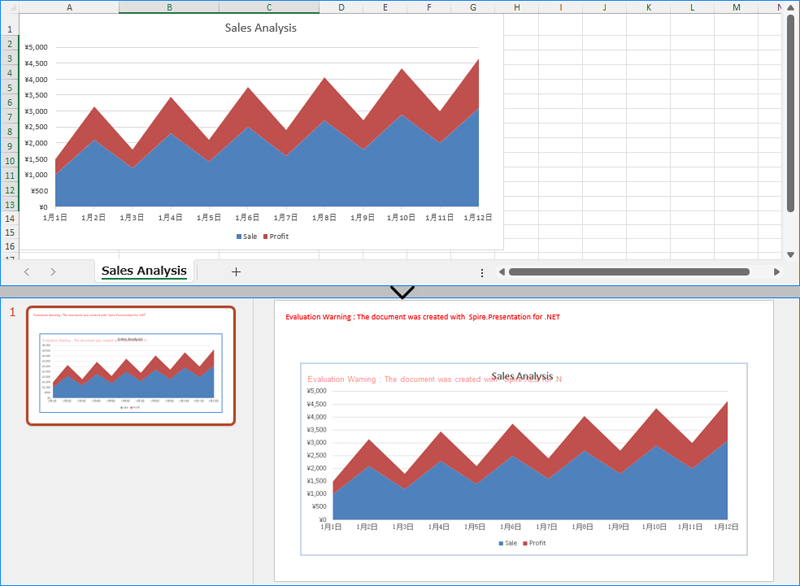
Excel ワークシートの既存のグラフをその外観と書式を正確に維持しながら PowerPoint スライドに挿入するためには、Workbook.SaveChartAsImage() メソッドを使用します。このメソッドは、Excel グラフを画像として保存し、その画像をスライドに追加することができます。具体的な手順は以下のとおりです:
using Spire.Presentation;
using Spire.Presentation.Drawing;
using Spire.Xls;
using System.Drawing;
using FileFormat = Spire.Presentation.FileFormat;

namespace PresentationChartExcelChart
{
    class Program
    {
        public static void Main(string[] args)
        {
            // Presentationクラスのインスタンスを作成
            Presentation presentation = new Presentation();

            // スライドサイズを設定
            presentation.SlideSize.Type = SlideSizeType.Screen16x9;

            // Workbookクラスのインスタンスを作成し、Excelファイルを読み込む
            Workbook workbook = new Workbook();
            workbook.LoadFromFile("Sample.xlsx");

            // 最初のワークシート内の最初のチャートを画像として保存
            Image image = workbook.SaveChartAsImage(workbook.Worksheets[0], 0);

            // 画像をプレゼンテーションに埋め込む
            IImageData imageData = presentation.Images.Append(image);

            // 最初のスライドに画像を追加
            RectangleF rect = new RectangleF(50, 120, presentation.SlideSize.Size.Width - 100, presentation.SlideSize.Size.Height - 170);
            presentation.Slides[0].Shapes.AppendEmbedImage(ShapeType.Rectangle, imageData, rect);

            // プレゼンテーションを保存
            presentation.SaveToFile("output/PowerPointでExcelのグラフを画像として挿入.pptx", FileFormat.Pptx2019);
            presentation.Dispose();
            workbook.Dispose();
        }
    }
}
結果ドキュメントから評価メッセージを削除したい場合、または機能制限を取り除く場合は、についてこのメールアドレスはスパムボットから保護されています。閲覧するにはJavaScriptを有効にする必要があります。にお問い合わせ、30 日間有効な一時ライセンスを取得してください。
Word 文書のハイパーリンクは、読者がウェブサイトや他の文書に移動できるクリック可能なリンクです。ハイパーリンクは有用な追加情報を提供することがありますが、場合によっては注意を逸らしたり、不要に煩わしいと感じることもあります。そのため、ハイパーリンクを削除したい場合があります。この記事では、C# を使用して、Spire.Doc for .NET で Word ドキュメントからハイパーリンクを削除する方法を説明します。
まず、Spire.Doc for .NET パッケージに含まれている DLL ファイルを .NET プロジェクトの参照として追加する必要があります。DLL ファイルは、このリンクからダウンロードするか、NuGet を介してインストールできます。
PM> Install-Package Spire.DocWord文書内のすべてのハイパーリンクを一度に削除するには、まず文書内のすべてのハイパーリンクを見つけ、それらを一括して処理するカスタムメソッド FlattenHyperlinks() を作成する必要があります。以下はその詳細な手順です。
using System.Drawing;
using Spire.Doc;
using Spire.Doc.Documents;
using Spire.Doc.Fields;

namespace removeWordHyperlink
{
    class Program
    {
        static void Main(string[] args)
        {
            // ドキュメントインスタンスを作成
            Document doc = new Document();

            // サンプルのWordドキュメントを読み込む
            doc.LoadFromFile("Sample.docx");

            // すべてのハイパーリンクを探す
            List<Field> hyperlinks = FindAllHyperlinks(doc);

            // すべてのハイパーリンクをフラット化する
            for (int i = hyperlinks.Count - 1; i >= 0; i--)
            {
                FlattenHyperlinks(hyperlinks[i]);
            }

            // 結果のドキュメントを保存する
            doc.SaveToFile("output/RemoveHyperlinks.docx", FileFormat.Docx);

        }

        // サンプルドキュメントからすべてのハイパーリンクを取得するためのFindAllHyperlinks()メソッドを作成
        private static List<Field> FindAllHyperlinks(Document document)
        {
            List<Field> hyperlinks = new List<Field>();

            // セクション内の項目を繰り返し処理して、すべてのハイパーリンクを探す
            foreach (Section section in document.Sections)
            {
                foreach (DocumentObject sec in section.Body.ChildObjects)
                {
                    if (sec.DocumentObjectType == DocumentObjectType.Paragraph)
                    {
                        foreach (DocumentObject para in (sec as Paragraph).ChildObjects)
                        {
                            if (para.DocumentObjectType == DocumentObjectType.Field)
                            {
                                Field field = para as Field;

                                if (field.Type == FieldType.FieldHyperlink)
                                {
                                    hyperlinks.Add(field);
                                }
                            }
                        }
                    }
                }
            }
            return hyperlinks;
        }

        // ハイパーリンクフィールドをフラット化するためのFlattenHyperlinks()メソッドを作成
        private static void FlattenHyperlinks(Field field)
        {
            int ownerParaIndex = field.OwnerParagraph.OwnerTextBody.ChildObjects.IndexOf(field.OwnerParagraph);
            int fieldIndex = field.OwnerParagraph.ChildObjects.IndexOf(field);
            Paragraph sepOwnerPara = field.Separator.OwnerParagraph;
            int sepOwnerParaIndex = field.Separator.OwnerParagraph.OwnerTextBody.ChildObjects.IndexOf(field.Separator.OwnerParagraph);
            int sepIndex = field.Separator.OwnerParagraph.ChildObjects.IndexOf(field.Separator);
            int endIndex = field.End.OwnerParagraph.ChildObjects.IndexOf(field.End);
            int endOwnerParaIndex = field.End.OwnerParagraph.OwnerTextBody.ChildObjects.IndexOf(field.End.OwnerParagraph);
            FormatFieldResultText(field.Separator.OwnerParagraph.OwnerTextBody, sepOwnerParaIndex, endOwnerParaIndex, sepIndex, endIndex);

            field.End.OwnerParagraph.ChildObjects.RemoveAt(endIndex);

            for (int i = sepOwnerParaIndex; i >= ownerParaIndex; i--)
            {
                if (i == sepOwnerParaIndex && i == ownerParaIndex)
                {
                    for (int j = sepIndex; j >= fieldIndex; j--)
                    {
                        field.OwnerParagraph.ChildObjects.RemoveAt(j);
                    }
                }
                else if (i == ownerParaIndex)
                {
                    for (int j = field.OwnerParagraph.ChildObjects.Count - 1; j >= fieldIndex; j--)
                    {
                        field.OwnerParagraph.ChildObjects.RemoveAt(j);
                    }
                }
                else if (i == sepOwnerParaIndex)
                {
                    for (int j = sepIndex; j >= 0; j--)
                    {
                        sepOwnerPara.ChildObjects.RemoveAt(j);
                    }
                }
                else
                {
                    field.OwnerParagraph.OwnerTextBody.ChildObjects.RemoveAt(i);
                }
            }
        }

        // ハイパーリンクのフォントカラーと下線フォーマットを削除するためのFormatFieldResultText()メソッドを作成
        private static void FormatFieldResultText(Body ownerBody, int sepOwnerParaIndex, int endOwnerParaIndex, int sepIndex, int endIndex)
        {
            for (int i = sepOwnerParaIndex; i <= endOwnerParaIndex; i++)
            {
                Paragraph para = ownerBody.ChildObjects[i] as Paragraph;
                if (i == sepOwnerParaIndex && i == endOwnerParaIndex)
                {
                    for (int j = sepIndex + 1; j < endIndex; j++)
                    {
                        FormatText(para.ChildObjects[j] as TextRange);
                    }
                }
                else if (i == sepOwnerParaIndex)
                {
                    for (int j = sepIndex + 1; j < para.ChildObjects.Count; j++)
                    {
                        FormatText(para.ChildObjects[j] as TextRange);
                    }
                }
                else if (i == endOwnerParaIndex)
                {
                    for (int j = 0; j < endIndex; j++)
                    {
                        FormatText(para.ChildObjects[j] as TextRange);
                    }
                }
                else
                {
                    for (int j = 0; j < para.ChildObjects.Count; j++)
                    {
                        FormatText(para.ChildObjects[j] as TextRange);
                    }
                }
            }
        }

        // テキストの色を黒に変更し、下線を削除するためのFormatText()メソッドを作成
        private static void FormatText(TextRange tr)
        {
            // テキストの色を黒に設定
            tr.CharacterFormat.TextColor = Color.Black;

            // テキストの下線スタイルをなしに設定
            tr.CharacterFormat.UnderlineStyle = UnderlineStyle.None;
        }
    }
}
結果ドキュメントから評価メッセージを削除したい場合、または機能制限を取り除く場合は、についてこのメールアドレスはスパムボットから保護されています。閲覧するにはJavaScriptを有効にする必要があります。にお問い合わせ、30 日間有効な一時ライセンスを取得してください。
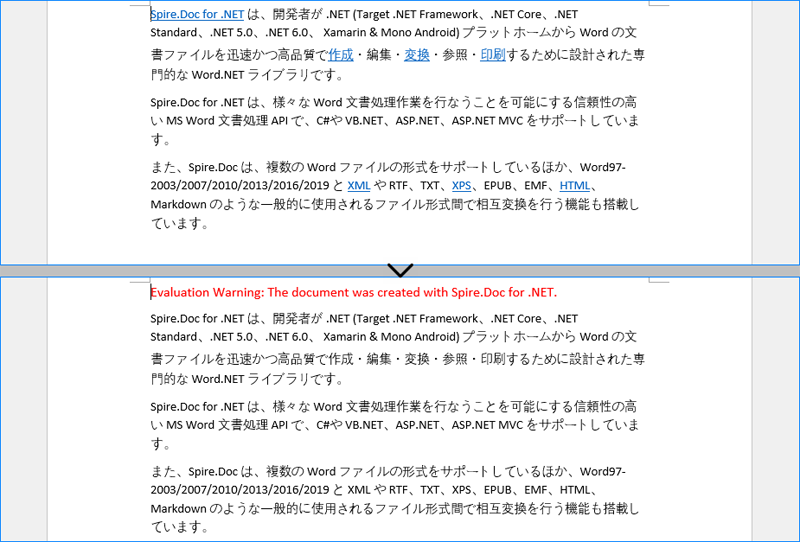
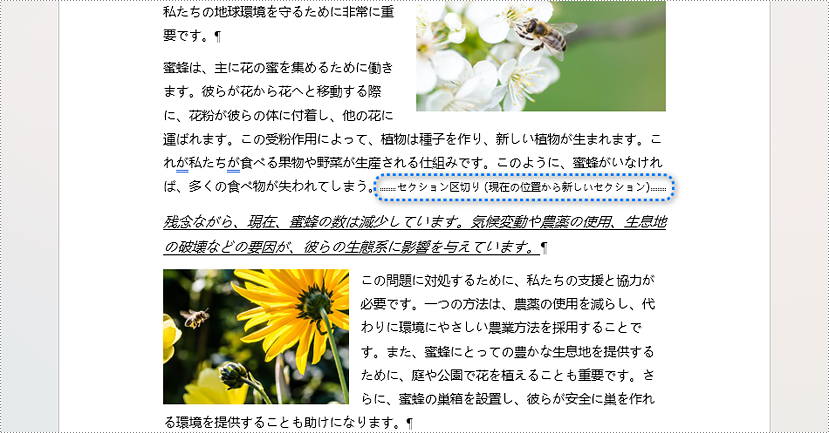
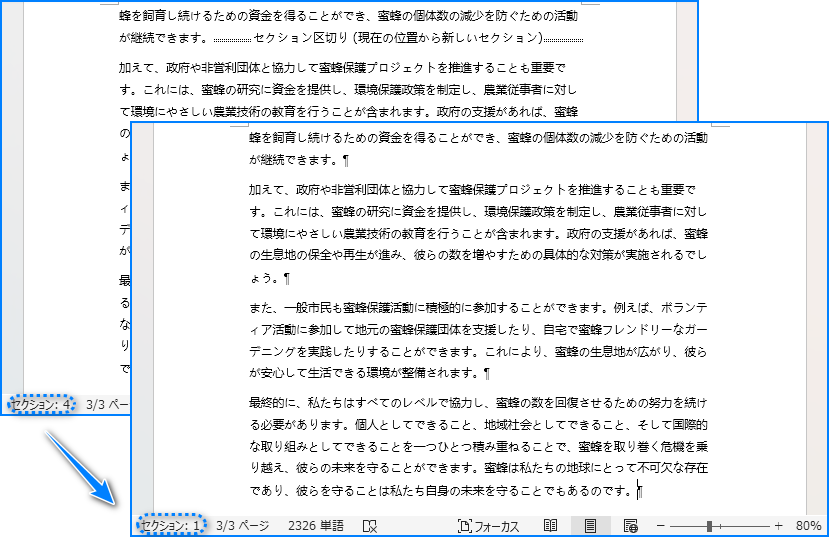
セクション区切りを使用すると、文書をセクションごとに分割し、それぞれに異なる書式設定やレイアウト設定を適用できます。これにより、文書の全体的な構造や外観をより細かく制御できます。複雑なレポートや長い論文を作成する際に、セクション区切りをマスターすることで、文書管理スキルを大幅に向上させることができます。本記事では、C# で Spire.Doc for .NET を使用して Word 文書にセクション区切りを挿入・削除する方法を示します。
まず、Spire.Doc for .NET パッケージに含まれている DLL ファイルを .NET プロジェクトの参照として追加する必要があります。DLL ファイルは、このリンクからダウンロードするか、NuGet を介してインストールできます。
PM> Install-Package Spire.DocSpire.Doc for .NET は、Paragraph.InsertSectionBreak(SectionBreakType breakType) メソッドを提供しており、指定されたタイプのセクション区切りを段落に挿入できます。以下の表は、サポートされているセクション区切りの種類、それに対応する Enum、および説明を示しています。
| セクション区切り | Enum | 説明 |
| 新しいページ | SectionBreakType.NewPage | 新しいセクションを新しいページで開始します。 |
| 連続 | SectionBreakType.NoBreak | 新しいセクションを同じページで開始し、連続したコンテンツの流れを可能にします。 |
| 奇数ページ | SectionBreakType.OddPage | 新しいセクションを次の奇数ページで開始します。 |
| 偶数ページ | SectionBreakType.EvenPage | 新しいセクションを次の偶数ページで開始します。 |
| 新しい列 | SectionBreakType.NewColumn | 列が有効な場合、新しいセクションを次の列で開始します。 |
以下は連続したセクション区切りを挿入する手順の詳細です:
using Spire.Doc;
using Spire.Doc.Documents;

namespace InsertSectionBreak
{
    class Program
    {
        static void Main(string[] args)
        {
            // ドキュメントのインスタンスを作成
            Document doc = new Document();

            // Word ドキュメントをロード
            doc.LoadFromFile("Sample.docx");

            // ドキュメント内の最初のセクションを取得
            Section sec = doc.Sections[0];

            // セクション内の2番目の段落を取得
            Paragraph para = sec.Paragraphs[2];

            // 連続するセクションブレークを挿入
            para.InsertSectionBreak(SectionBreakType.NoBreak);

            // 結果のドキュメントを保存
            doc.SaveToFile("output/セクション区切りを挿入.docx", FileFormat.Docx);
            doc.Close();
        }
    }
}
Word 文書からすべてのセクション区切りを削除するには、文書の最初のセクションにアクセスし、他のセクションの内容を最初のセクションにコピーしてから、それらを削除する必要があります。以下は詳細な手順です:
using Spire.Doc;

namespace DeleteSectionBreak
{
    class Program
    {
        static void Main(string[] args)
        {
            // Document のインスタンスを作成
            Document doc = new Document();

            // Word ドキュメントをロード
            doc.LoadFromFile("Sample.docx");

            // 最初のセクションを取得
            Section section = doc.Sections[0];

            // 残りのセクションを反復処理
            for (int i = 1; i < doc.Sections.Count; i++)
            {
                // 現在のセクションを取得
                Section section1 = doc.Sections[i];

                // セクション内の子オブジェクトを反復処理
                foreach (DocumentObject obj in section1.Body.ChildObjects)
                {
                    // 子オブジェクトを最初のセクションにコピーする
                    section.Body.ChildObjects.Add(obj.Clone());
                }

                // 現在のセクションを削除
                doc.Sections.RemoveAt(i);
                i--;
            }

            // ドキュメントを保存
            doc.SaveToFile("output/セクション区切りを削除.docx", FileFormat.Docx);
            doc.Close();
        }
    }
}
結果ドキュメントから評価メッセージを削除したい場合、または機能制限を取り除く場合は、についてこのメールアドレスはスパムボットから保護されています。閲覧するにはJavaScriptを有効にする必要があります。にお問い合わせ、30 日間有効な一時ライセンスを取得してください。
差し込み印刷は、Word ドキュメントの強力な機能で、単一のテンプレートドキュメントとデータソースから手紙、ラベル、封筒、さらには電子メールなどの複数のドキュメントを作成できます。これにより、各手紙を個別に書くことなく、多くの受信者にパーソナライズされた対応を送信することができます。
この記事では、Spire.Doc for .NET を使用して Word ドキュメントで差し込み印刷を実行する方法について説明します。
まず、Spire.Doc for .NET パッケージに含まれている DLL ファイルを .NET プロジェクトの参照として追加する必要があります。DLL ファイルは、このリンクからダウンロードするか、NuGet を介してインストールできます。
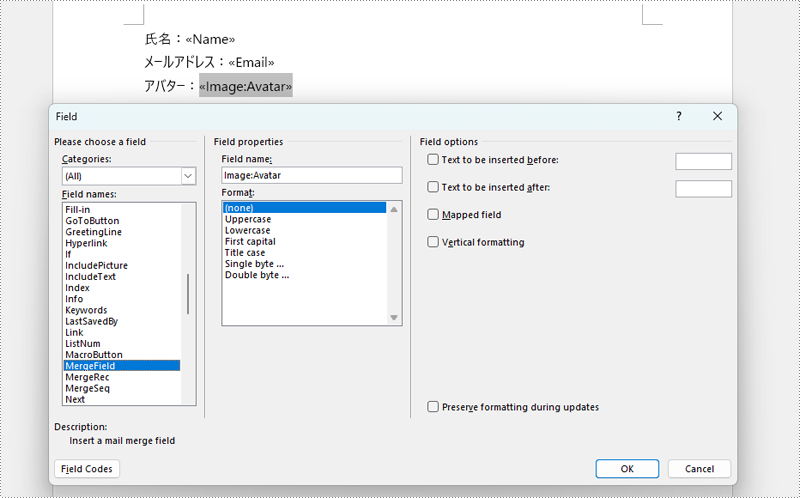
PM> Install-Package Spire.Doc差し込みフィールドを含むテンプレート Word ドキュメントを生成するには、Microsoft Word などの Word エディターを使用することをお勧めします。Word エディターのビジュアルインターフェイスを使用すると、テンプレートの独自のレイアウト、書式設定、その他の要素をインタラクティブにデザインできます。
以下のスクリーンショットは、MS Word を使用して Word ドキュメントに差し込みフィールドを追加する方法を示しています。画像を差し込みフィールドに挿入したい場合は、「Image:FieldName」形式を使用してください。
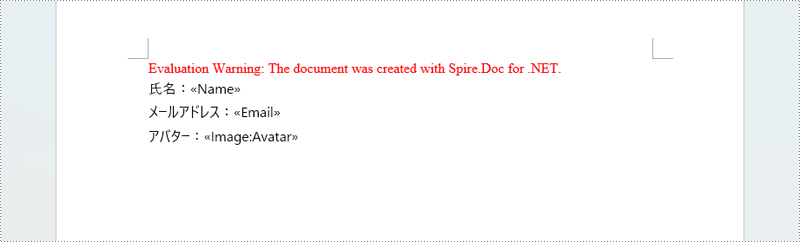
C# コードを使用してテンプレート Word ドキュメントを作成する場合、次の手順に従います。
using Spire.Doc;
using Spire.Doc.Documents;
namespace MailMerge
{
class Program
{
static void Main(string[] args)
{
// Create an instance of Document class
Document doc = new Document();
// Add a section to the document
Section section = doc.AddSection();
// Add a paragraph to the section
Paragraph para = section.AddParagraph();
// Set the format
section.PageSetup.Margins.All = 80;
ParagraphStyle style = new ParagraphStyle(doc);
style.Name = "Default Style";
style.CharacterFormat.FontName = "Yu Gothic UI";
style.CharacterFormat.FontSize = 12;
doc.Styles.Add(style);
para.ApplyStyle(style.Name);
// Add text and mail merge fields to the paragraph
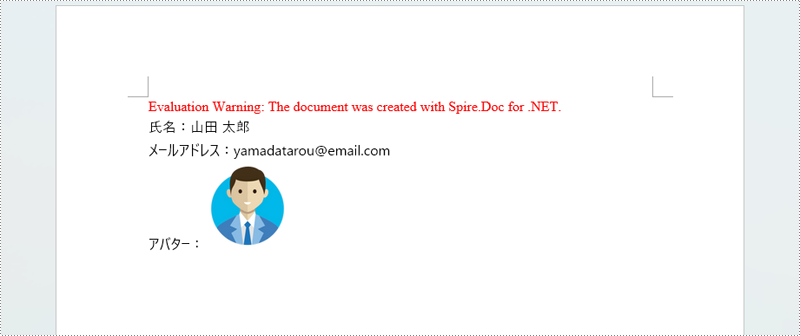
para.AppendText("氏名:");
para.AppendField("Name", FieldType.FieldMergeField);
para.AppendBreak(BreakType.LineBreak);
para.AppendText("メールアドレス:");
para.AppendField("Email", FieldType.FieldMergeField);
para.AppendBreak(BreakType.LineBreak);
para.AppendText("アバター:");
para.AppendField("Image:Avatar", FieldType.FieldMergeField);
// Save the document
doc.SaveToFile("Example.docx", FileFormat.Docx2019);
doc.Close();
}
}
}
Spire.Doc は、Word ドキュメントで指定された差し込み印刷操作を実行するための MailMerge.Execute() メソッドを提供します。このメソッドは6つのオーバーロードがあり、DataTable、DataView、および文字列配列など、さまざまなデータソースから差し込み印刷を実行できます。
配列で提供されたデータを使用して差し込み印刷を実行する手順は次のとおりです。
using Spire.Doc;
using Spire.Doc.Reporting;
using System.Drawing;

namespace MailMergeInDocument
{
    class Program
    {
        static void Main(string[] args)
        {
            // Create a Document object
            Document document = new Document();

            // Load the template Word document
            document.LoadFromFile("Example.docx");

            // Specify field names
            String[] fieldNames = {

                "Name",
                "Email",
                "Avatar"
            };

            // Specify values that'll be used to fill the fields
            String[] fieldValues = {

                "山田 太郎",
                "yamadatarou @email.com",
                "yamadatarou.png"
            };

            // Register an event which occurs when merging the image filed
            document.MailMerge.MergeImageField += new MergeImageFieldEventHandler(MailMerge_MergeImageField);

            // Mail merge data to the document
            document.MailMerge.Execute(fieldNames, fieldValues);

            // Save the document
            document.SaveToFile("差し込み印刷.docx", FileFormat.Docx2019);

            // Dispose resources
            document.Dispose();
        }

        // Fill an image field with a picture
        private static void MailMerge_MergeImageField(object sender, MergeImageFieldEventArgs field)
        {
            string filePath = field.FieldValue as string;

            if (!string.IsNullOrEmpty(filePath))
            {
                field.Image = Image.FromFile(filePath);
            }
        }
    }
}
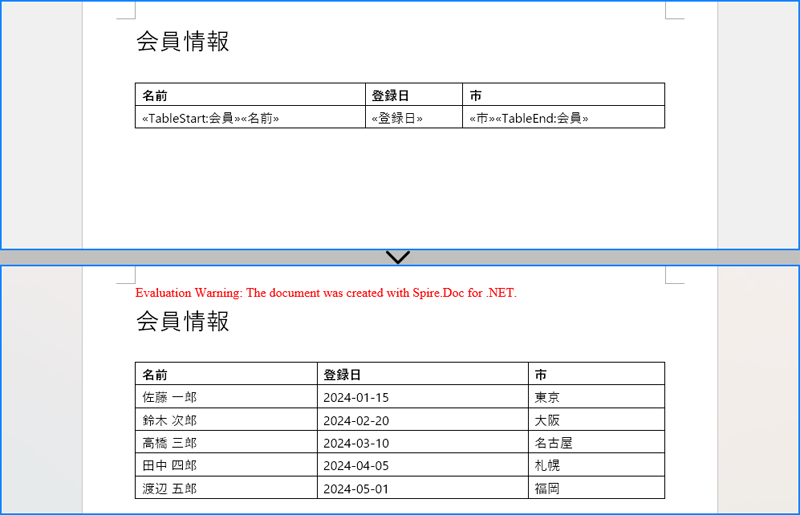
領域とは、データソースからのデータを挿入するドキュメント内の特定のエリアを指します。差し込み印刷は、データソース内の各レコードに対してその領域を繰り返します。Spire.Doc は、MailMerge.ExecuteWidthRegion() メソッドを提供し、領域を指定した差し込み印刷を実行します。
DataTable によって提供されたデータを使用して領域を指定した差し込み印刷を実行する手順は次のとおりです。
using Spire.Doc;
using System.Data;

namespace MailMergeWithGroup
{
    class Program
    {
        static void Main(string[] args)
        {

            // Document オブジェクトを作成する
            Document document = new Document();

            // テンプレートのWord文書を読み込む
            document.LoadFromFile("Sample.docx");

            // テーブル名を指定してデータテーブルを作成する
            DataTable table = new DataTable("会員");

            // テーブルにサンプルデータを追加する
            table.Columns.Add("名前");
            table.Columns.Add("登録日");
            table.Columns.Add("市");
            table.Rows.Add("佐藤 一郎", "2024-01-15", "東京");
            table.Rows.Add("鈴木 次郎", "2024-02-20", "大阪");
            table.Rows.Add("高橋 三郎", "2024-03-10", "名古屋");
            table.Rows.Add("田中 四郎", "2024-04-05", "札幌");
            table.Rows.Add("渡辺 五郎", "2024-05-01", "福岡");

            // 領域内でメールマージを実行する
            document.MailMerge.ExecuteWidthRegion(table);

            // 文書を保存する
            document.SaveToFile("output/地域との差し込み印刷.docx", FileFormat.Docx2019);

            // リソースを破棄する
            document.Dispose();
        }
    }
}
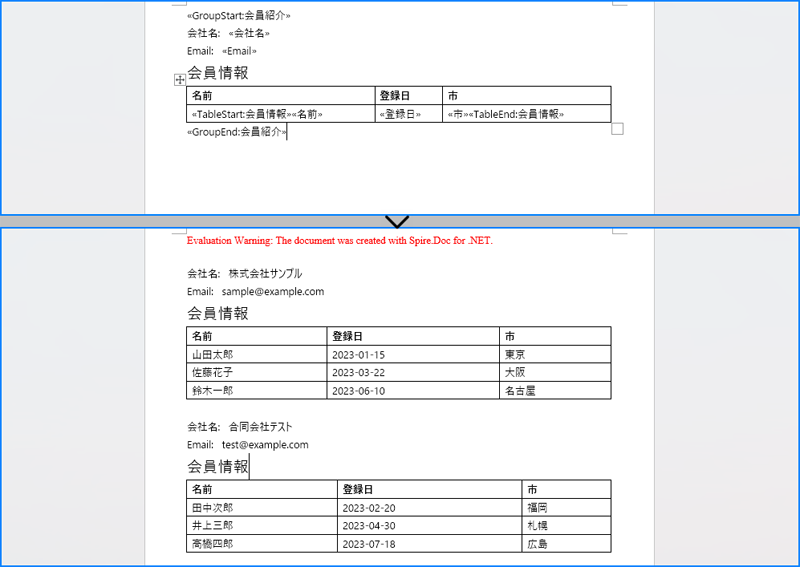
入れ子のグループの差し込み印刷は、入れ子の領域内の差し込みフィールドを、階層構造で整理されたデータで置換することによって機能します。入れ子の領域を使用すると、ある領域の内容が他の領域のデータに依存する、より複雑なレイアウトを作成できます。
XML ファイルのデータを使用して入れ子の領域で差し込み印刷を実行する手順は次のとおりです。
using Spire.Doc;
using System.Collections;
using System.Data;

namespace MailMergeWithNestedRegions
{
    class Program
    {
        static void Main(string[] args)
        {
            // Documentオブジェクトを作成
            Document document = new Document();

            // テンプレートWord文書を読み込む
            document.LoadFromFile("Sample.docx");

            // XMLファイルからデータを読み込んでDataSetオブジェクトに格納
            DataSet dataSet = new DataSet();
            dataSet.ReadXml("Sample.xml");

            // マージフィールド情報を格納するListオブジェクトを作成
            List<DictionaryEntry> list = new List<DictionaryEntry>();

            // 2つのDictionaryEntryオブジェクトを作成し、リストに追加する(それぞれのオブジェクトはマージフィールド名と関連する式を指定)
            DictionaryEntry dictionaryEntry = new DictionaryEntry("会員紹介", string.Empty);
            list.Add(dictionaryEntry);

            dictionaryEntry = new DictionaryEntry("会員情報", "会員ID = %会員紹介.会員ID%");
            list.Add(dictionaryEntry);

            // ネストされた領域を持つメールマージ操作を実行
            document.MailMerge.ExecuteWidthNestedRegion(dataSet, list);

            // ファイルに保存
            document.SaveToFile("output/入れ子の領域での差し込み印刷.docx", FileFormat.Docx2019);

            // リソースを解放
            document.Dispose();
        }
    }
}
結果ドキュメントから評価メッセージを削除したい場合、または機能制限を取り除く場合は、についてこのメールアドレスはスパムボットから保護されています。閲覧するにはJavaScriptを有効にする必要があります。にお問い合わせ、30 日間有効な一時ライセンスを取得してください。
PowerPoint プレゼンテーションは、さまざまな分野でのコミュニケーションにおいて基本的なツールです。これらのプレゼンテーションが大きく複雑になるにつれて、それらを効果的に管理することが重要になります。実用的な解決策の一つは、大きなプレゼンテーションを小さくて管理しやすいものに分割することです。特定のオーディエンスに適応させるため、トレーニングモジュールを分割するため、または配布のためにファイルサイズを最適化するためなど、C# を使用して .NET で PowerPoint プレゼンテーションを分割する機能は、ワークフローの効率を大幅に向上させます。この記事では、C# を使用して Spire.Presentation for .NET を用いて、スライドごと、スライド範囲ごと、セクションごとに PowerPoint プレゼンテーションを分割する方法を紹介します。
まず、Spire.Presentation for .NET パッケージに含まれている DLL ファイルを .NET プロジェクトの参照として追加する必要があります。DLL ファイルは、このリンクからダウンロードするか、NuGet を介してインストールできます。
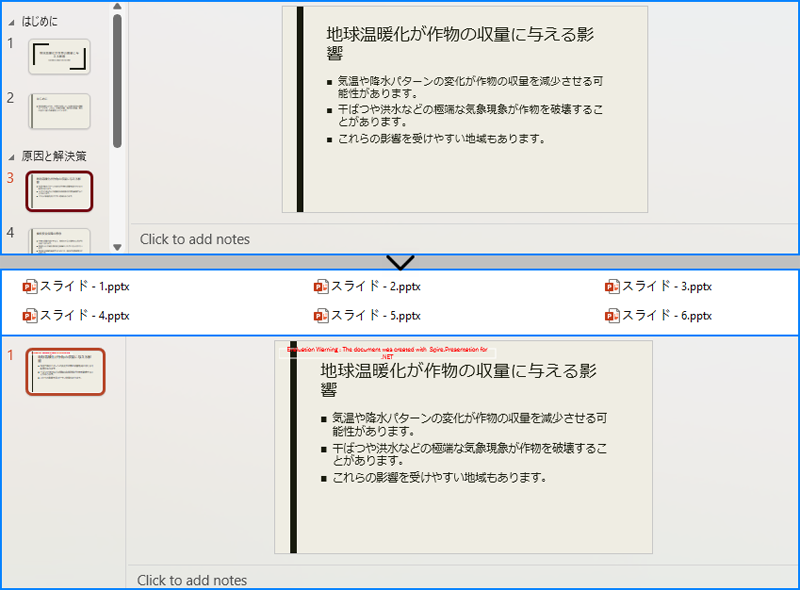
PM> Install-Package Spire.PresentationSpire.Presentation for .NET を使用すると、開発者は元のプレゼンテーションのスライドを順に新しいプレゼンテーションに追加し、各スライドを個別のプレゼンテーションとして保存することができます。
詳細な手順は次の通りです:
using Spire.Presentation;

namespace SplitPresentationSlide
{
    class Program
    {
        static void Main(string[] args)
        {
            // Presentationクラスのインスタンスを作成する
            Presentation presentation = new Presentation();

            // PowerPointプレゼンテーションを読み込む
            presentation.LoadFromFile("Sample.pptx");

            // すべてのスライドを繰り返し処理する
            for (int i = 0; i < presentation.Slides.Count; i++)
            {
                // スライドを取得する
                ISlide slide = presentation.Slides[i];
                // 新しいプレゼンテーションを作成し、デフォルトのスライドを削除する
                Presentation newPresentation = new Presentation();
                newPresentation.Slides.RemoveAt(0);
                // スライドを新しいプレゼンテーションに追加する
                newPresentation.Slides.Append(slide);
                // 新しいプレゼンテーションを保存する
                newPresentation.SaveToFile("output/プレゼンテーション/スライド - " + (i +1).ToString() + ".pptx", FileFormat.Pptx2013);
                newPresentation.Dispose();
            }
            presentation.Dispose();
        }
    }
}
個別のスライドプレゼンテーションに分割するだけでなく、指定したスライド範囲を新しいプレゼンテーションにコピーして保存することで、スライド範囲ごとにプレゼンテーションを分割することもできます。
詳細な手順は次の通りです:
using Spire.Presentation;

namespace SplitPresentationSlide
{
    class Program
    {
        static void Main(string[] args)
        {
            // Presentationクラスのインスタンスを作成する
            Presentation presentation = new Presentation();

            // 元のPowerPointプレゼンテーションを読み込む
            presentation.LoadFromFile("Sample.pptx");

            // Presentationクラスの新しいインスタンスを2つ作成する
            Presentation presentation1 = new Presentation();
            Presentation presentation2 = new Presentation();

            // デフォルトの空白スライドを削除する
            presentation1.Slides.RemoveAt(0);
            presentation2.Slides.RemoveAt(0);

            // 特定の範囲のスライドを新しいプレゼンテーションに追加する
            for (int i = 0; i < 3; i++)
            {
                presentation1.Slides.Append(presentation.Slides[i]);
            }
            for (int i = 3; i < presentation.Slides.Count; i++)
            {
                presentation2.Slides.Append(presentation.Slides[i]);
            }

            // 新しいプレゼンテーションを保存する
            presentation1.SaveToFile("output/プレゼンテーション/スライド範囲 1.pptx", FileFormat.Pptx2013);
            presentation2.SaveToFile("output/プレゼンテーション/スライド範囲 2.pptx", FileFormat.Pptx2013);

            presentation1.Dispose();
            presentation2.Dispose();
            presentation.Dispose();
        }
    }
}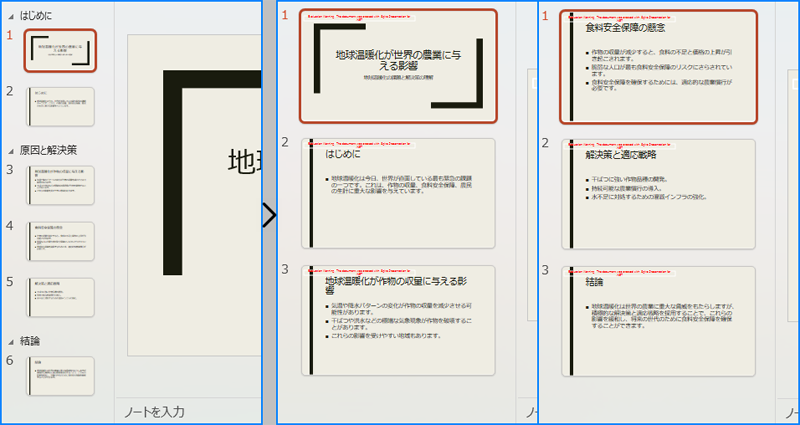
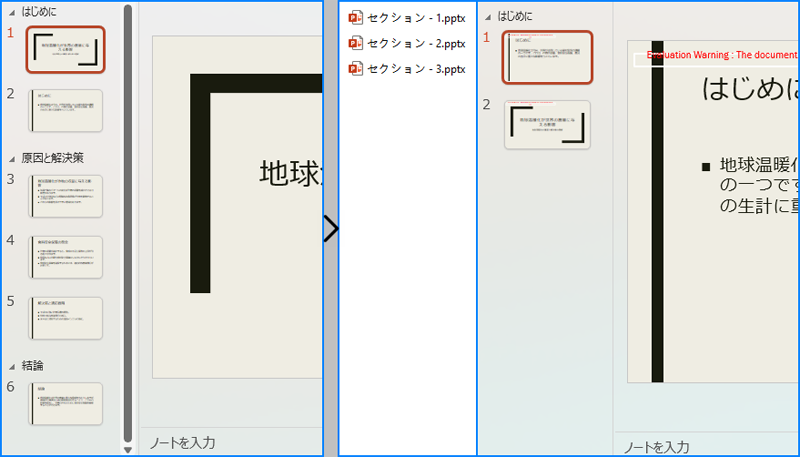
プレゼンテーションのセクションを繰り返し処理し、それぞれのセクション内のスライドを新しい PowerPoint プレゼンテーションに追加して保存することもできます。
詳細な手順は次の通りです:
using Spire.Presentation;

namespace SplitPresentationSlide
{
    class Program
    {
        static void Main(string[] args)
        {
            // Presentationクラスのインスタンスを作成する
            Presentation presentation = new Presentation();

            // PowerPointプレゼンテーションを読み込む
            presentation.LoadFromFile("Sample.pptx");

            for (int i = 0; i < presentation.SectionList.Count; i++)
            {
                // 現在のセクションを取得する
                Section section = presentation.SectionList[i];
                // Presentationクラスの新しいインスタンスを作成し、デフォルトのスライドを削除する
                Presentation newPresentation = new Presentation();
                newPresentation.Slides.RemoveAt(0);
                // 新しいプレゼンテーションにセクションを追加する
                newPresentation.SectionList.Append(section.Name);
                // セクション内のスライドを取得する
                ISlide[] slides = section.GetSlides();
                foreach (ISlide slide in slides)
                {
                    // 新しいプレゼンテーションの新しいセクションにスライドを挿入する
                    newPresentation.SectionList[0].Insert(0, slide);
                }
                // 新しいプレゼンテーションを保存する
                newPresentation.SaveToFile("output/プレゼンテーション/セクション - " + (i + 1).ToString() + ".pptx", FileFormat.Pptx2019);
                newPresentation.Dispose();
            }
            presentation.Dispose();
        }
    }
}
結果ドキュメントから評価メッセージを削除したい場合、または機能制限を取り除く場合は、についてこのメールアドレスはスパムボットから保護されています。閲覧するにはJavaScriptを有効にする必要があります。にお問い合わせ、30 日間有効な一時ライセンスを取得してください。
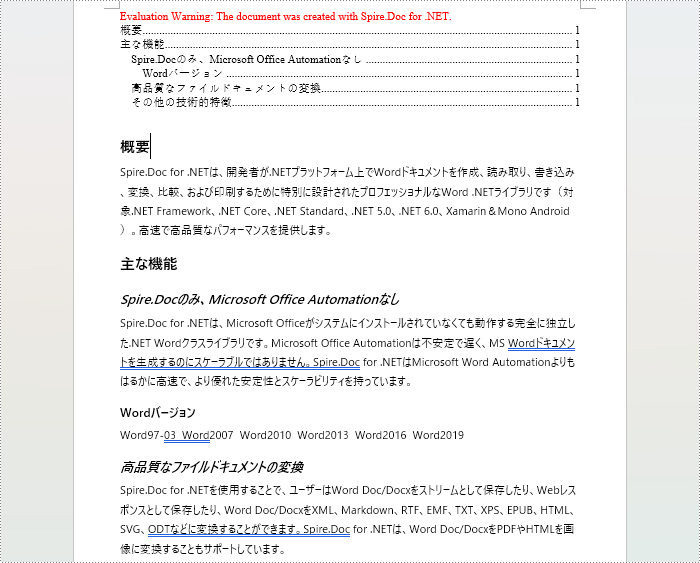
新しく作成した Word ドキュメントに目次を作成することは、文書の質を向上させ、読みやすさを改善し、情報を効果的に伝達する重要な手段です。目次は文書のナビゲーションガイドとして機能し、読者が文書の内容を迅速に見つけて移動できるようにします。目次を通じて、読者は文書の構造と内容の整理を迅速に把握でき、読書時間を節約し、作業効率を向上させることができます。本記事では、C# プロジェクト内で Spire.Doc for .NET を使用して新しい Word ドキュメントの目次を作成する方法を説明します。
まず、Spire.Doc for .NET パッケージに含まれている DLL ファイルを .NET プロジェクトの参照として追加する必要があります。DLL ファイルは、このリンクからダウンロードするか、NuGet を介してインストールできます。
PM> Install-Package Spire.Doc見出しスタイルを使用して目次を作成することは、異なるレベルの見出しスタイルを使用して文書内のタイトルやサブタイトルを特定することで、Word 文書内に目次を自動生成する方法です。以下に詳細な手順を示します:
using Spire.Doc;
using Spire.Doc.Documents;
using Spire.Doc.Fields;
using Spire.Doc.Formatting;

namespace SpireDocDemo
{
    internal class Program
    {
        static void Main(string[] args)
        {
            // 新しいドキュメントオブジェクトを作成
            Document doc = new Document();

            // ドキュメントにセクションを追加
            Section section = doc.AddSection();

            // CharacterFormatオブジェクトを作成し、フォントを設定
            CharacterFormat characterFormat1 = new CharacterFormat(doc);
            characterFormat1.FontName = "Yu Gothic UI";

            // 別のCharacterFormatオブジェクトを作成
            CharacterFormat characterFormat2 = new CharacterFormat(doc);
            characterFormat2.FontName = "Yu Gothic UI";
            characterFormat2.FontSize = 12;

            // 段落を追加
            Paragraph TOCparagraph = section.AddParagraph();
            TableOfContent TOC = TOCparagraph.AppendTOC(1, 3);
            TOC.ApplyCharacterFormat(characterFormat1);

            // 見出し1スタイルの段落を追加
            Paragraph paragraph = section.Body.AddParagraph();
            paragraph.ApplyStyle(BuiltinStyle.Heading1);

            // テキストを追加し、文字書式を適用
            TextRange textRange1 = paragraph.AppendText("概要");
            textRange1.ApplyCharacterFormat(characterFormat1);

            // 通常のコンテンツを追加
            paragraph = section.Body.AddParagraph();
            TextRange textRange2 = paragraph.AppendText("Spire.Doc for .NETは、開発者が.NETプラットフォーム上でWordドキュメントを作成、読み取り、書き込み、変換、比較、および印刷するために特別に設計されたプロフェッショナルなWord .NETライブラリです(対象.NET Framework、.NET Core、.NET Standard、.NET 5.0、.NET 6.0、Xamarin&Mono Android)。高速で高品質なパフォーマンスを提供します。");
            textRange2.ApplyCharacterFormat(characterFormat2);

            // 見出し1スタイルの段落を追加
            paragraph = section.Body.AddParagraph();
            paragraph.ApplyStyle(BuiltinStyle.Heading1);
            textRange1 = paragraph.AppendText("主な機能");
            textRange1.ApplyCharacterFormat(characterFormat1);

            // 見出し2スタイルの段落を追加
            paragraph = section.Body.AddParagraph();
            paragraph.ApplyStyle(BuiltinStyle.Heading2);
            textRange1 = paragraph.AppendText("Spire.Docのみ、Microsoft Office Automationなし");
            textRange1.ApplyCharacterFormat(characterFormat1);

            // 通常のコンテンツを追加
            paragraph = section.Body.AddParagraph();
            textRange2 = paragraph.AppendText("Spire.Doc for .NETは、Microsoft Officeがシステムにインストールされていなくても動作する完全に独立した.NET Wordクラスライブラリです。Microsoft Office Automationは不安定で遅く、MS Wordドキュメントを生成するのにスケーラブルではありません。Spire.Doc for .NETはMicrosoft Word Automationよりもはるかに高速で、より優れた安定性とスケーラビリティを持っています。");
            textRange2.ApplyCharacterFormat(characterFormat2);

            // 見出し3スタイルの段落を追加
            paragraph = section.Body.AddParagraph();
            paragraph.ApplyStyle(BuiltinStyle.Heading3);
            textRange1 = paragraph.AppendText("Wordバージョン");
            textRange1.ApplyCharacterFormat(characterFormat1);
            paragraph = section.Body.AddParagraph();
            textRange2 = paragraph.AppendText("Word97-03  Word2007  Word2010  Word2013  Word2016  Word2019");
            textRange2.ApplyCharacterFormat(characterFormat2);

            // 見出し2スタイルの段落を追加
            paragraph = section.Body.AddParagraph();
            paragraph.ApplyStyle(BuiltinStyle.Heading2);
            textRange1 = paragraph.AppendText("高品質なファイルドキュメントの変換");
            textRange1.ApplyCharacterFormat(characterFormat1);

            // 通常のコンテンツを追加
            paragraph = section.Body.AddParagraph();
            textRange2 = paragraph.AppendText("Spire.Doc for .NETを使用することで、ユーザーはWord Doc/Docxをストリームとして保存したり、Webレスポンスとして保存したり、Word Doc/DocxをXML、Markdown、RTF、EMF、TXT、XPS、EPUB、HTML、SVG、ODTなどに変換することができます。Spire.Doc for .NETは、Word Doc/DocxをPDFやHTMLを画像に変換することもサポートしています。");
            textRange2.ApplyCharacterFormat(characterFormat2);

            // 見出し2スタイルの段落を追加
            paragraph = section.Body.AddParagraph();
            paragraph.ApplyStyle(BuiltinStyle.Heading2);
            textRange1 = paragraph.AppendText("その他の技術的特徴");
            textRange1.ApplyCharacterFormat(characterFormat1);

            // 通常のコンテンツを追加
            paragraph = section.Body.AddParagraph();
            textRange2 = paragraph.AppendText("Spire.Docを使用することで、開発者はASP.NET、Webサービス、WinForms、Xamarin、Mono Androidなど、32ビットまたは64ビットの.NETアプリケーションを構築し、Wordドキュメントを作成および処理することができます。");
            textRange2.ApplyCharacterFormat(characterFormat2);

            // 目次を更新
            doc.UpdateTableOfContents();

            // ドキュメントを保存
            doc.SaveToFile("output/見出しスタイルで目次を作成.docx", FileFormat.Docx2016);

            // リソースを解放
            doc.Dispose();
        }
    }
}
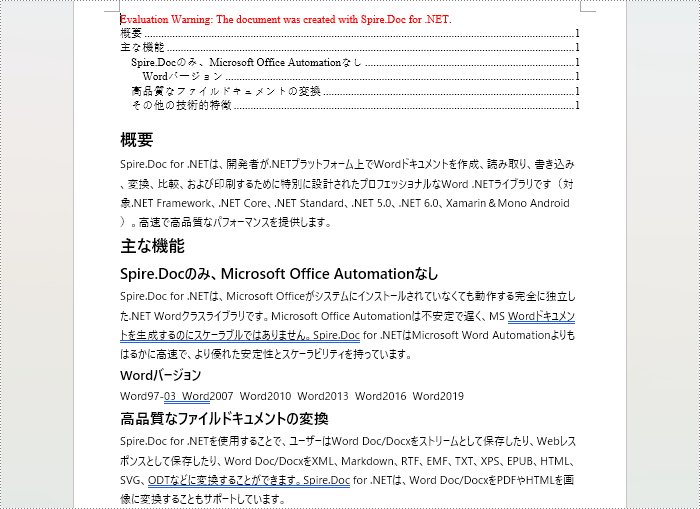
Word 文書内でアウトラインレベルスタイルを使用して目次を作成することもできます。ParagraphFormat.OutlineLevel プロパティを使用してアウトラインの段落のレベルスタイルを指定し、これらのアウトラインレベルスタイルを TableOfContent.SetTOCLevelStyle() メソッドを介して目次作成ルールに適用できます。以下に詳細な手順を示します:
using Spire.Doc;
using Spire.Doc.Documents;
using Spire.Doc.Fields;
using Spire.Doc.Formatting;

namespace SpireDocDemo
{
    internal class Program
    {
        static void Main(string[] args)
        {
            // ドキュメントオブジェクトを作成
            Document doc = new Document();
            Section section = doc.AddSection();

            // アウトラインレベル1を定義
            ParagraphStyle titleStyle1 = new ParagraphStyle(doc);
            titleStyle1.Name = "T1S";
            titleStyle1.ParagraphFormat.OutlineLevel = OutlineLevel.Level1;
            titleStyle1.CharacterFormat.Bold = true;
            titleStyle1.CharacterFormat.FontName = "Yu Gothic UI";
            titleStyle1.CharacterFormat.FontSize = 18f;
            titleStyle1.ParagraphFormat.HorizontalAlignment = HorizontalAlignment.Left;
            doc.Styles.Add(titleStyle1);

            // アウトラインレベル2を定義
            ParagraphStyle titleStyle2 = new ParagraphStyle(doc);
            titleStyle2.Name = "T2S";
            titleStyle2.ParagraphFormat.OutlineLevel = OutlineLevel.Level2;
            titleStyle2.CharacterFormat.Bold = true;
            titleStyle2.CharacterFormat.FontName = "Yu Gothic UI";
            titleStyle2.CharacterFormat.FontSize = 16f;
            titleStyle2.ParagraphFormat.HorizontalAlignment = HorizontalAlignment.Left;
            doc.Styles.Add(titleStyle2);

            // アウトラインレベル3を定義
            ParagraphStyle titleStyle3 = new ParagraphStyle(doc);
            titleStyle3.Name = "T3S";
            titleStyle3.ParagraphFormat.OutlineLevel = OutlineLevel.Level3;
            titleStyle3.CharacterFormat.Bold = true;
            titleStyle3.CharacterFormat.FontName = "Yu Gothic UI";
            titleStyle3.CharacterFormat.FontSize = 14f;
            titleStyle3.ParagraphFormat.HorizontalAlignment = HorizontalAlignment.Left;
            doc.Styles.Add(titleStyle3);

            // 段落を追加
            Paragraph TOCparagraph = section.AddParagraph();
            TableOfContent toc = TOCparagraph.AppendTOC(1, 3);
            toc.UseHeadingStyles = false;
            toc.UseHyperlinks = true;
            toc.UseTableEntryFields = false;
            toc.RightAlignPageNumbers = true;
            toc.SetTOCLevelStyle(1, titleStyle1.Name);
            toc.SetTOCLevelStyle(2, titleStyle2.Name);
            toc.SetTOCLevelStyle(3, titleStyle3.Name);

            // 文字書式を定義
            CharacterFormat characterFormat = new CharacterFormat(doc);
            characterFormat.FontName = "Yu Gothic UI";
            characterFormat.FontSize = 12;

            // 段落を追加し、アウトラインレベルスタイル1を適用
            Paragraph paragraph = section.Body.AddParagraph();
            paragraph.ApplyStyle(titleStyle1.Name);
            paragraph.AppendText("概要");

            // 段落を追加し、テキストコンテンツを設定
            paragraph = section.Body.AddParagraph();
            TextRange textRange = paragraph.AppendText("Spire.Doc for .NETは、開発者が.NETプラットフォーム上でWordドキュメントを作成、読み取り、書き込み、変換、比較、および印刷するために特別に設計されたプロフェッショナルなWord .NETライブラリです(対象.NET Framework、.NET Core、.NET Standard、.NET 5.0、.NET 6.0、Xamarin&Mono Android)。高速で高品質なパフォーマンスを提供します。");
            textRange.ApplyCharacterFormat(characterFormat);

            // 段落を追加し、アウトラインレベルスタイル1を適用
            paragraph = section.Body.AddParagraph();
            paragraph.ApplyStyle(titleStyle1.Name);
            paragraph.AppendText("主な機能");

            // 段落を追加し、アウトラインレベルスタイル2を適用
            paragraph = section.Body.AddParagraph();
            paragraph.ApplyStyle(titleStyle2.Name);
            paragraph.AppendText("Spire.Docのみ、Microsoft Office Automationなし");

            // 段落を追加し、テキストコンテンツを設定
            paragraph = section.Body.AddParagraph();
            textRange = paragraph.AppendText("Spire.Doc for .NETは、Microsoft Officeがシステムにインストールされていなくても動作する完全に独立した.NET Wordクラスライブラリです。Microsoft Office Automationは不安定で遅く、MS Wordドキュメントを生成するのにスケーラブルではありません。Spire.Doc for .NETはMicrosoft Word Automationよりもはるかに高速で、より優れた安定性とスケーラビリティを持っています。");
            textRange.ApplyCharacterFormat(characterFormat);

            // 段落を追加し、アウトラインレベルスタイル3を適用
            paragraph = section.Body.AddParagraph();
            paragraph.ApplyStyle(titleStyle3.Name);
            paragraph.AppendText("Wordバージョン");

            // 段落を追加し、テキストコンテンツを設定
            paragraph = section.Body.AddParagraph();
            textRange = paragraph.AppendText("Word97-03  Word2007  Word2010  Word2013  Word2016  Word2019");
            textRange.ApplyCharacterFormat(characterFormat);

            // 段落を追加し、アウトラインレベルスタイル2を適用
            paragraph = section.Body.AddParagraph();
            paragraph.ApplyStyle(titleStyle2.Name);
            paragraph.AppendText("高品質なファイルドキュメントの変換");

            // 段落を追加し、テキストコンテンツを設定
            paragraph = section.Body.AddParagraph();
            textRange = paragraph.AppendText("Spire.Doc for .NETを使用することで、ユーザーはWord Doc/Docxをストリームとして保存したり、Webレスポンスとして保存したり、Word Doc/DocxをXML、Markdown、RTF、EMF、TXT、XPS、EPUB、HTML、SVG、ODTなどに変換することができます。Spire.Doc for .NETは、Word Doc/DocxをPDFやHTMLを画像に変換することもサポートしています。");
            textRange.ApplyCharacterFormat(characterFormat);

            // 段落を追加し、アウトラインレベルスタイル2を適用
            paragraph = section.Body.AddParagraph();
            paragraph.ApplyStyle(titleStyle2.Name);
            paragraph.AppendText("その他の技術的特徴");

            // 段落を追加し、テキストコンテンツを設定
            paragraph = section.Body.AddParagraph();
            textRange = paragraph.AppendText("Spire.Docを使用することで、開発者はASP.NET、Webサービス、WinForms、Xamarin、Mono Androidなど、32ビットまたは64ビットの.NETアプリケーションを構築し、Wordドキュメントを作成および処理することができます。");
            textRange.ApplyCharacterFormat(characterFormat);

            // 目次を更新
            doc.UpdateTableOfContents();

            // ドキュメントを保存
            doc.SaveToFile("output/アウトラインレベルスタイルで目次を作成.docx", FileFormat.Docx2016);

            // リソースを解放
            doc.Dispose();
        }
    }
}
Spire.Doc ライブラリを使用して、TableOfContent tocForImage = new TableOfContent(Document, " \h \z \c "Image"") メソッドを使用して画像キャプションに基づいた目次を作成できます。以下に詳細な手順を示します:
using Spire.Doc;
using Spire.Doc.Documents;
using Spire.Doc.Fields;

namespace SpireDocDemo
{
    internal class Program
    {
        static void Main(string[] args)
        {
            // ドキュメントオブジェクトを作成
            Document doc = new Document();

            // ドキュメントにセクションを追加
            Section section = doc.AddSection();

            // 画像用の目次オブジェクトを作成
            TableOfContent tocForImage = new TableOfContent(doc, " \\h \\z \\c \"Picture\"");

            // セクションに段落を追加
            Paragraph tocParagraph = section.Body.AddParagraph();

            // 段落にTOCオブジェクトを追加
            tocParagraph.Items.Add(tocForImage);

            // フィールドセパレーターを追加
            tocParagraph.AppendFieldMark(FieldMarkType.FieldSeparator);

            // テキストコンテンツを追加
            tocParagraph.AppendText("TOC");

            // フィールドエンドマークを追加
            tocParagraph.AppendFieldMark(FieldMarkType.FieldEnd);

            // セクションに空の段落を追加
            section.Body.AddParagraph();

            // セクションに段落を追加
            Paragraph paragraph = section.Body.AddParagraph();

            // 画像を追加
            DocPicture docPicture = paragraph.AppendPicture("images/Doc-NET.png");
            docPicture.Width = 100;
            docPicture.Height = 100;

            // 画像のキャプション段落を追加
            Paragraph pictureCaptionParagraph = docPicture.AddCaption("Picture", CaptionNumberingFormat.Number, CaptionPosition.BelowItem) as Paragraph;
            pictureCaptionParagraph.AppendText("  Spire.Doc for .NET製品");
            pictureCaptionParagraph.Format.AfterSpacing = 20;

            // セクションに段落を追加し続ける
            paragraph = section.Body.AddParagraph();
            docPicture = paragraph.AppendPicture("images/PDF-NET.png");
            docPicture.Width = 100;
            docPicture.Height = 100;
            pictureCaptionParagraph = docPicture.AddCaption("Picture", CaptionNumberingFormat.Number, CaptionPosition.BelowItem) as Paragraph;
            pictureCaptionParagraph.AppendText("  Spire.PDF for .NET製品");
            pictureCaptionParagraph.Format.AfterSpacing = 20;
            paragraph = section.Body.AddParagraph();
            docPicture = paragraph.AppendPicture("images/XLS-NET.png");
            docPicture.Width = 100;
            docPicture.Height = 100;
            pictureCaptionParagraph = docPicture.AddCaption("Picture", CaptionNumberingFormat.Number, CaptionPosition.BelowItem) as Paragraph;
            pictureCaptionParagraph.AppendText("  Spire.XLS for .NET製品");
            pictureCaptionParagraph.Format.AfterSpacing = 20;
            paragraph = section.Body.AddParagraph();
            docPicture = paragraph.AppendPicture("images/PPT-NET.png");
            docPicture.Width = 100;
            docPicture.Height = 100;
            pictureCaptionParagraph = docPicture.AddCaption("Picture", CaptionNumberingFormat.Number, CaptionPosition.BelowItem) as Paragraph;
            pictureCaptionParagraph.AppendText("  Spire.Presentation for .NET製品");

            // 目次を更新
            doc.UpdateTableOfContents(tocForImage);

            // ドキュメントをファイルに保存
            doc.SaveToFile("output/画像キャプションで目次を作成.docx", FileFormat.Docx2016);

            // ドキュメントオブジェクトを破棄
            doc.Dispose();
        }
    }
}
表キャプションを使用して目次を作成するためには、TableOfContent tocForTable = new TableOfContent(Document, " \h \z \c "Table"") メソッドを使用します。以下に詳細な手順を示します:
using Spire.Doc;
using Spire.Doc.Documents;
using Spire.Doc.Fields;
using Spire.Doc.Formatting;

namespace SpireDocDemo
{
    internal class Program
    {
        static void Main(string[] args)
        {
            // 新しいドキュメントを作成
            Document doc = new Document();

            // ドキュメントにセクションを追加
            Section section = doc.AddSection();

            // TableOfContentオブジェクトを作成
            TableOfContent tocForTable = new TableOfContent(doc, " \\h \\z \\c \"Table\"");

            // セクションに段落を追加し、TableOfContentオブジェクトを配置
            Paragraph tocParagraph = section.Body.AddParagraph();
            tocParagraph.Items.Add(tocForTable);
            tocParagraph.AppendFieldMark(FieldMarkType.FieldSeparator);
            tocParagraph.AppendText("TOC");
            tocParagraph.AppendFieldMark(FieldMarkType.FieldEnd);

            // セクションに空の段落を2つ追加
            section.Body.AddParagraph();
            section.Body.AddParagraph();

            // セクションにテーブルを追加
            Table table = section.Body.AddTable(true);
            table.ResetCells(1, 3);

            // テーブルのキャプション段落を追加
            Paragraph tableCaptionParagraph = table.AddCaption("Table", CaptionNumberingFormat.Number, CaptionPosition.BelowItem) as Paragraph;
            tableCaptionParagraph.AppendText("  一行三列");
            tableCaptionParagraph.Format.AfterSpacing = 18;

            // セクションに新しいテーブルを追加
            table = section.Body.AddTable(true);
            table.ResetCells(3, 3);

            // 2番目のテーブルのキャプション段落を追加
            tableCaptionParagraph = table.AddCaption("Table", CaptionNumberingFormat.Number, CaptionPosition.BelowItem) as Paragraph;
            tableCaptionParagraph.AppendText("  三行三列");
            tableCaptionParagraph.Format.AfterSpacing = 18;

            // セクションにもう一つ新しいテーブルを追加
            table = section.Body.AddTable(true);
            table.ResetCells(5, 3);

            // 3番目のテーブルのキャプション段落を追加
            tableCaptionParagraph = table.AddCaption("Table", CaptionNumberingFormat.Number, CaptionPosition.BelowItem) as Paragraph;
            tableCaptionParagraph.AppendText("  五行三列");

            // 目次を更新
            doc.UpdateTableOfContents(tocForTable);

            // ドキュメントを指定されたファイルに保存
            doc.SaveToFile("output/表キャプションで目次を作成.docx", Spire.Doc.FileFormat.Docx2016);

            // リソースを破棄
            doc.Dispose();
        }
    }
}
結果ドキュメントから評価メッセージを削除したい場合、または機能制限を取り除く場合は、についてこのメールアドレスはスパムボットから保護されています。閲覧するにはJavaScriptを有効にする必要があります。にお問い合わせ、30 日間有効な一時ライセンスを取得してください。
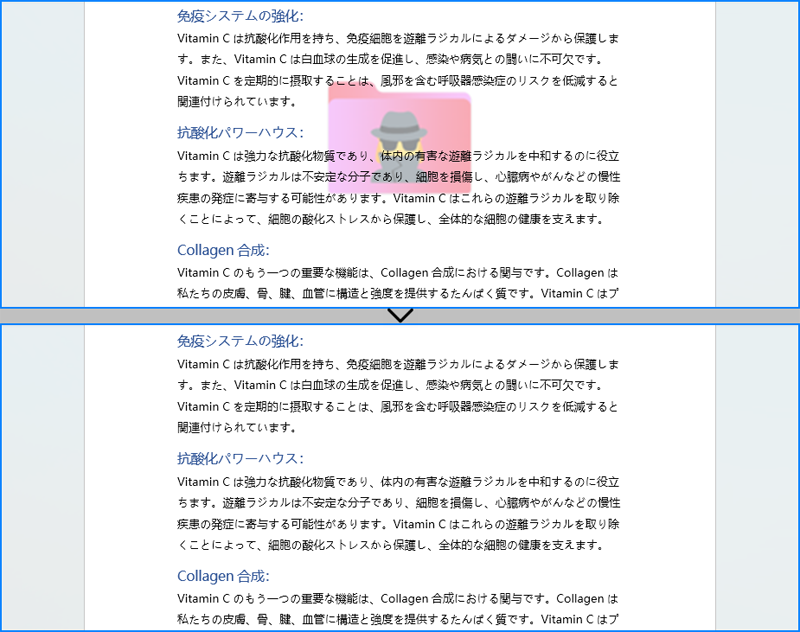
透かしは、ドキュメントの所有権や状態を他の人に知らせるために Word ドキュメントに追加できます。しかし、既存の透かしを削除したい場合もあります。この記事では、Spire.Doc for .NET を使用して C# で Word ドキュメントから透かしを削除する方法を説明します。
まず、Spire.Doc for .NET パッケージに含まれている DLL ファイルを .NET プロジェクトの参照として追加する必要があります。DLL ファイルは、このリンクからダウンロードするか、NuGet を介してインストールできます。
PM> Install-Package Spire.DocWord ドキュメントの透かしを削除するには、Document.Watermark プロパティを null に設定します。以下の手順に従って、Word ドキュメントから透かしを削除します。
using Spire.Doc;

namespace RemoveWordWatermark
{
    class Program
    {
        static void Main(string[] args)
        {
            // Documentのインスタンスを作成する
            Document doc = new Document();

            // Wordドキュメントを読み込む
            doc.LoadFromFile("Sample.docx");

            // 透かしを削除する
            doc.Watermark = null;

            // ドキュメントを保存する
            doc.SaveToFile("Wordの透かしを削除.docx");
            doc.Close();
        }
    }
}
結果ドキュメントから評価メッセージを削除したい場合、または機能制限を取り除く場合は、についてこのメールアドレスはスパムボットから保護されています。閲覧するにはJavaScriptを有効にする必要があります。にお問い合わせ、30 日間有効な一時ライセンスを取得してください。
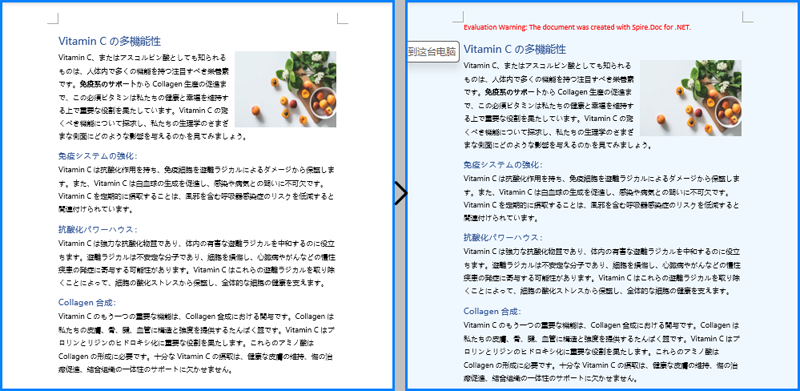
Word ドキュメントのデフォルトの背景は白であり、ほとんどの場合、シンプルな白い背景で十分です。しかし、履歴書、パンフレット、または目を引く必要があるその他のクリエイティブなドキュメントを作成する場合、独自の背景色や画像を設定することが重要です。この記事では、Spire.Doc for .NET を使用してプログラムで Word ドキュメントに背景色や背景画像を追加する方法を説明します。
まず、Spire.Doc for .NET パッケージに含まれている DLL ファイルを .NET プロジェクトの参照として追加する必要があります。DLL ファイルは、このリンクからダウンロードするか、NuGet を介してインストールできます。
PM> Install-Package Spire.DocWord ドキュメントに背景色を追加するのは非常に簡単です。背景タイプを「色」に設定し、背景色を選択するだけです。詳細な手順は以下の通りです。
using Spire.Doc;
using Spire.Doc.Documents;
using System.Drawing;

namespace BackgroundColorWord
{
    class Program
    {
        static void Main(string[] args)
        {
            // Documentのインスタンスを作成する
            Document doc = new Document();

            // Wordドキュメントを読み込む
            doc.LoadFromFile("Sample.docx");

            // ドキュメントの背景を取得する
            Background background = doc.Background;

            // 背景タイプをカラーに設定する
            background.Type = BackgroundType.Color;

            // 背景色を設定する
            background.Color = Color.AliceBlue;

            // ドキュメントを保存する
            doc.SaveToFile("Wordの背景色.docx");
            doc.Close();
        }
    }
}
グラデーション背景を追加するには、いくつかのステップが必要です。背景タイプを「グラデーション」に設定し、2 つの色を選択し、シェーディングバリアントとスタイルを設定します。詳細な手順は以下の通りです。
using Spire.Doc;
using Spire.Doc.Documents;
using System.Drawing;

namespace GradientBackgroundWord
{
    class Program
    {
        static void Main(string[] args)
        {
            // Documentのインスタンスを作成する
            Document doc = new Document();

            // Wordドキュメントを読み込む
            doc.LoadFromFile("Sample.docx");

            // ドキュメントの背景を取得する
            Background background = doc.Background;

            // 背景タイプをグラデーションに設定する
            background.Type = BackgroundType.Gradient;

            // グラデーションの色を設定する
            background.Gradient.Color1 = Color.LightYellow;
            background.Gradient.Color2 = Color.LightGreen;

            // グラデーションのシェーディングバリアントとスタイルを設定する
            background.Gradient.ShadingVariant = GradientShadingVariant.ShadingDown;
            background.Gradient.ShadingStyle = GradientShadingStyle.Vertical;

            // ドキュメントを保存する
            doc.SaveToFile("Wordのグラデーションの背景.docx");
            doc.Close();
        }
    }
}
Word ドキュメントに背景画像を挿入するには、背景タイプを「画像」に設定し、背景として画像を挿入します。詳細な手順は以下の通りです。
using Spire.Doc;
using Spire.Doc.Documents;
using System.Drawing;

namespace BackgroundImageWord
{
    class Program
    {
        static void Main(string[] args)
        {
            // Documentのインスタンスを作成する
            Document doc = new Document();

            // Wordドキュメントを読み込む
            doc.LoadFromFile("Sample.docx");

            // ドキュメントの背景を取得する
            Background background = doc.Background;

            // 背景タイプを画像に設定する
            background.Type = BackgroundType.Picture;

            // 背景画像を設定する
            background.Picture = Image.FromFile("G:/Documents/BackgroundImage.jpg");

            // ドキュメントを保存する
            doc.SaveToFile("Wordの背景画像.docx");
            doc.Close();
        }
    }
}
結果ドキュメントから評価メッセージを削除したい場合、または機能制限を取り除く場合は、についてこのメールアドレスはスパムボットから保護されています。閲覧するにはJavaScriptを有効にする必要があります。にお問い合わせ、30 日間有効な一時ライセンスを取得してください。
Spire.PDF for Python は、開発者が Python プログラム内で外部アプリケーションやライブラリに依存することなく、 PDF ファイルを作成、読み取り、編集、変換、および保存できるプロフェッショナルな PDF 開発コンポーネントです。
この Python PDF クラスライブラリは、ゼロから PDF ファイルを作成したり、既存の PDF ドキュメントを完全に処理したりするためのさまざまな機能を開発者に提供します。